


With Google Search Console’s meta tags, you can verify domain ownership for your landing pages. It is necessary to ensure Google you are the web page owner and you are allowed to see the landing page's private data.
You can add meta tags to your landing page in a couple of ways. This instruction shows how to do so with HTML tags and DNS records.
Add Google HTML tag
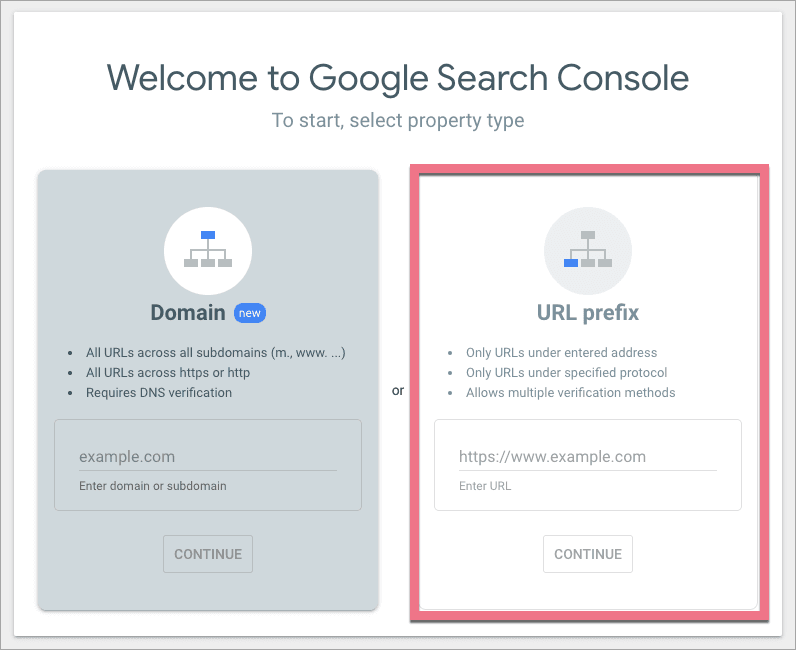
1. Go to Google Search Console.
2. In the URL prefix field, enter your landing page URL address (with https:// prefix). Click Continue.
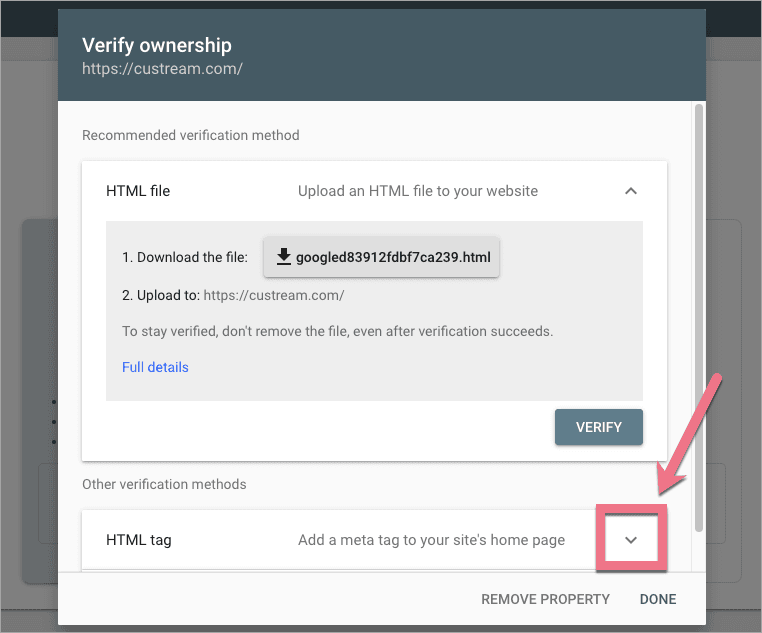
3. In a pop-up window, find Other verification methods and click the arrow next to the HTML tag.
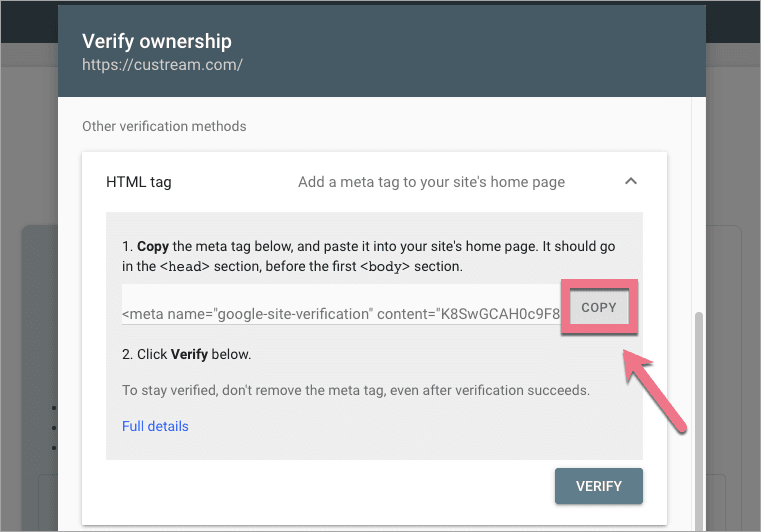
4. Copy the meta tag.
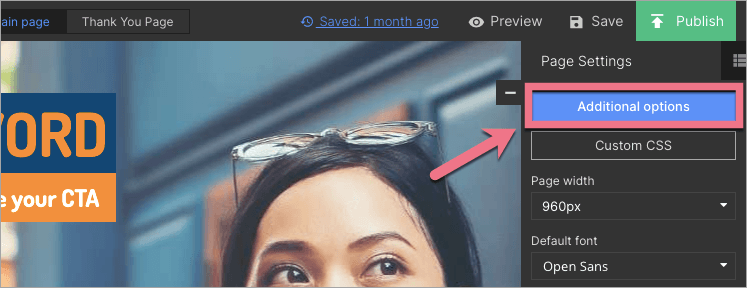
5. In a new browser tab, open the editor of your landing page (do not close the Google Search Console page). Navigate to Page settings and click Additional options.
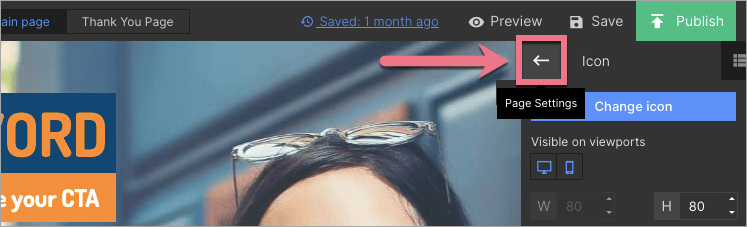
To return to Page Settings when editing, click on the arrow:
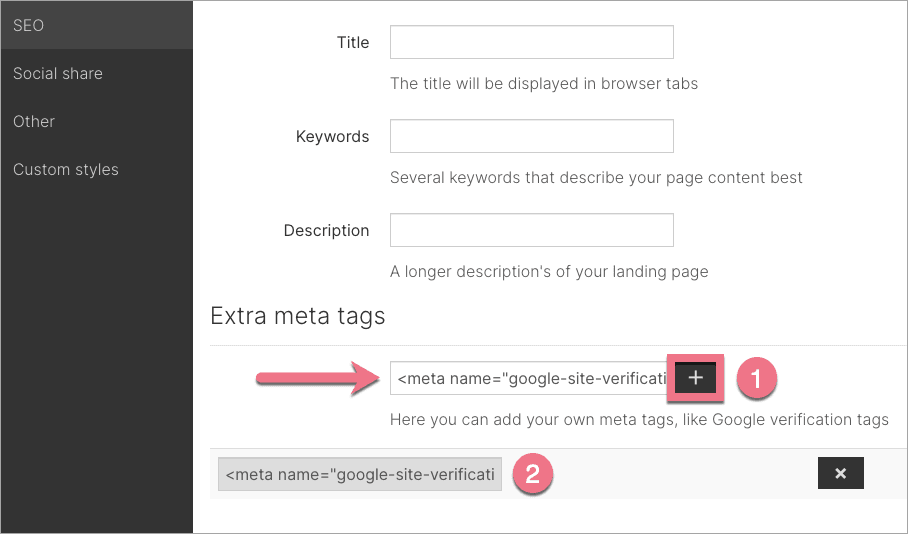
6. In the SEO tab, paste the meta tag in the Extra meta tags field and click + (1). The tag will appear underneath (2). Save and close.
7. Publish your landing page and go back to Google Search Console.
8. Click Verify.

Verification confirmation will show.
Verify your domain with DNS
1. Go to Google Search Console.
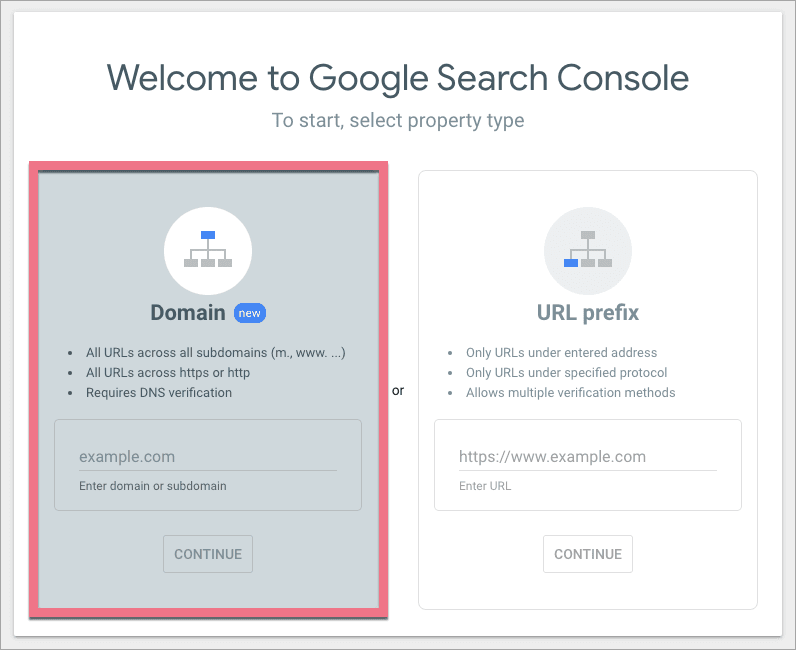
2. In the Domain field, enter your landing page domain. Click Continue.
3. In a pop-up window, choose instructions (1) depending on your domain provider and follow the directions, or choose Any DNS provider and Copy (2) the TXT record.

4. In a new browser tab, log in to your domain provider panel. Go to the edition of DNS records. Add a new TXT record or delete the old one and paste the record copied from Google Search Console. Save the changes.
5. Go back to Google Search Console and click Verify.

Verification may not happen immediately. In case of delays, try to finish the verification the next day.