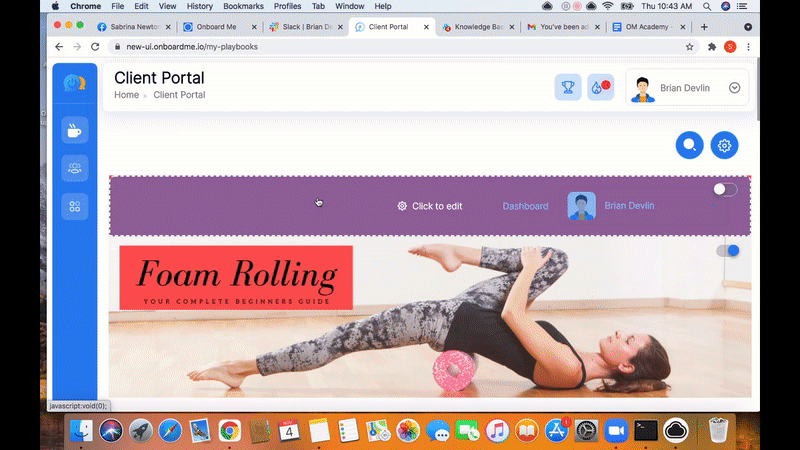
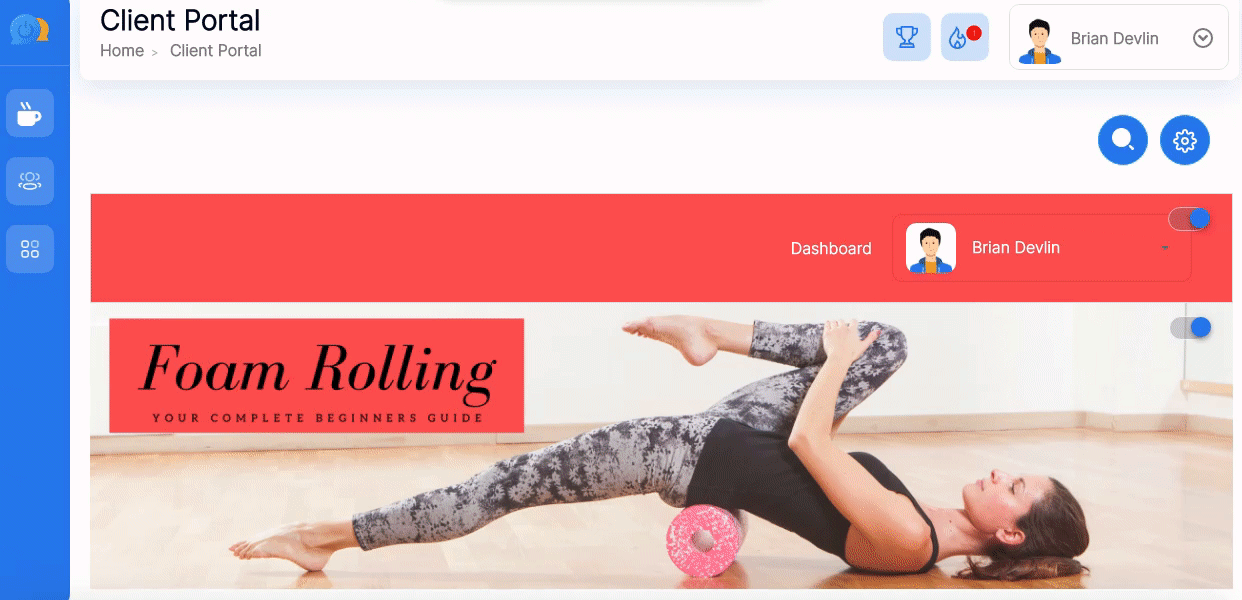
Use this portal to communicate with your clients via training, progress tracking, and more!
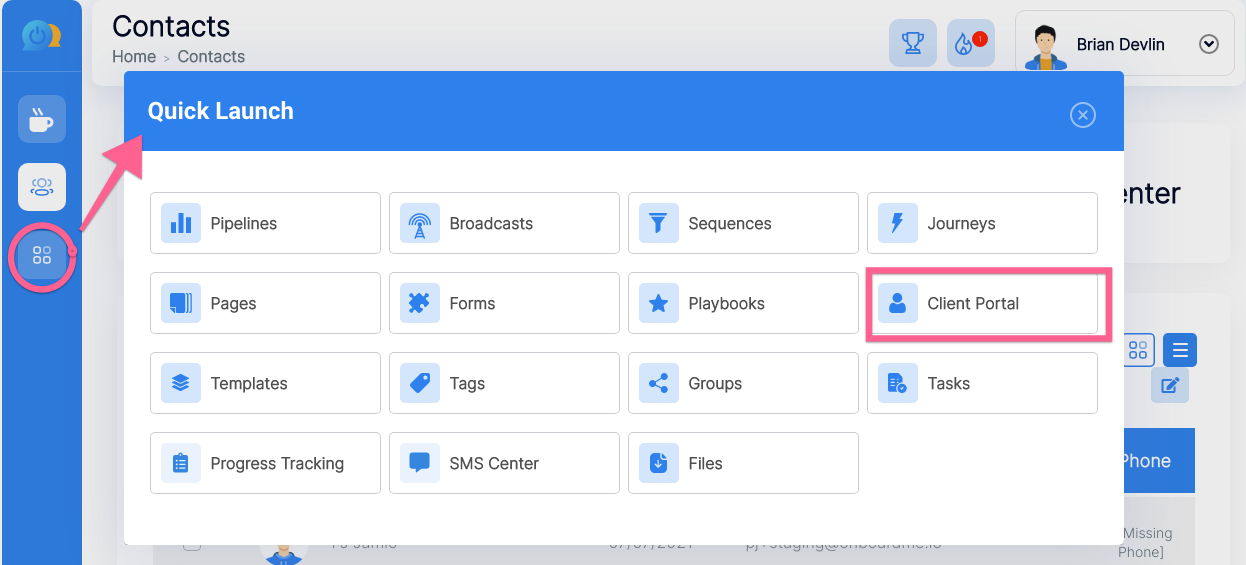
1. Click Quick Launch & click the Client Portal button.
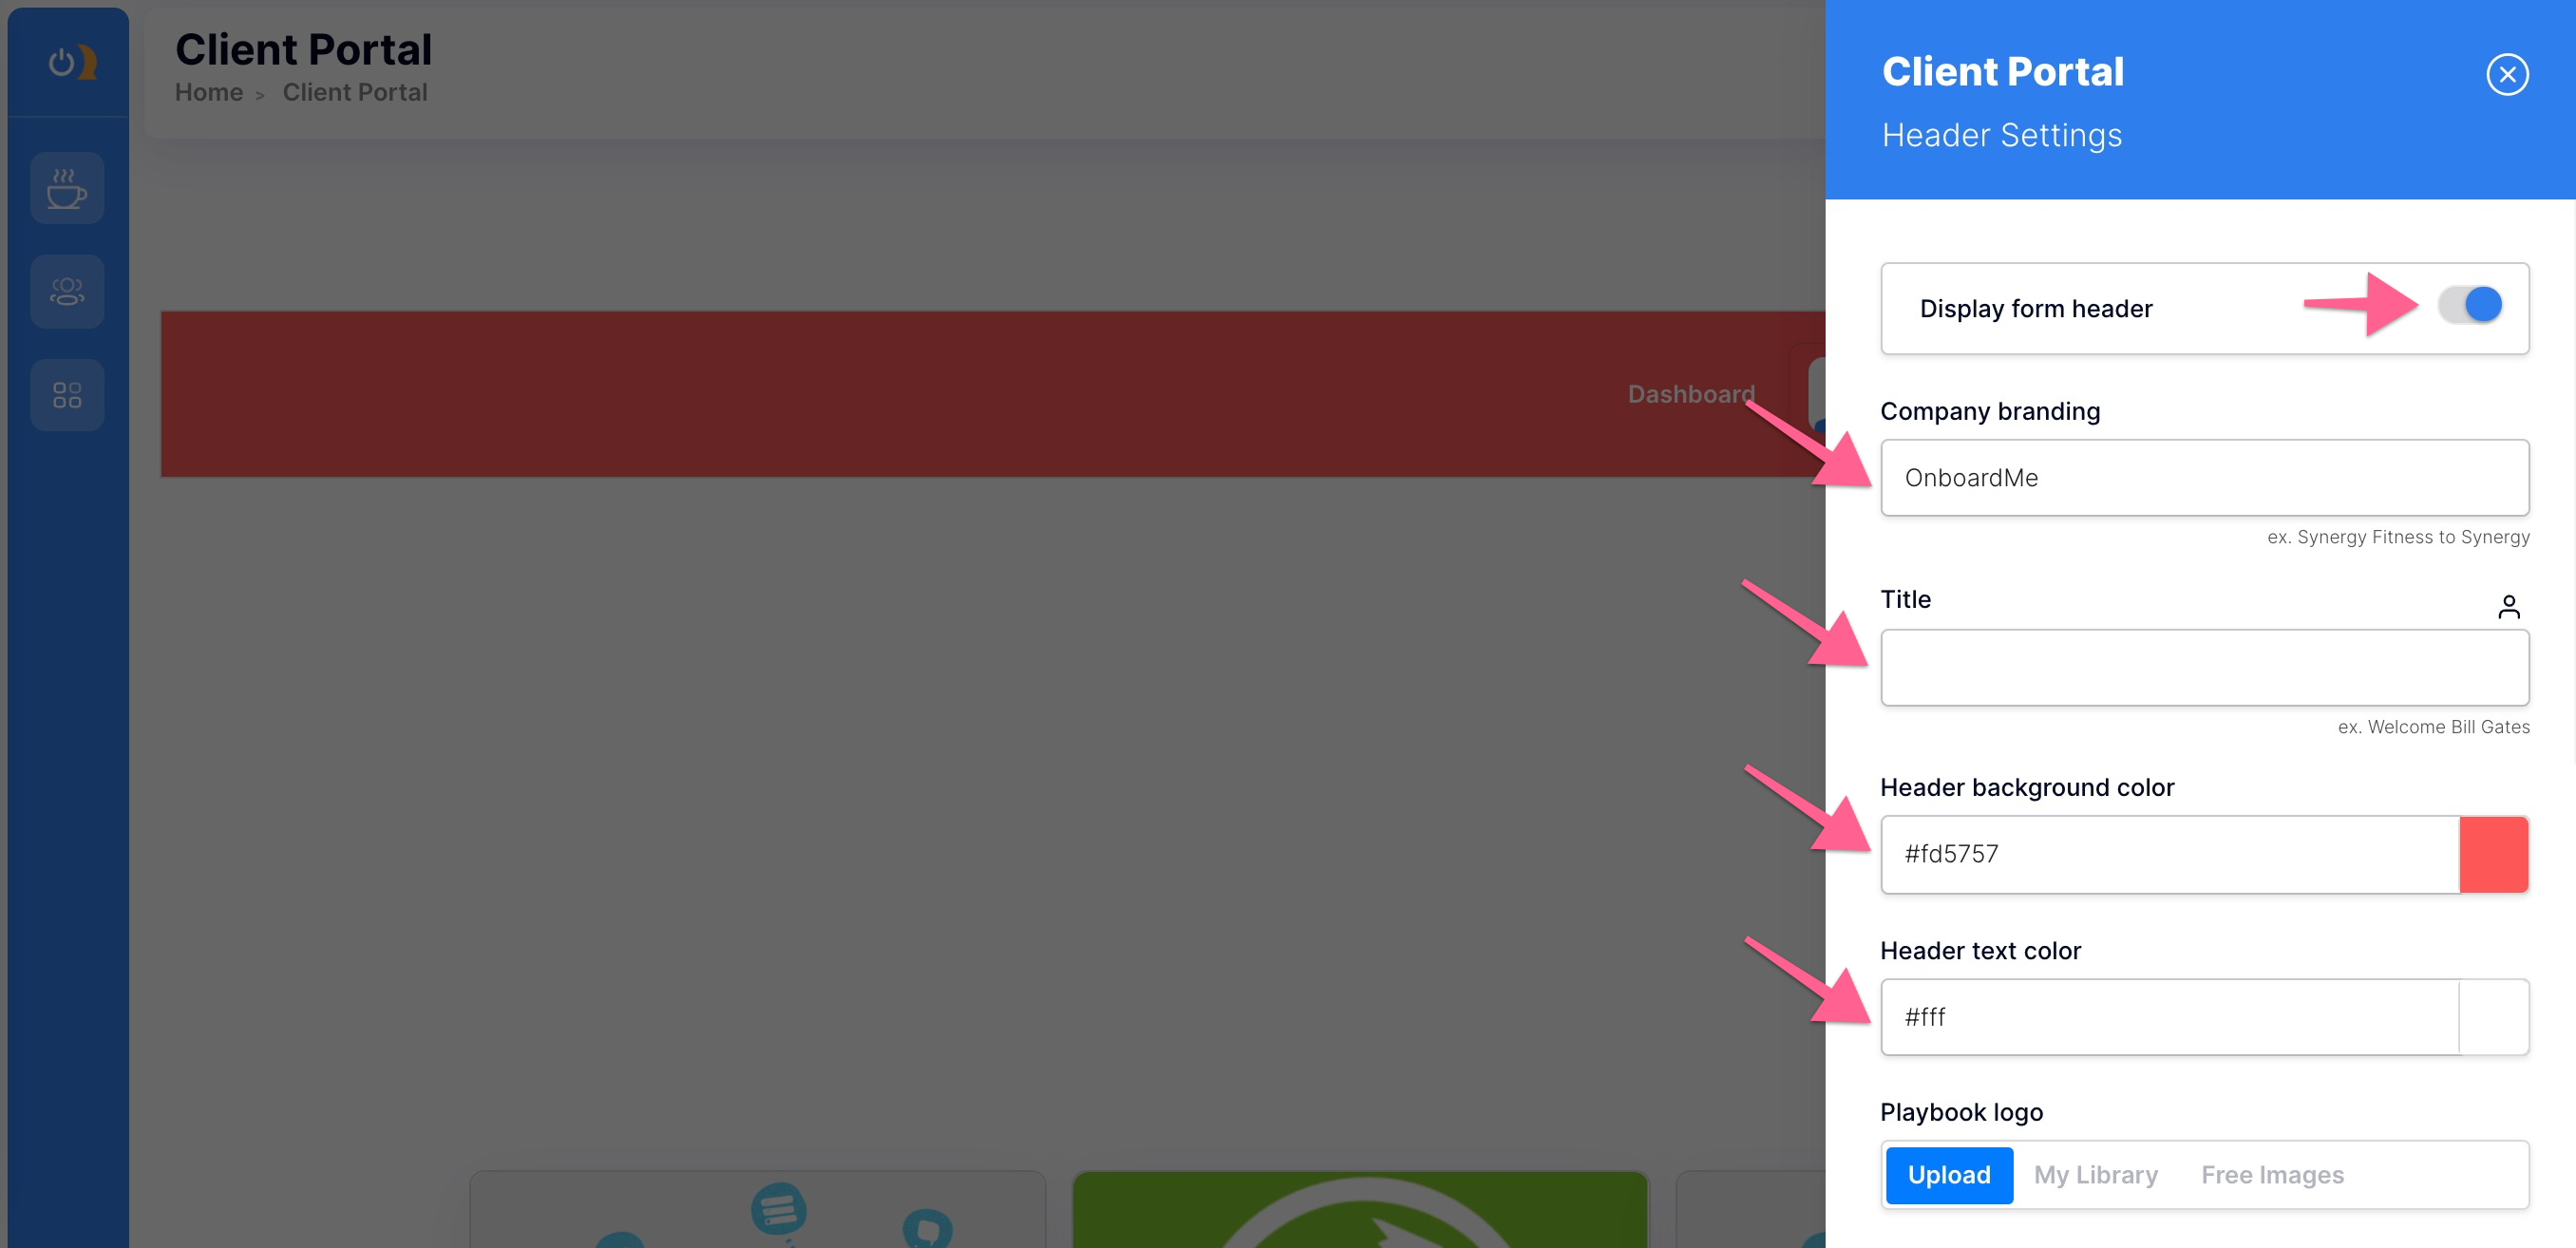
2. Make sure your header section is toggled ON.
3. Enter your Company branding & Title. Update your Header background & Header text color.
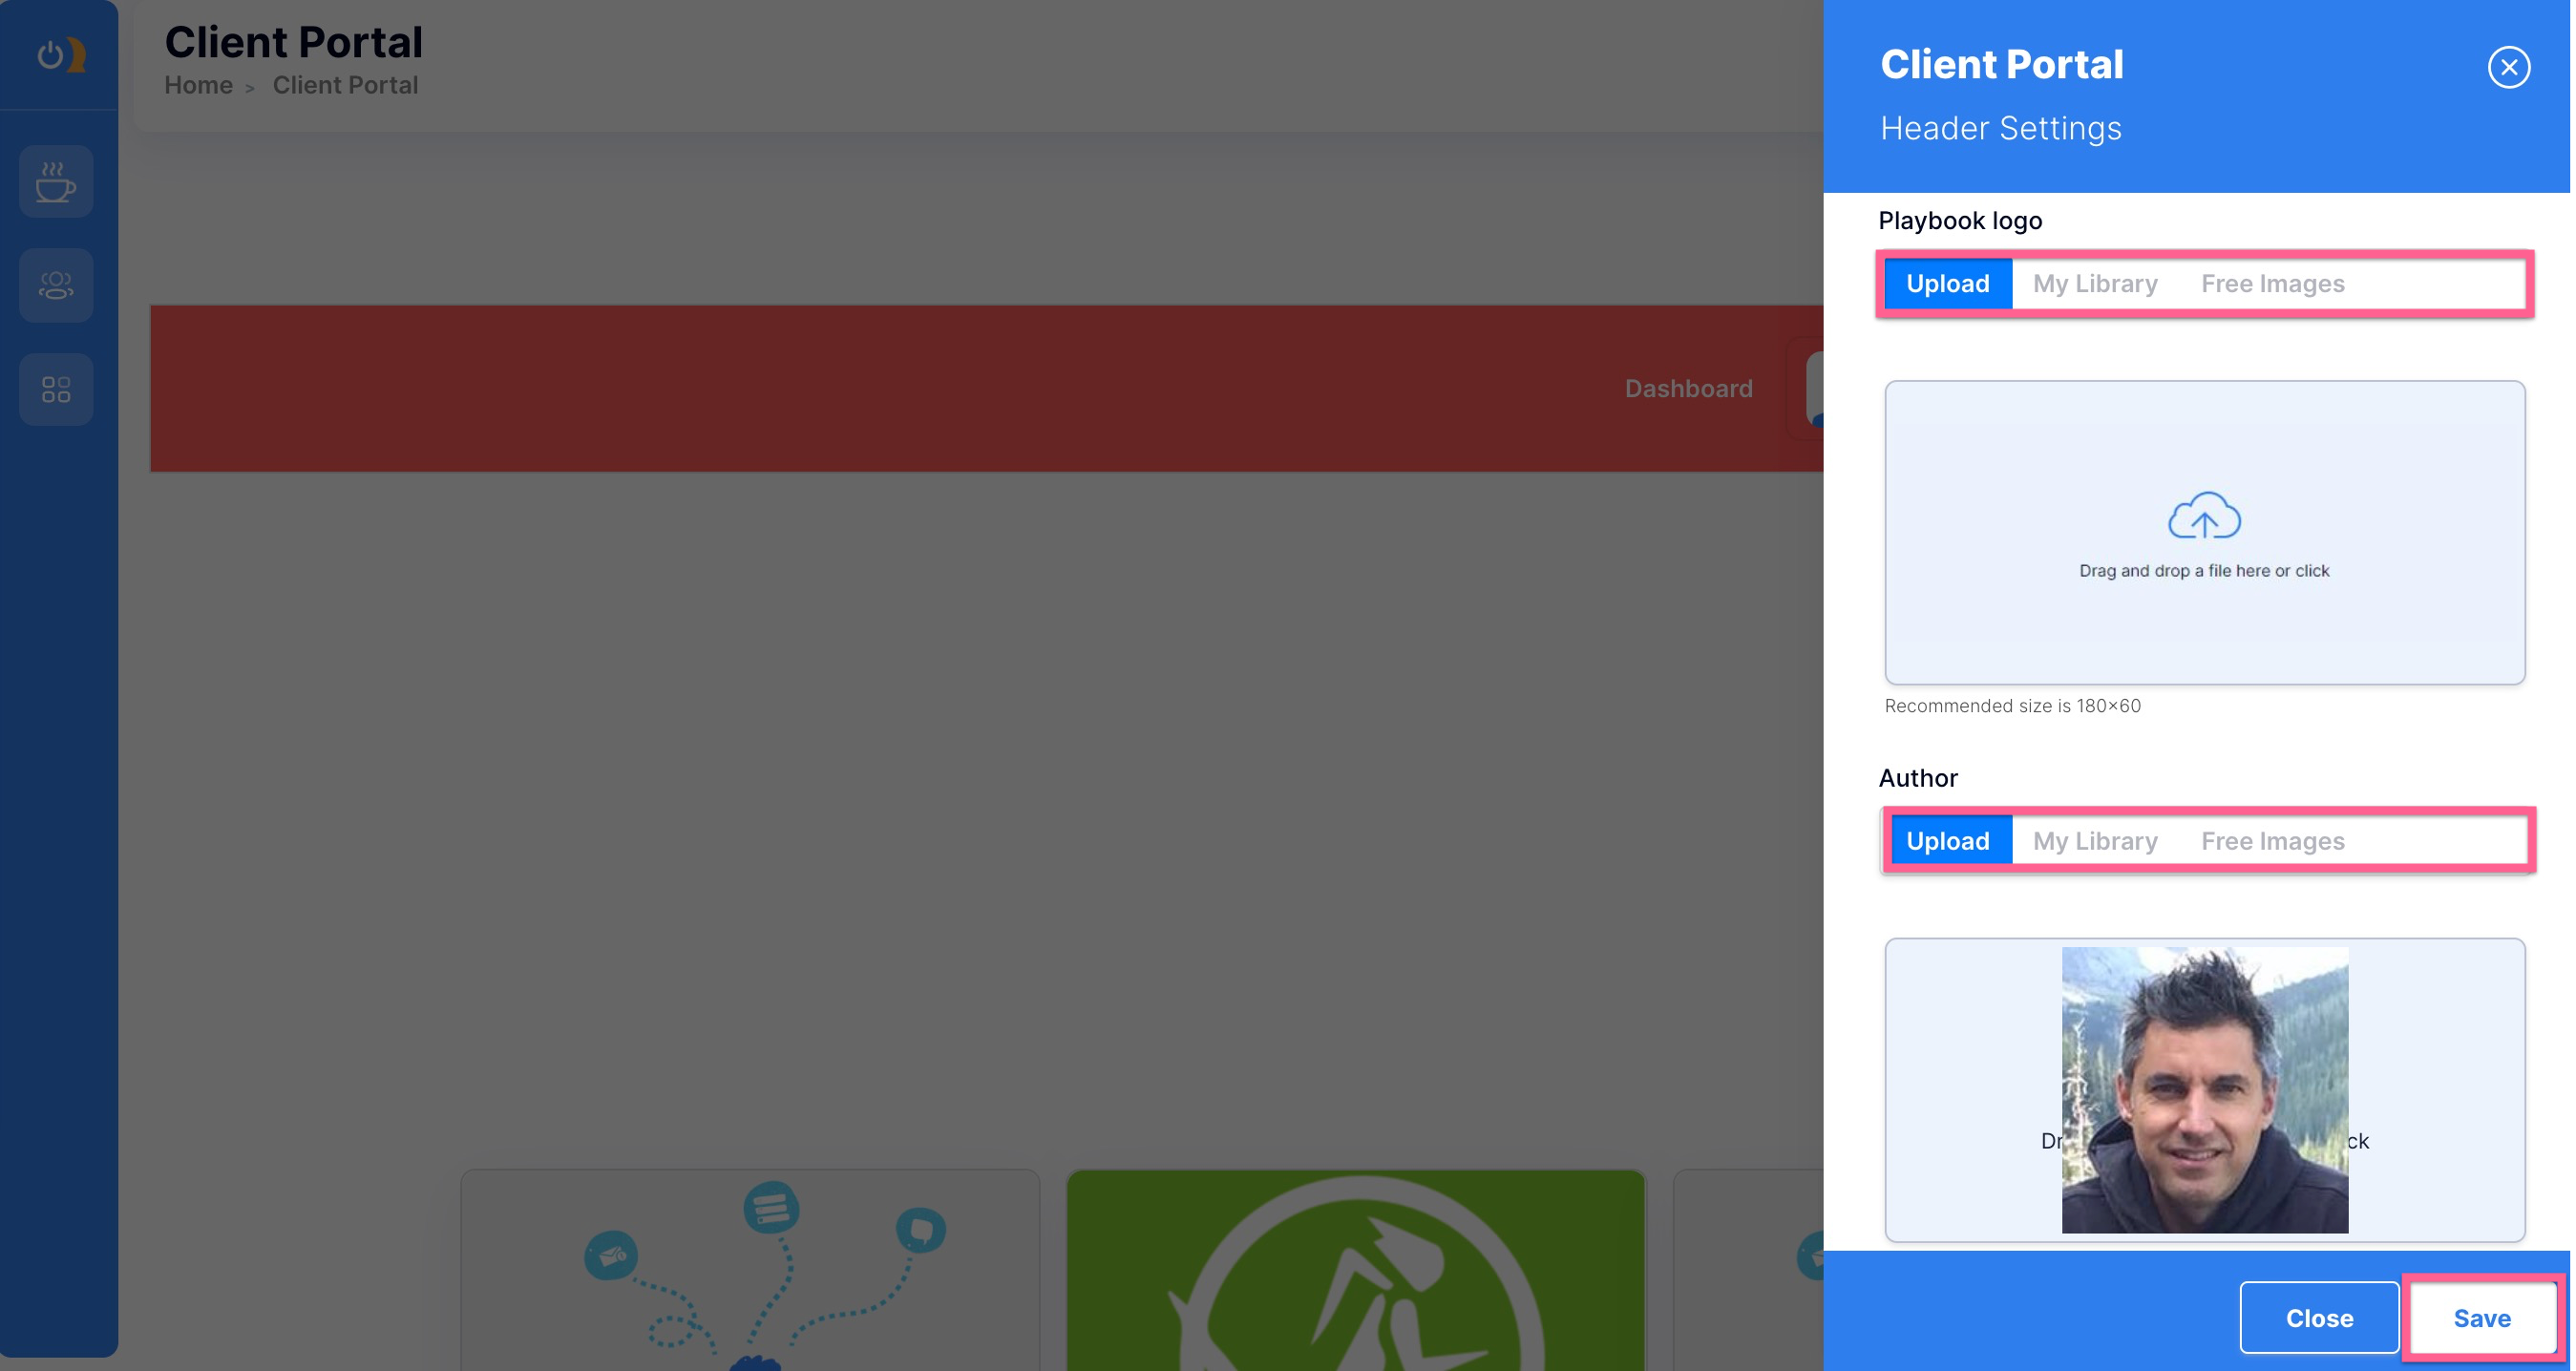
4. Upload your Playbook logo. You can click the upload button if your logo is already saved. Alternatively, you can click My Library or Free Images to search for one. Complete the process again for your Author image by clicking Upload, My Library, or Free Images. Click Save to complete the step.
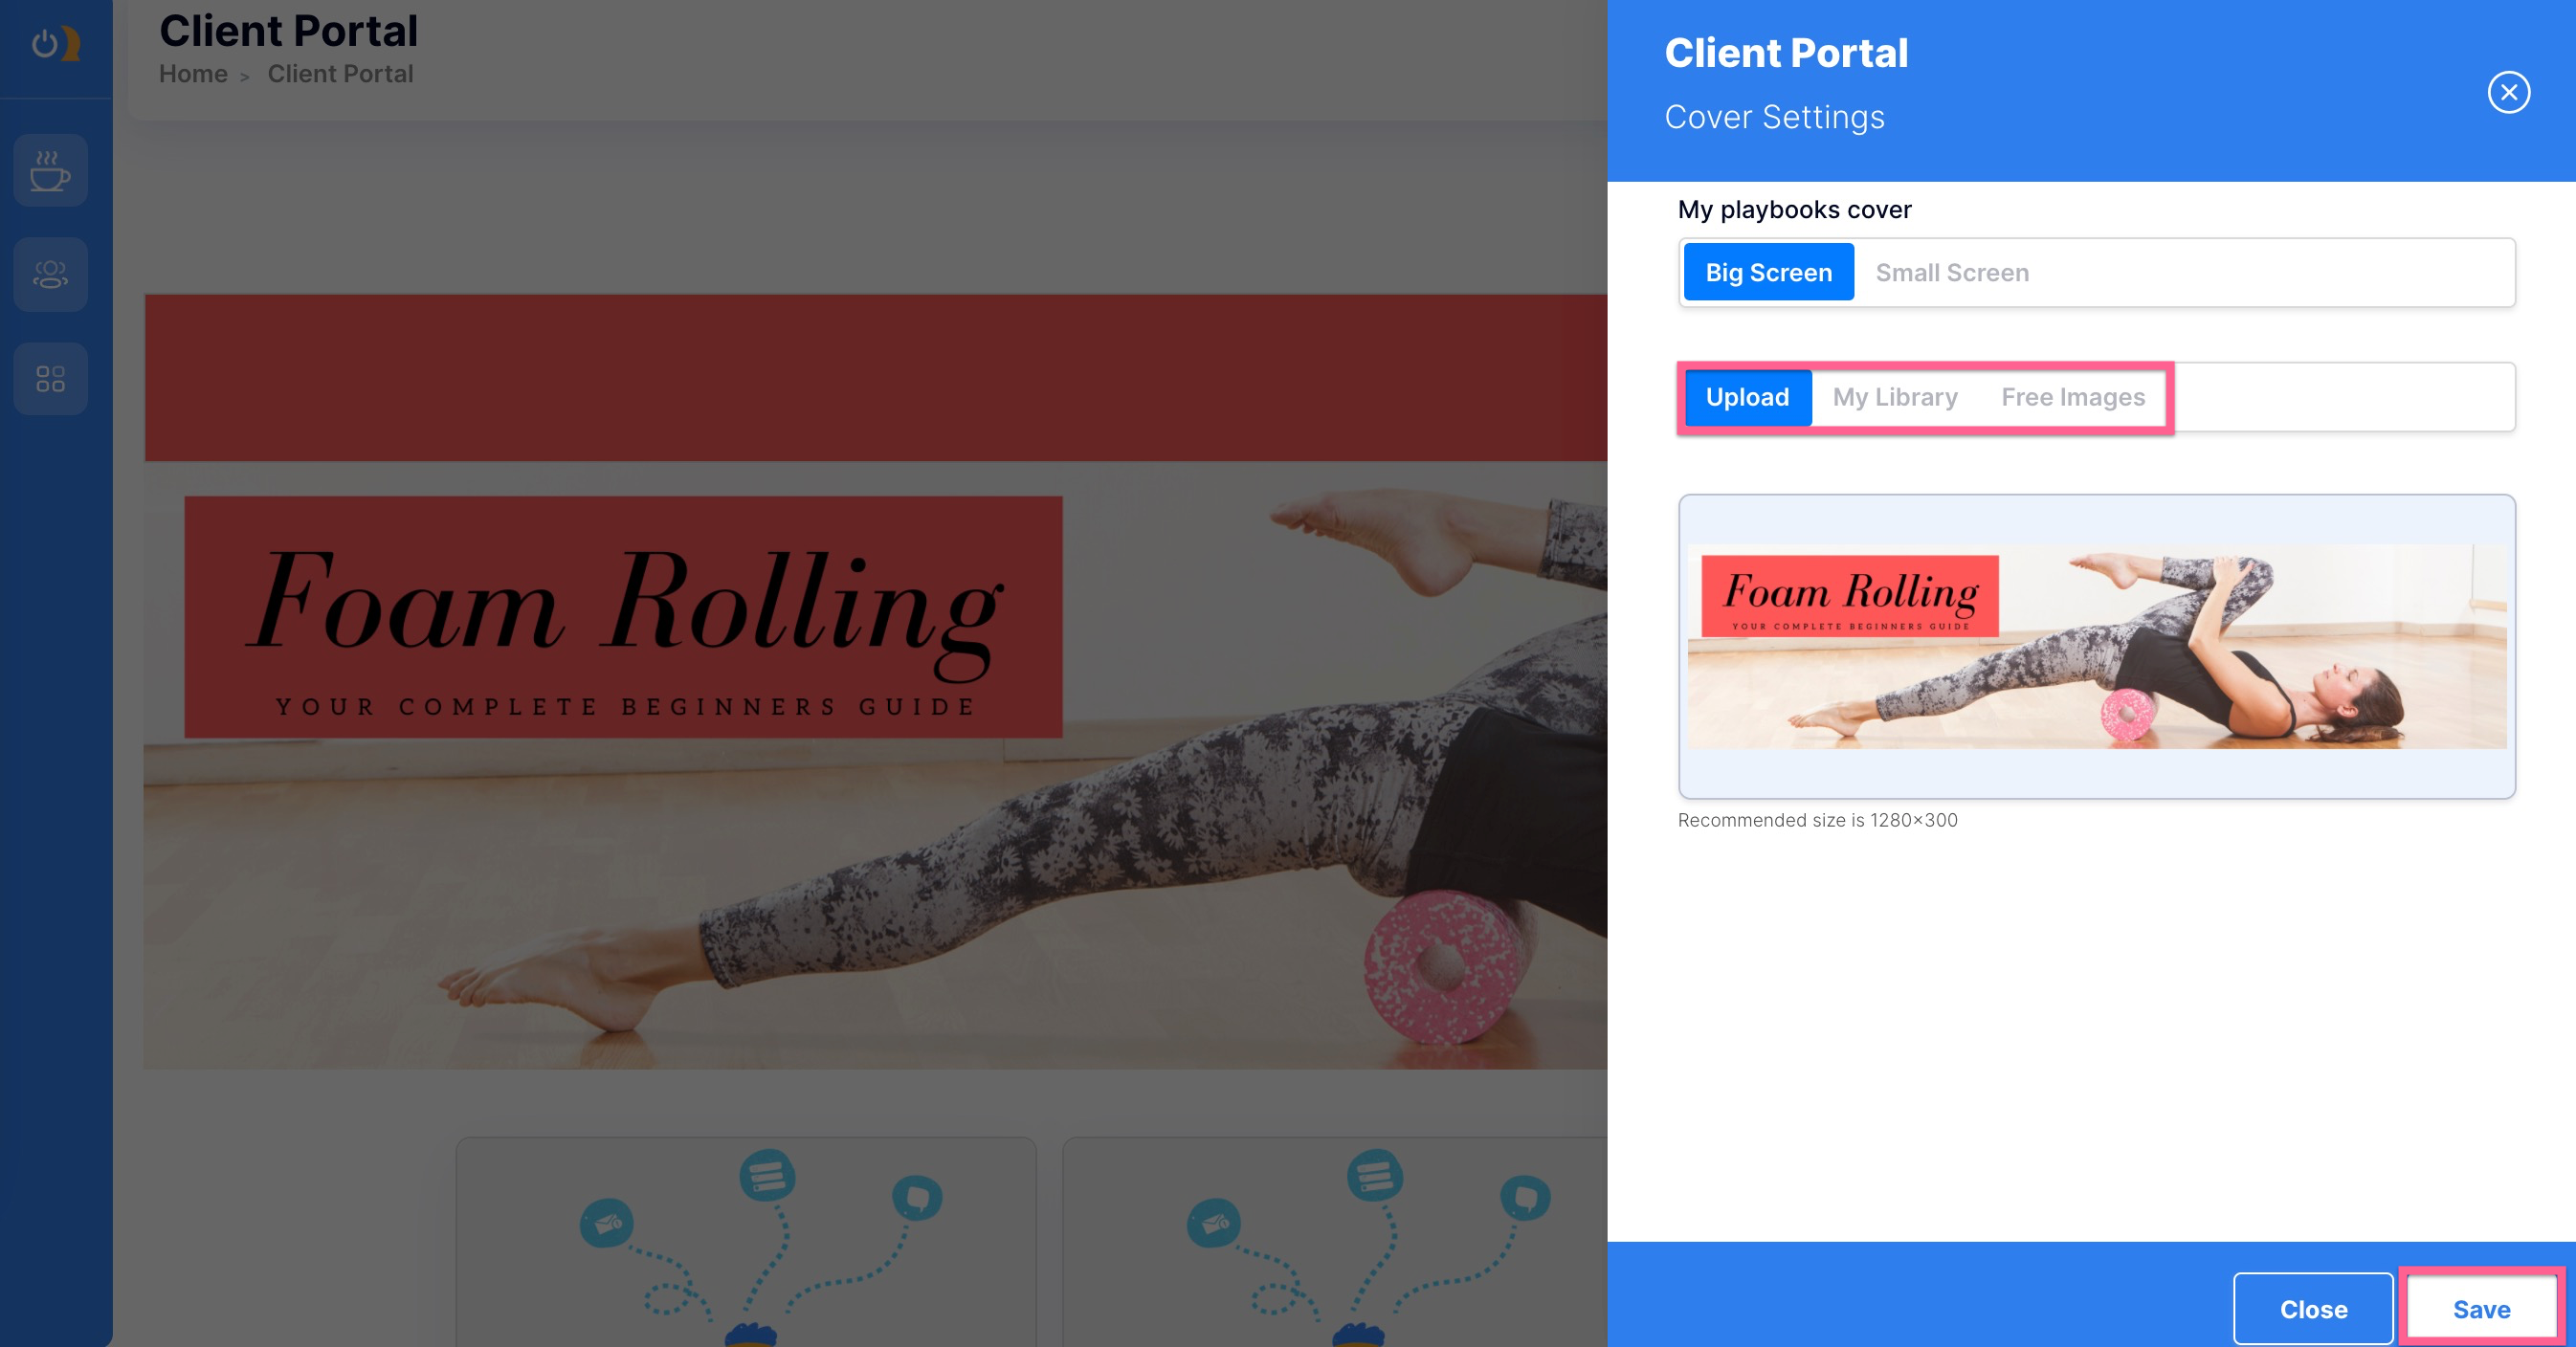
5. To update your Cover Portal, set the toggle ON and click the center of the section to edit.
6. Fill in your Playbooks Headline and Sub-headline, choose your Cover text color and Image Overlay color. Set the size of your Cover Portal screen.
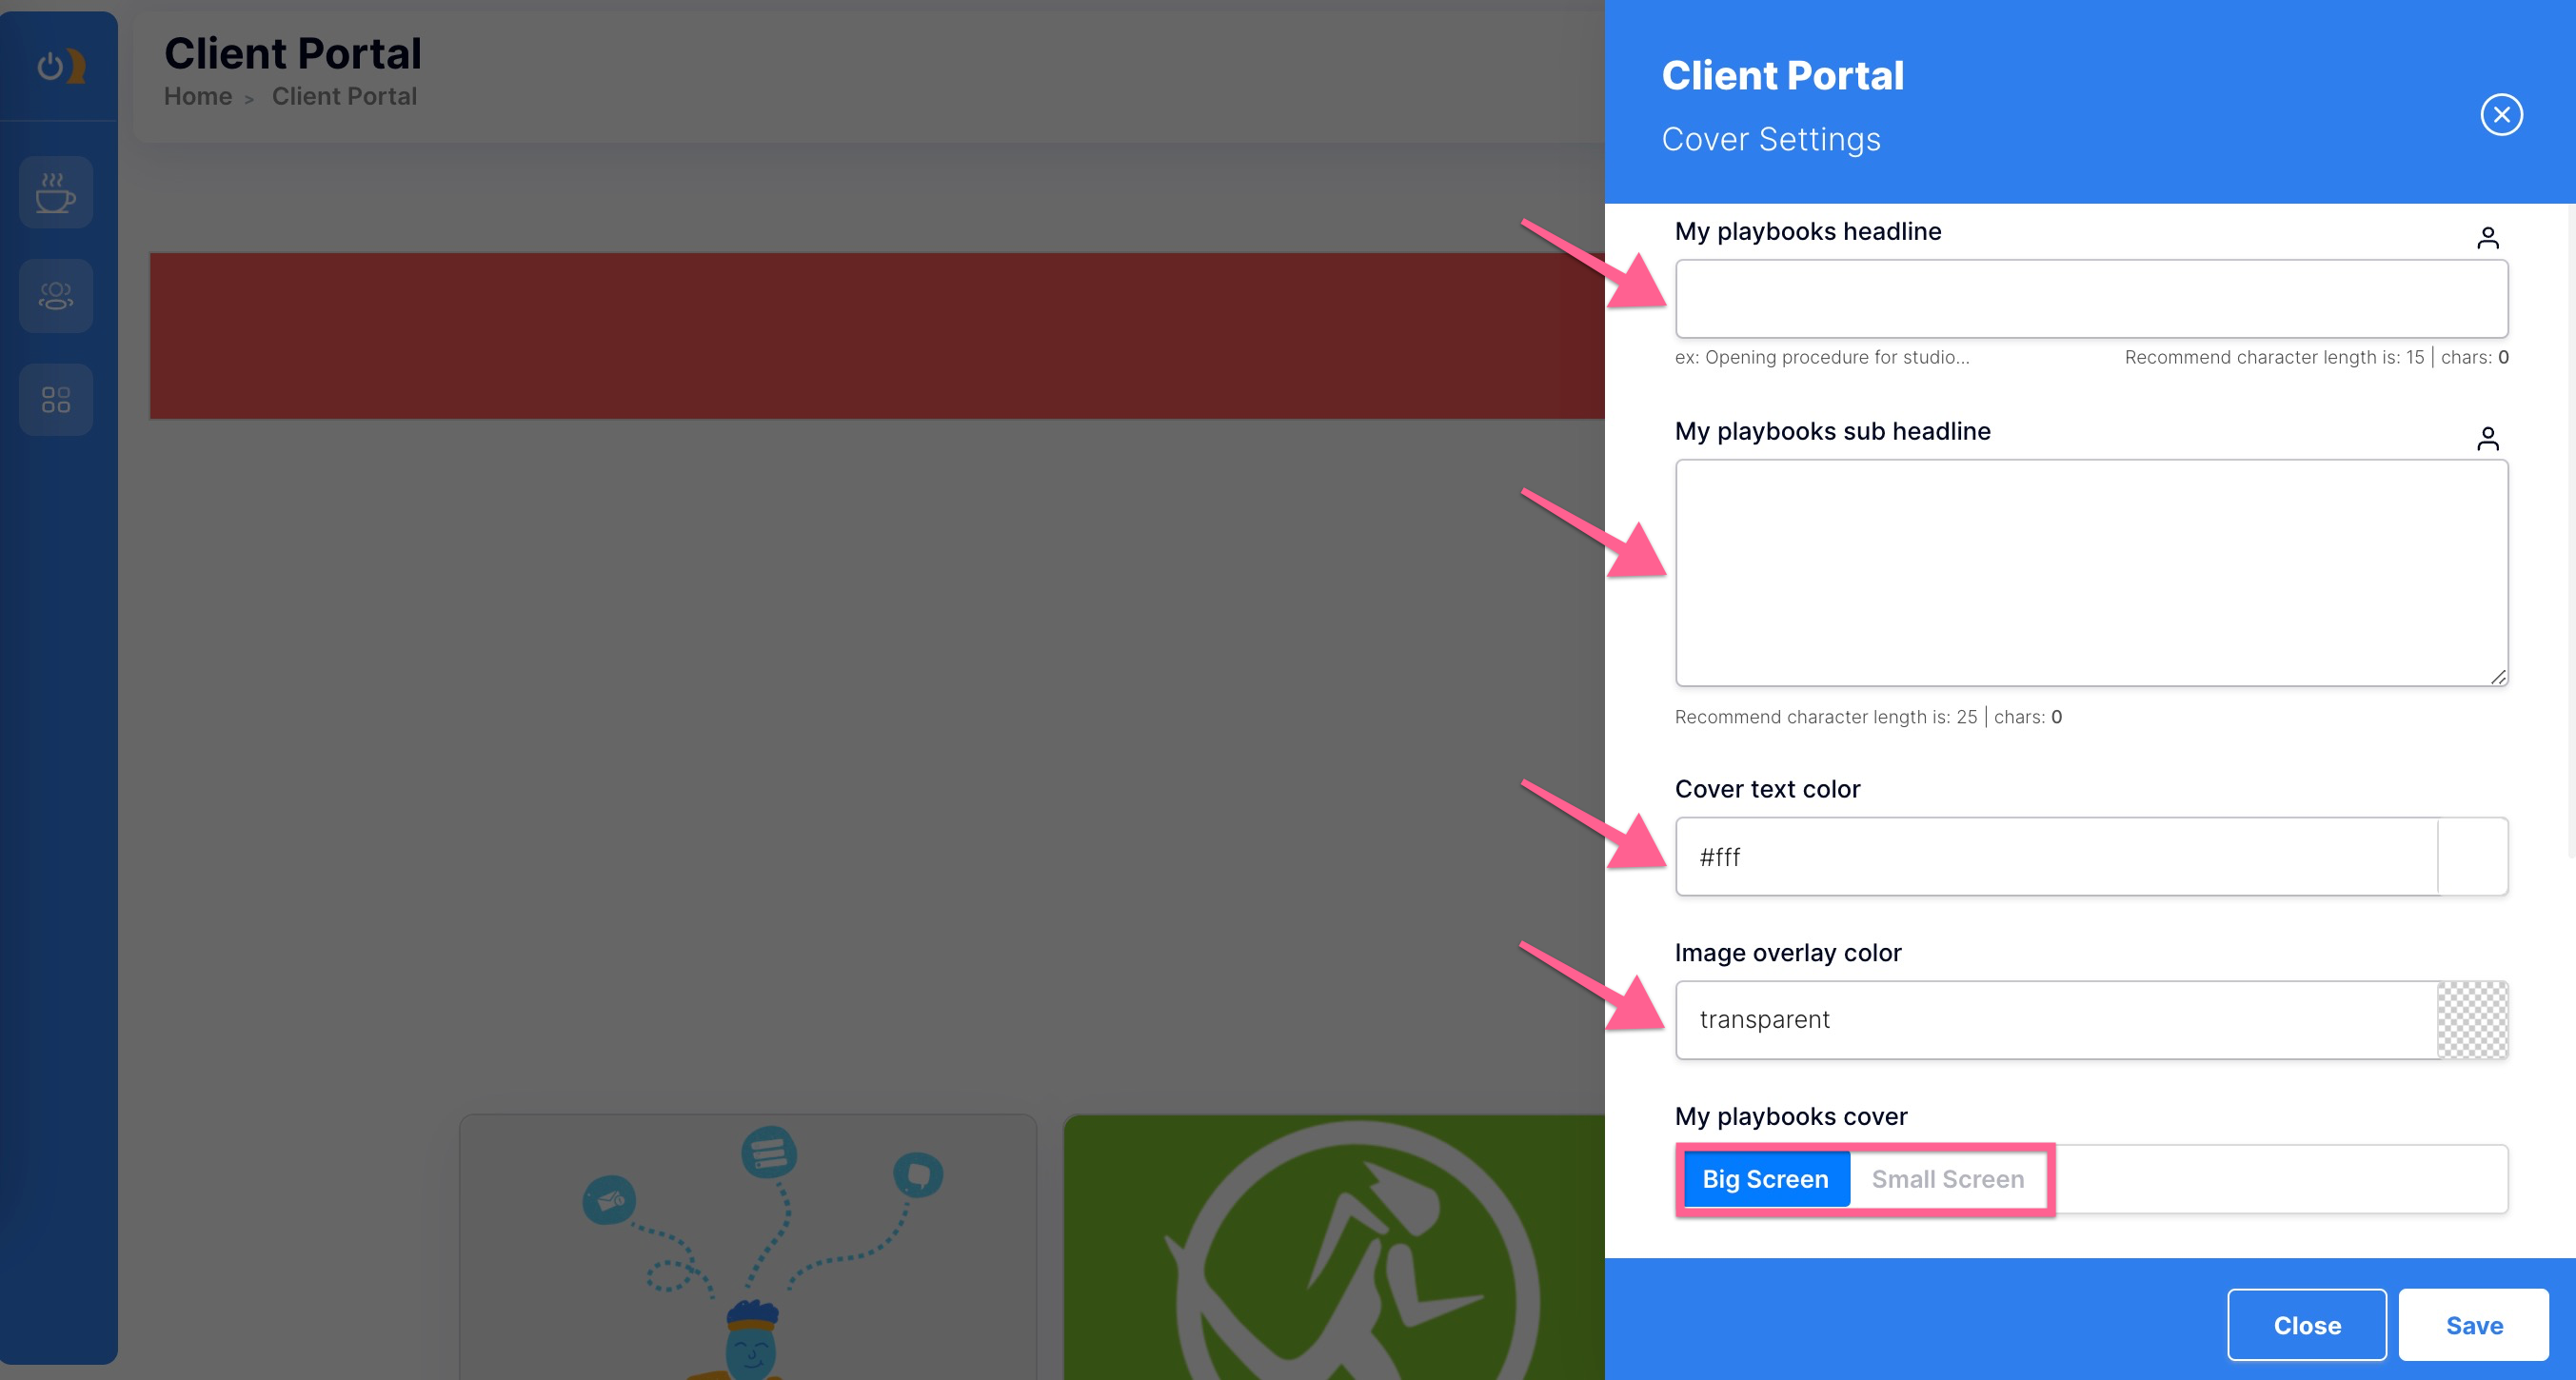
7. Upload your Cover Image directly or select from Library or Free Images. Then click Save.
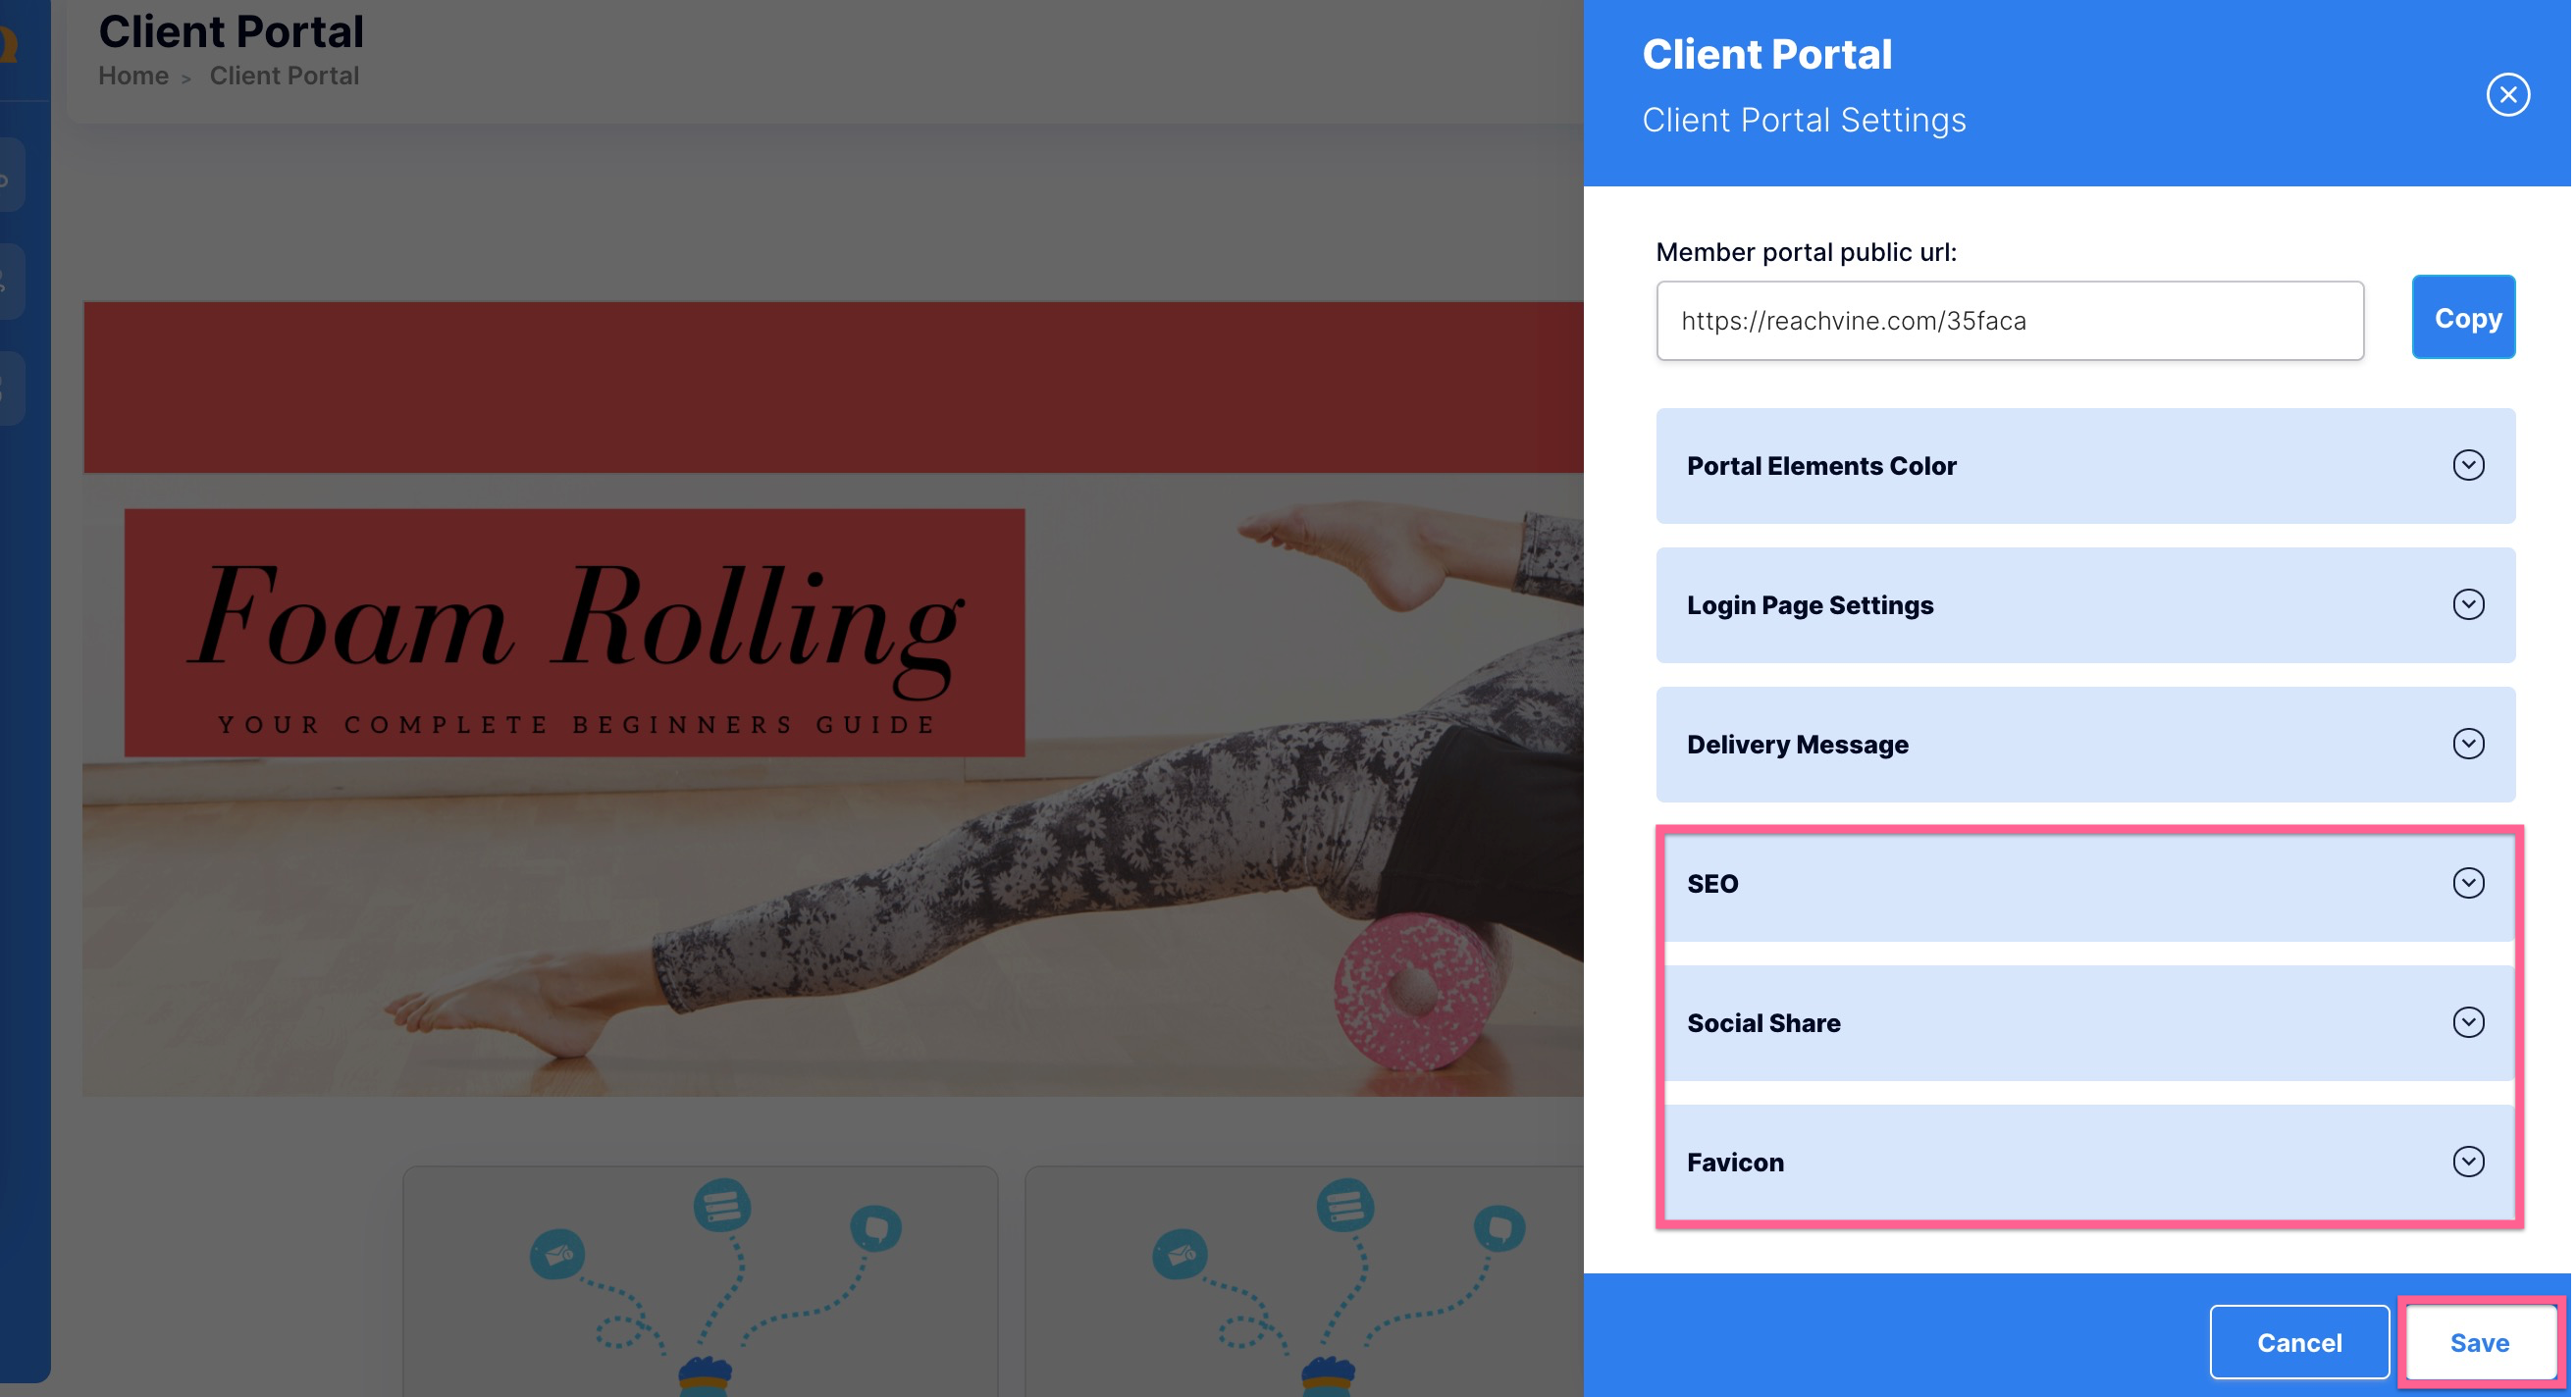
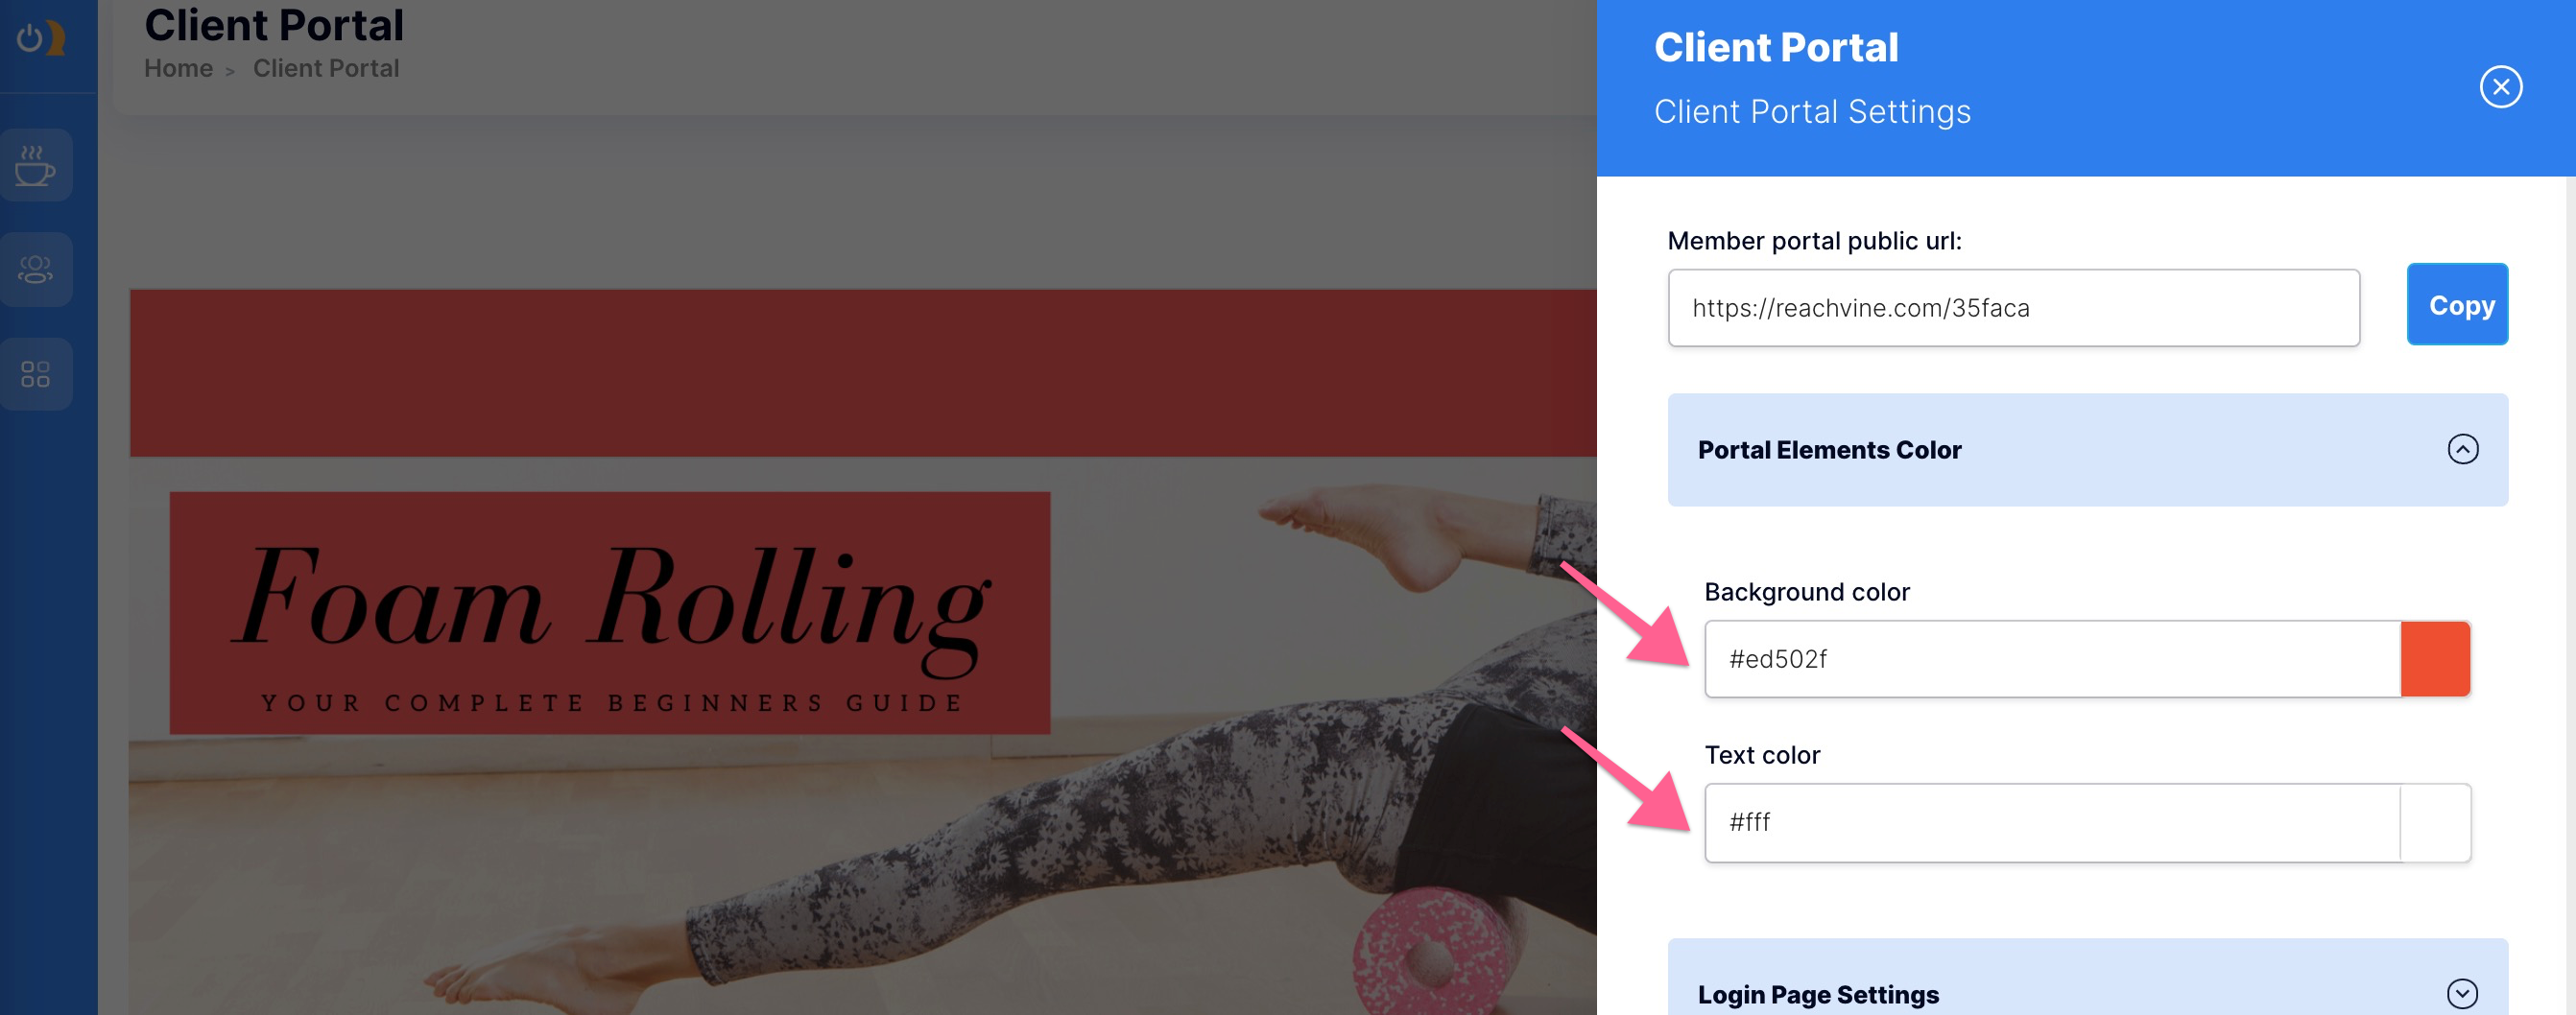
8. Next click your Settings button & you will see your Member Portal URL.
9. Click the Portal Elements Color tab to choose your background and text color.
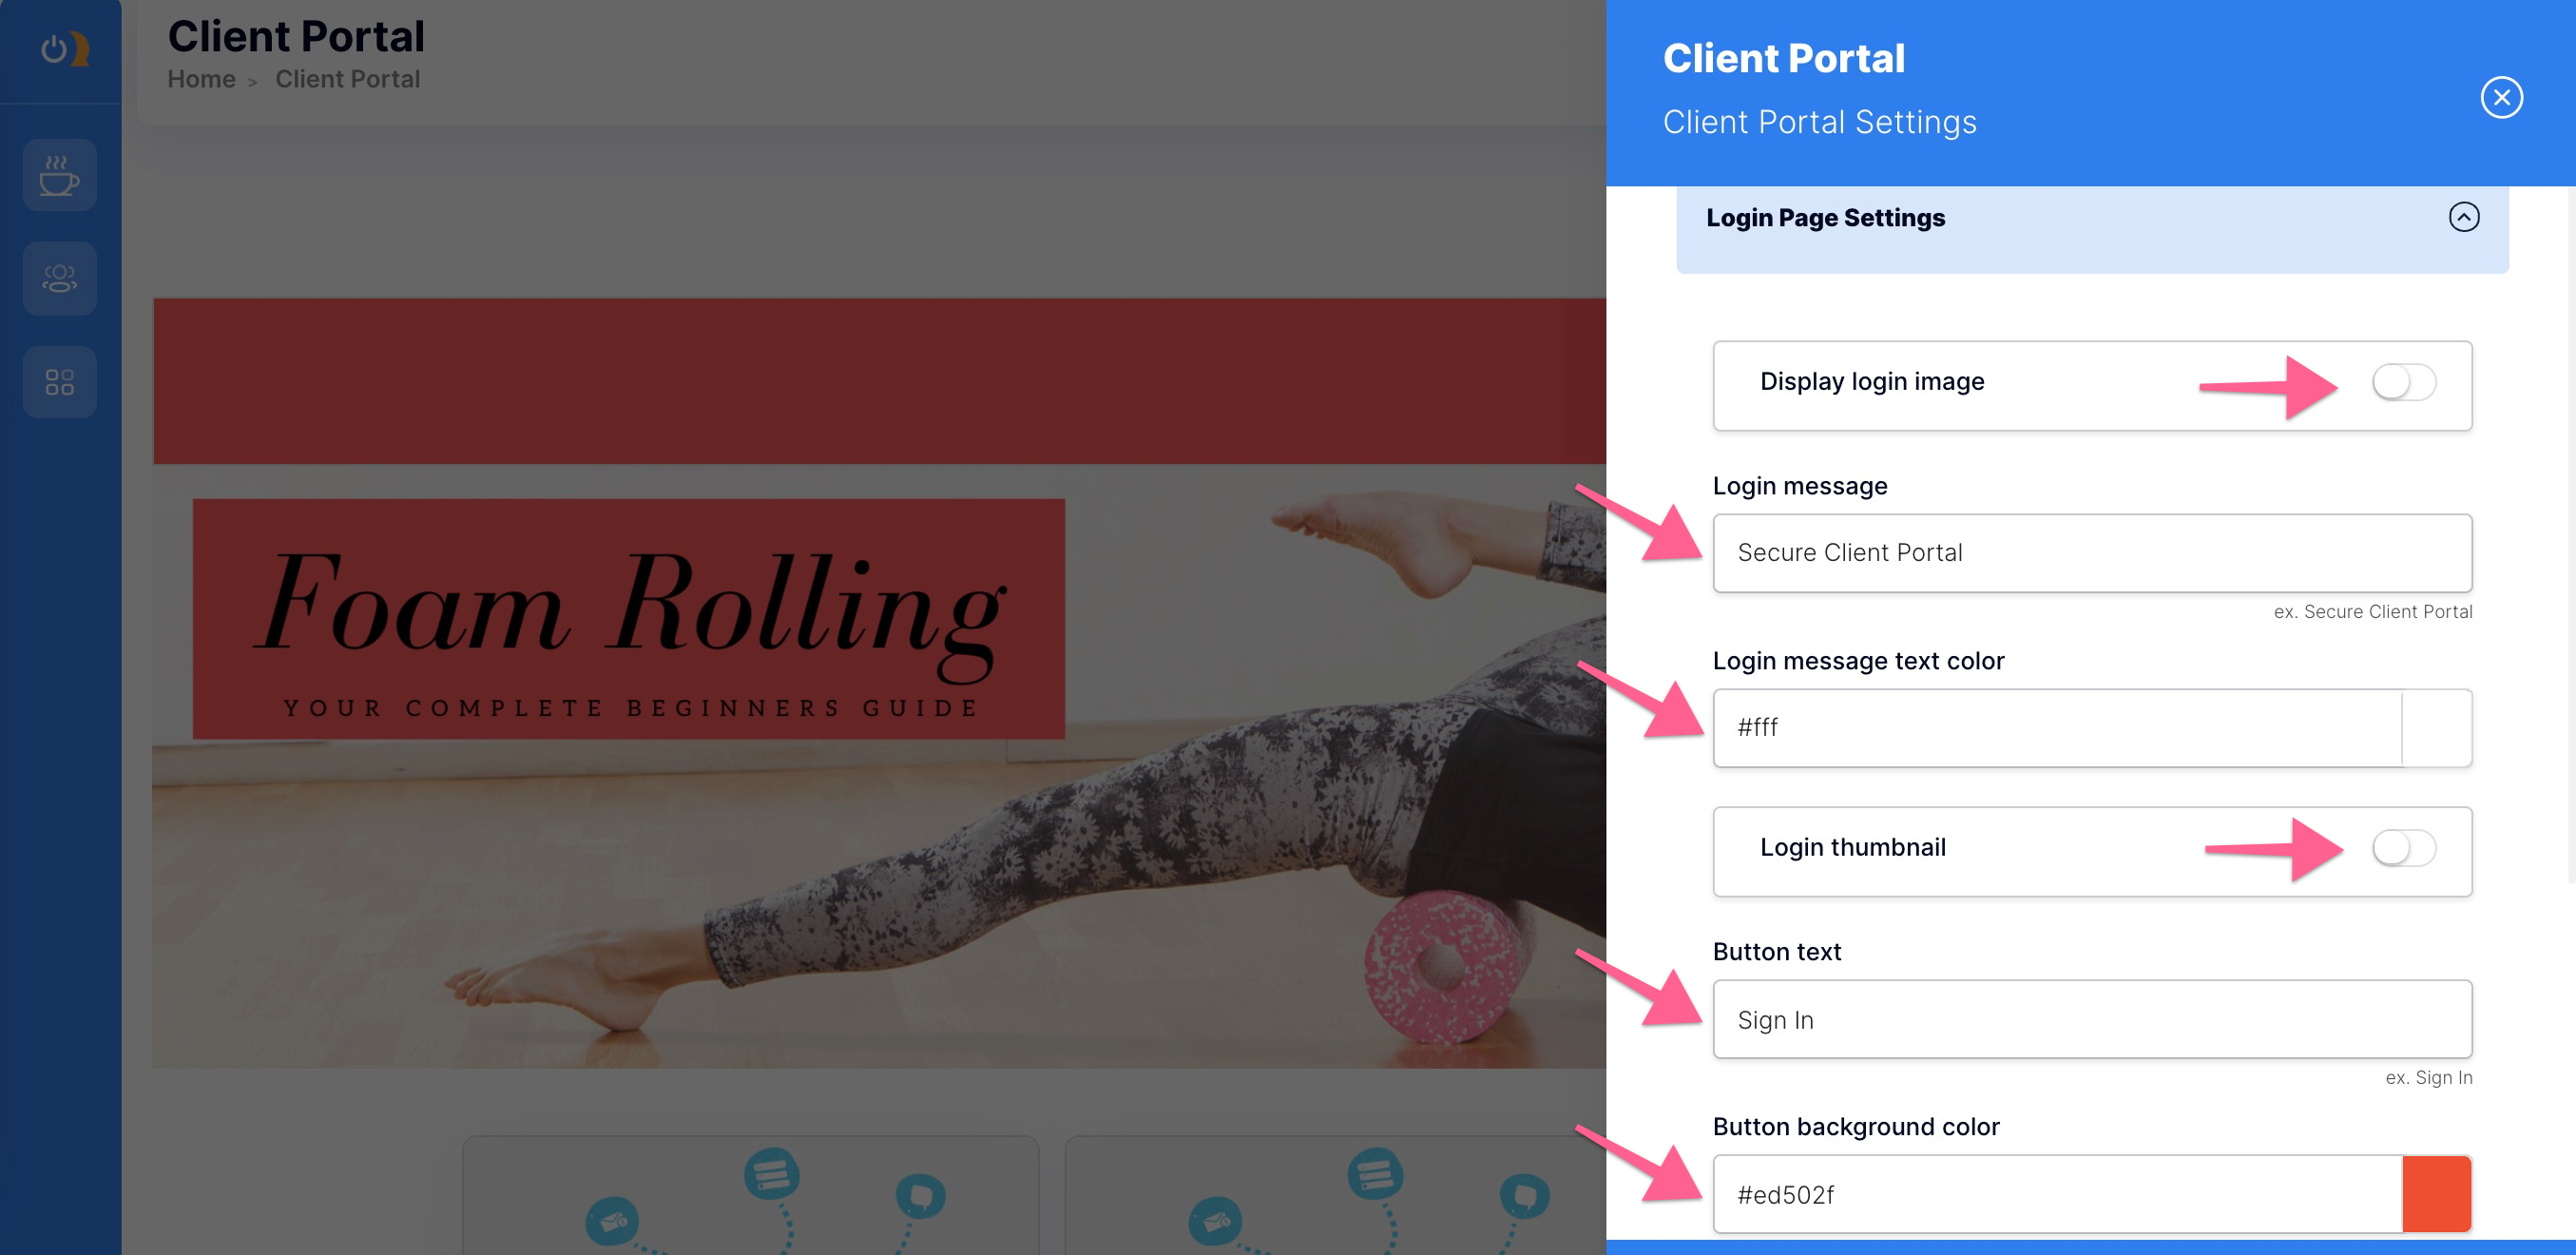
10. Under Login Page Settings, you have the option of displaying a login image (toggle ON), creating a login message using your selected text color. You can also create a Login thumbnail with custom Button text and Background color.
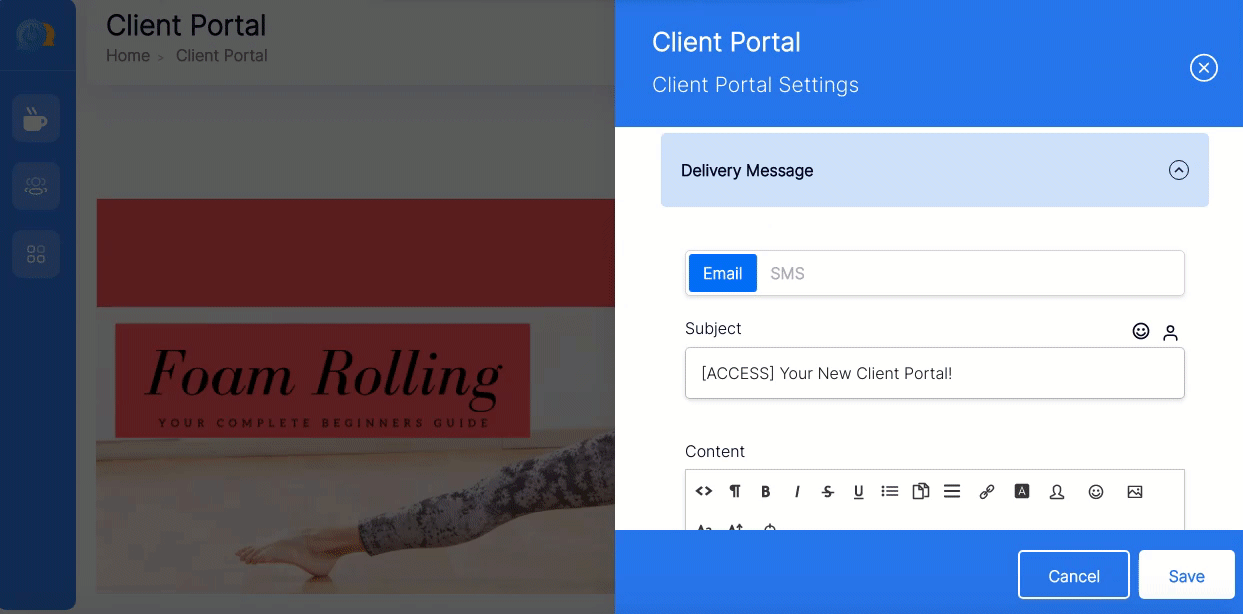
11. Next, you'll find the Delivery Message tab. We don't recommend you alter any merge fields (which are contained by double brackets) because doing so without advanced knowledge of email delivery could cause problems with your client logins.
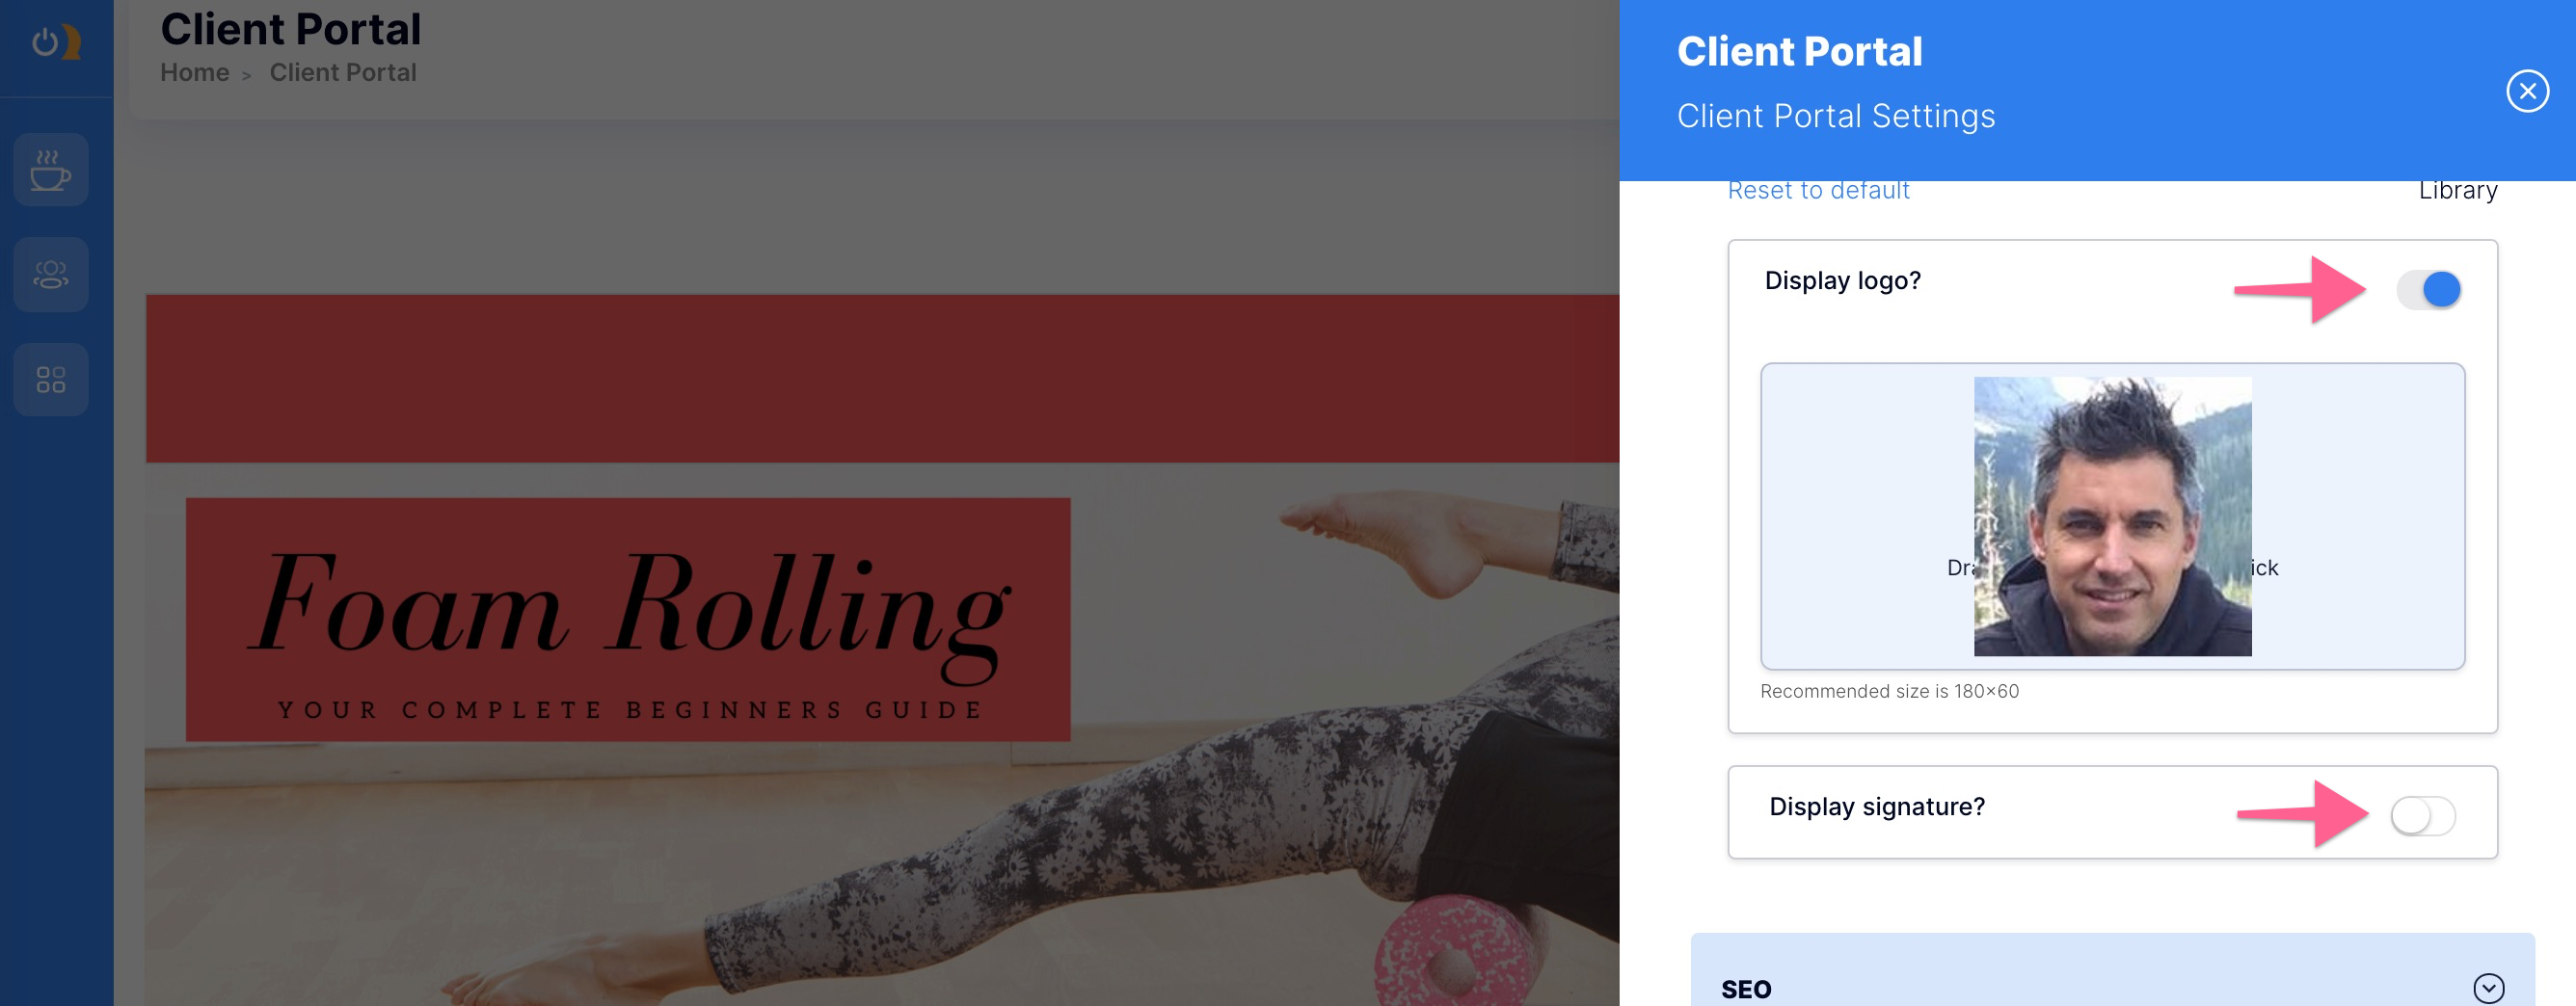
12. In the Delivery Message tab, you can choose to turn the Display logo toggle ON, allowing you to download an image of yourself or your company logo. Then decide whether you would like to display your signature in the message.
13. The last three tabs in your Client Portal Settings are advanced settings for search engine optimization (SEO, Social Share, and Favicon). Complete these sections only if you have expertise in this area. Click Save to complete setting up your client portal!