Broadcasts Feature
Quick Training Links
- Start your broadcast
- Manually add content to your broadcast
- Insert a saved template from your library
- Edit a saved library template
- Add custom fields and images to your broadcast email
- Preview your broadcast
- Add broadcast email logo, signature, and test your broadcast
- Setting up your email broadcast "to" addresses and "from" address
- Selecting your broadcast filters
- Schedule your broadcast to send immediately or at a later date
- View broadcast statistics
Start your broadcast:
Go to your Quicklaunch menu & select Broadcasts.
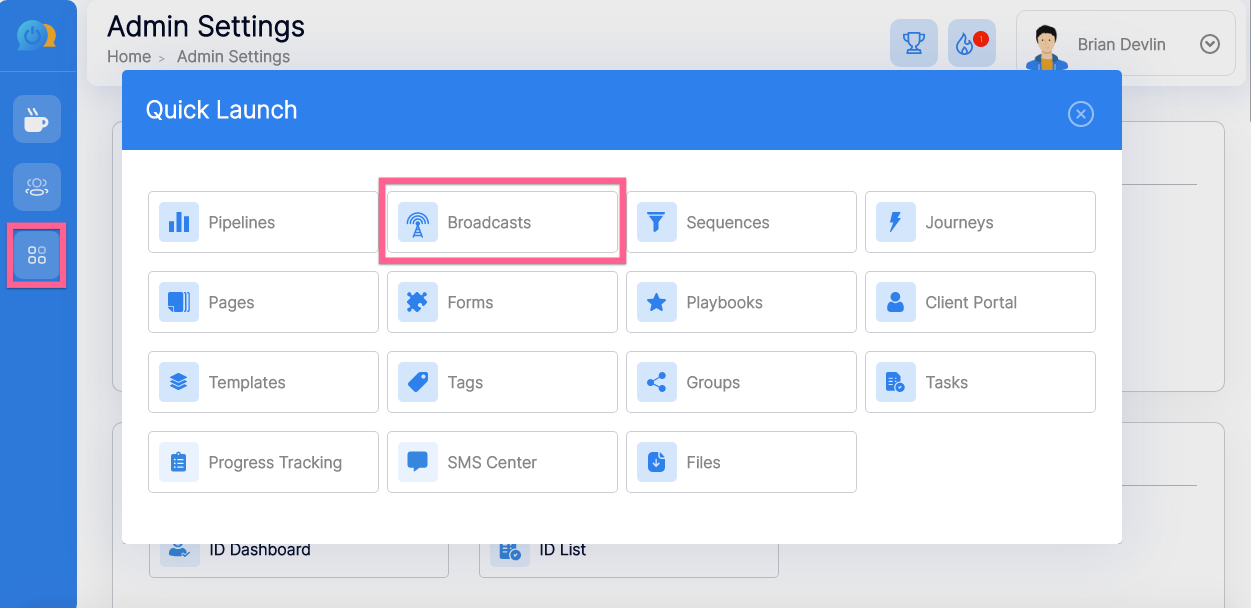
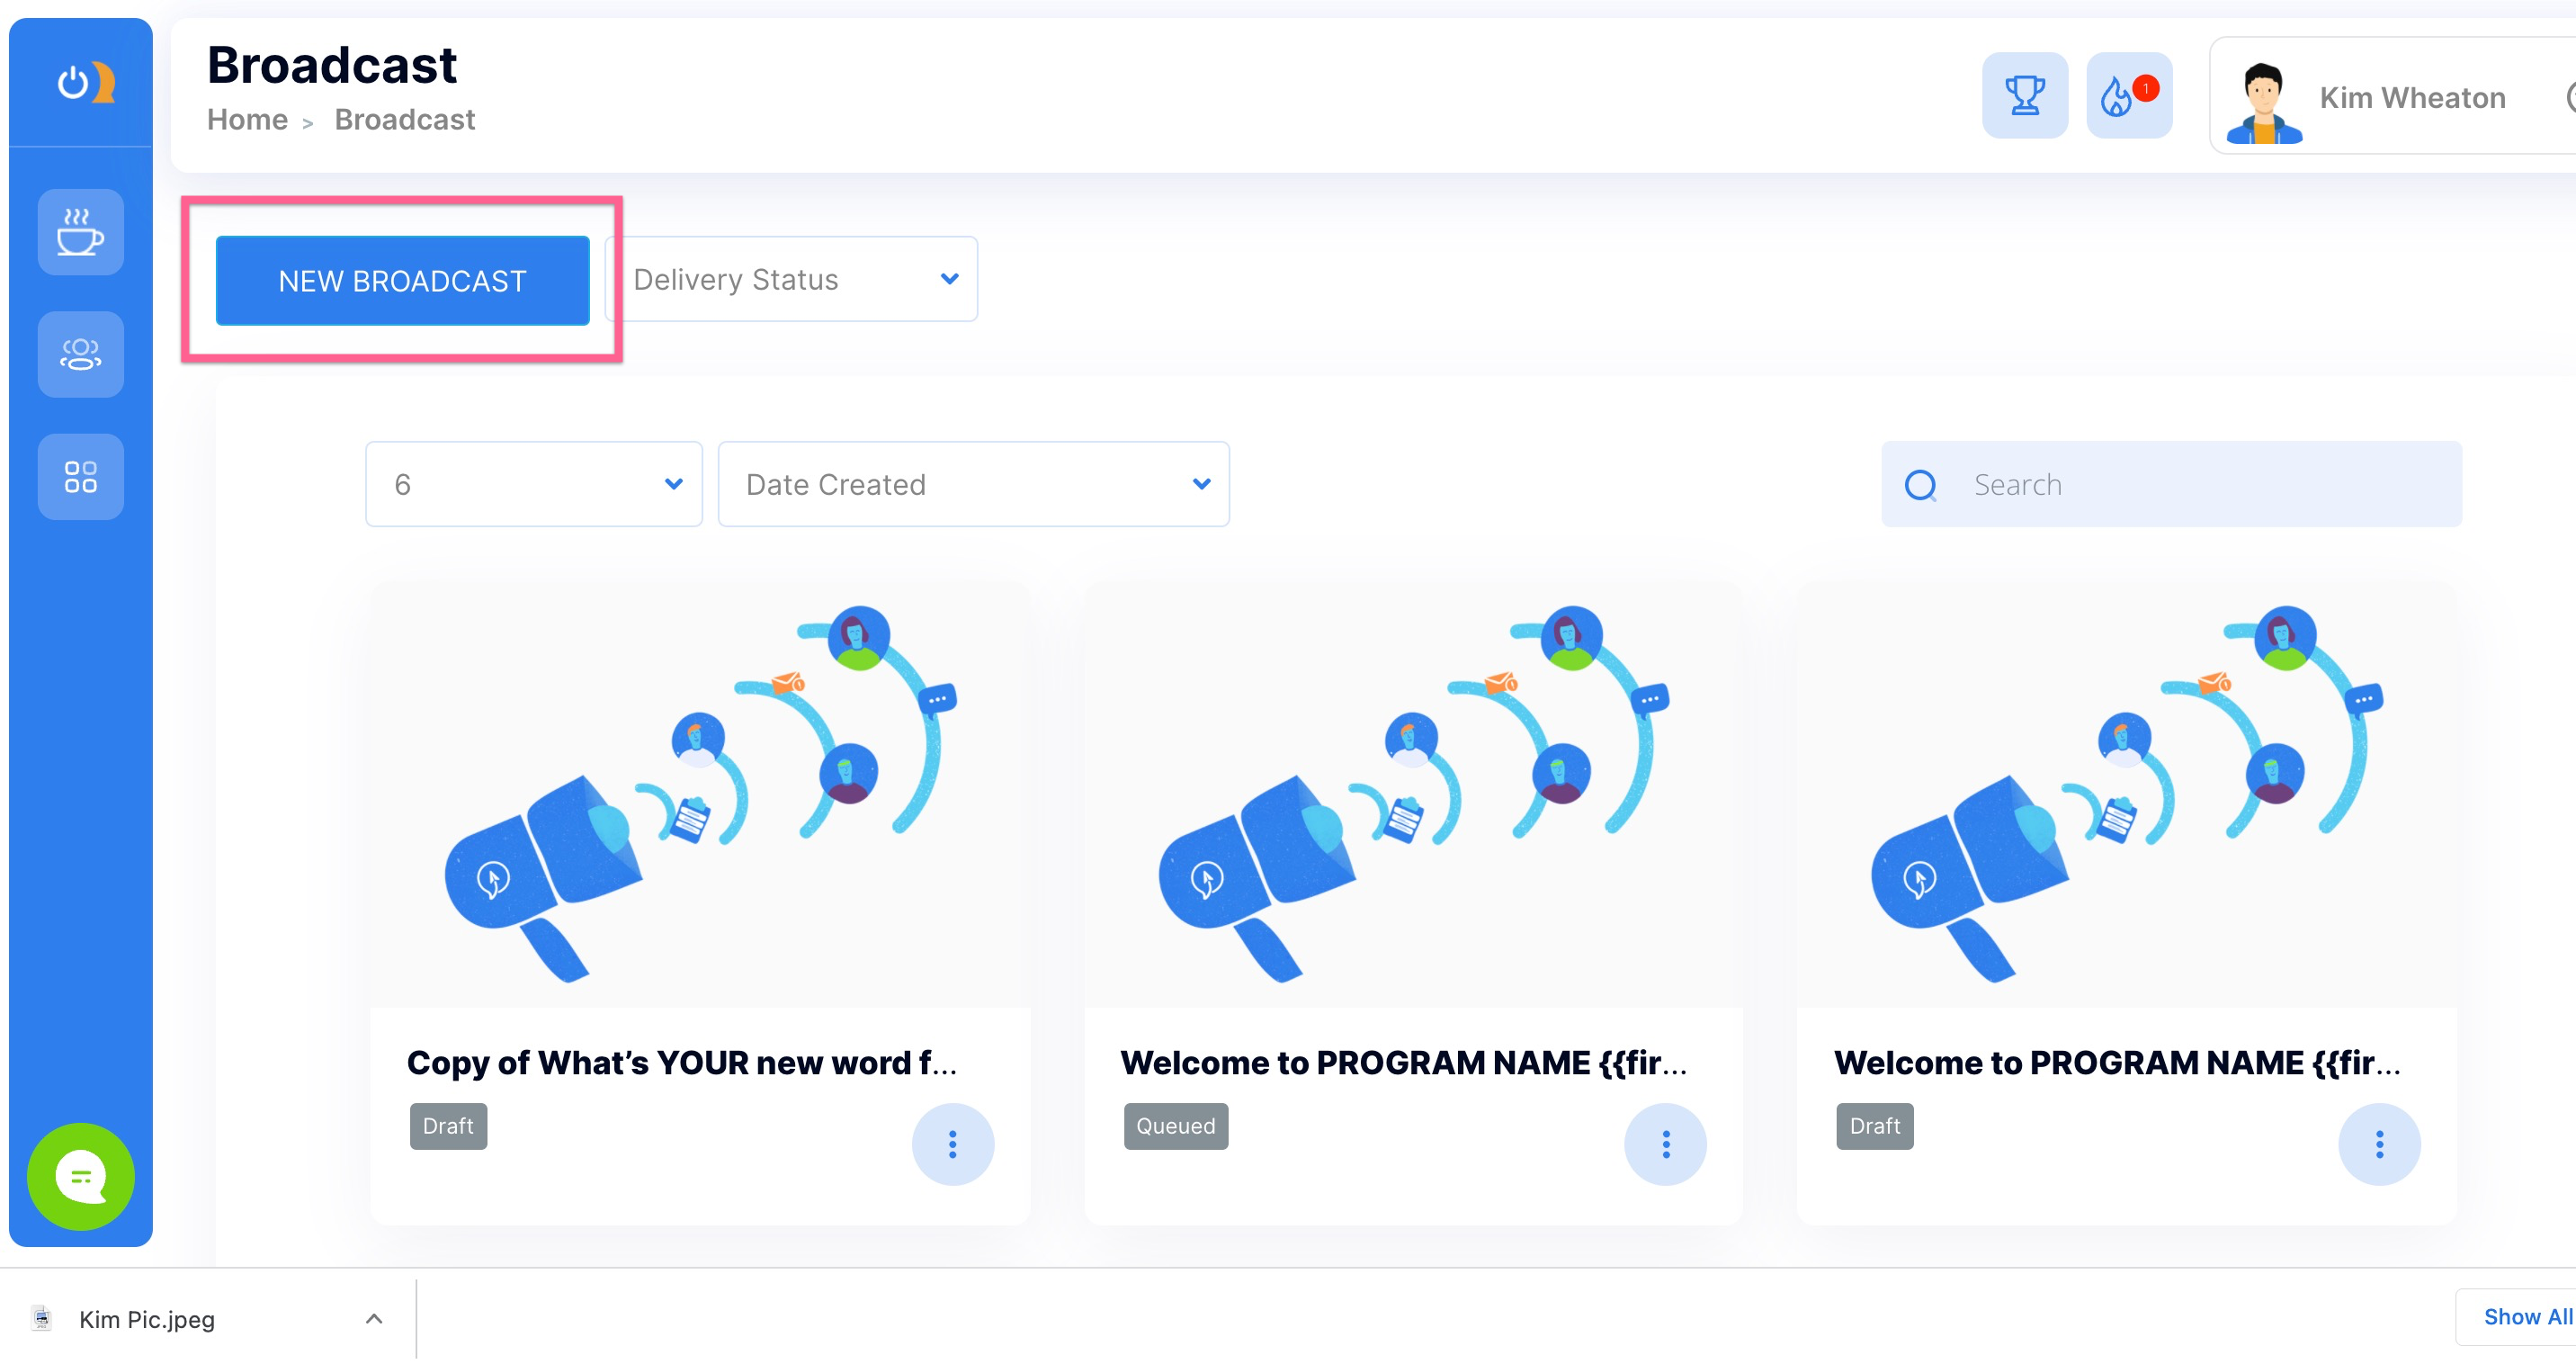
You will then click on the New Broadcast button.
You can manually add content to your broadcast email:
To add content, you can start by manually entering the subject or by clicking the Library link to access stored templates. Stored templates include readymades by Onboard Me or your own customized content previously created/stored in Templates. The email subject will auto-populate once your template is selected.
*To understand the Templates feature for future broadcast use, click HERE.
Manual broadcast email entry:
You can also insert a saved template from your library:
Click Library under the email content editor. Choose your broadcast template from the Category drop-down menu.
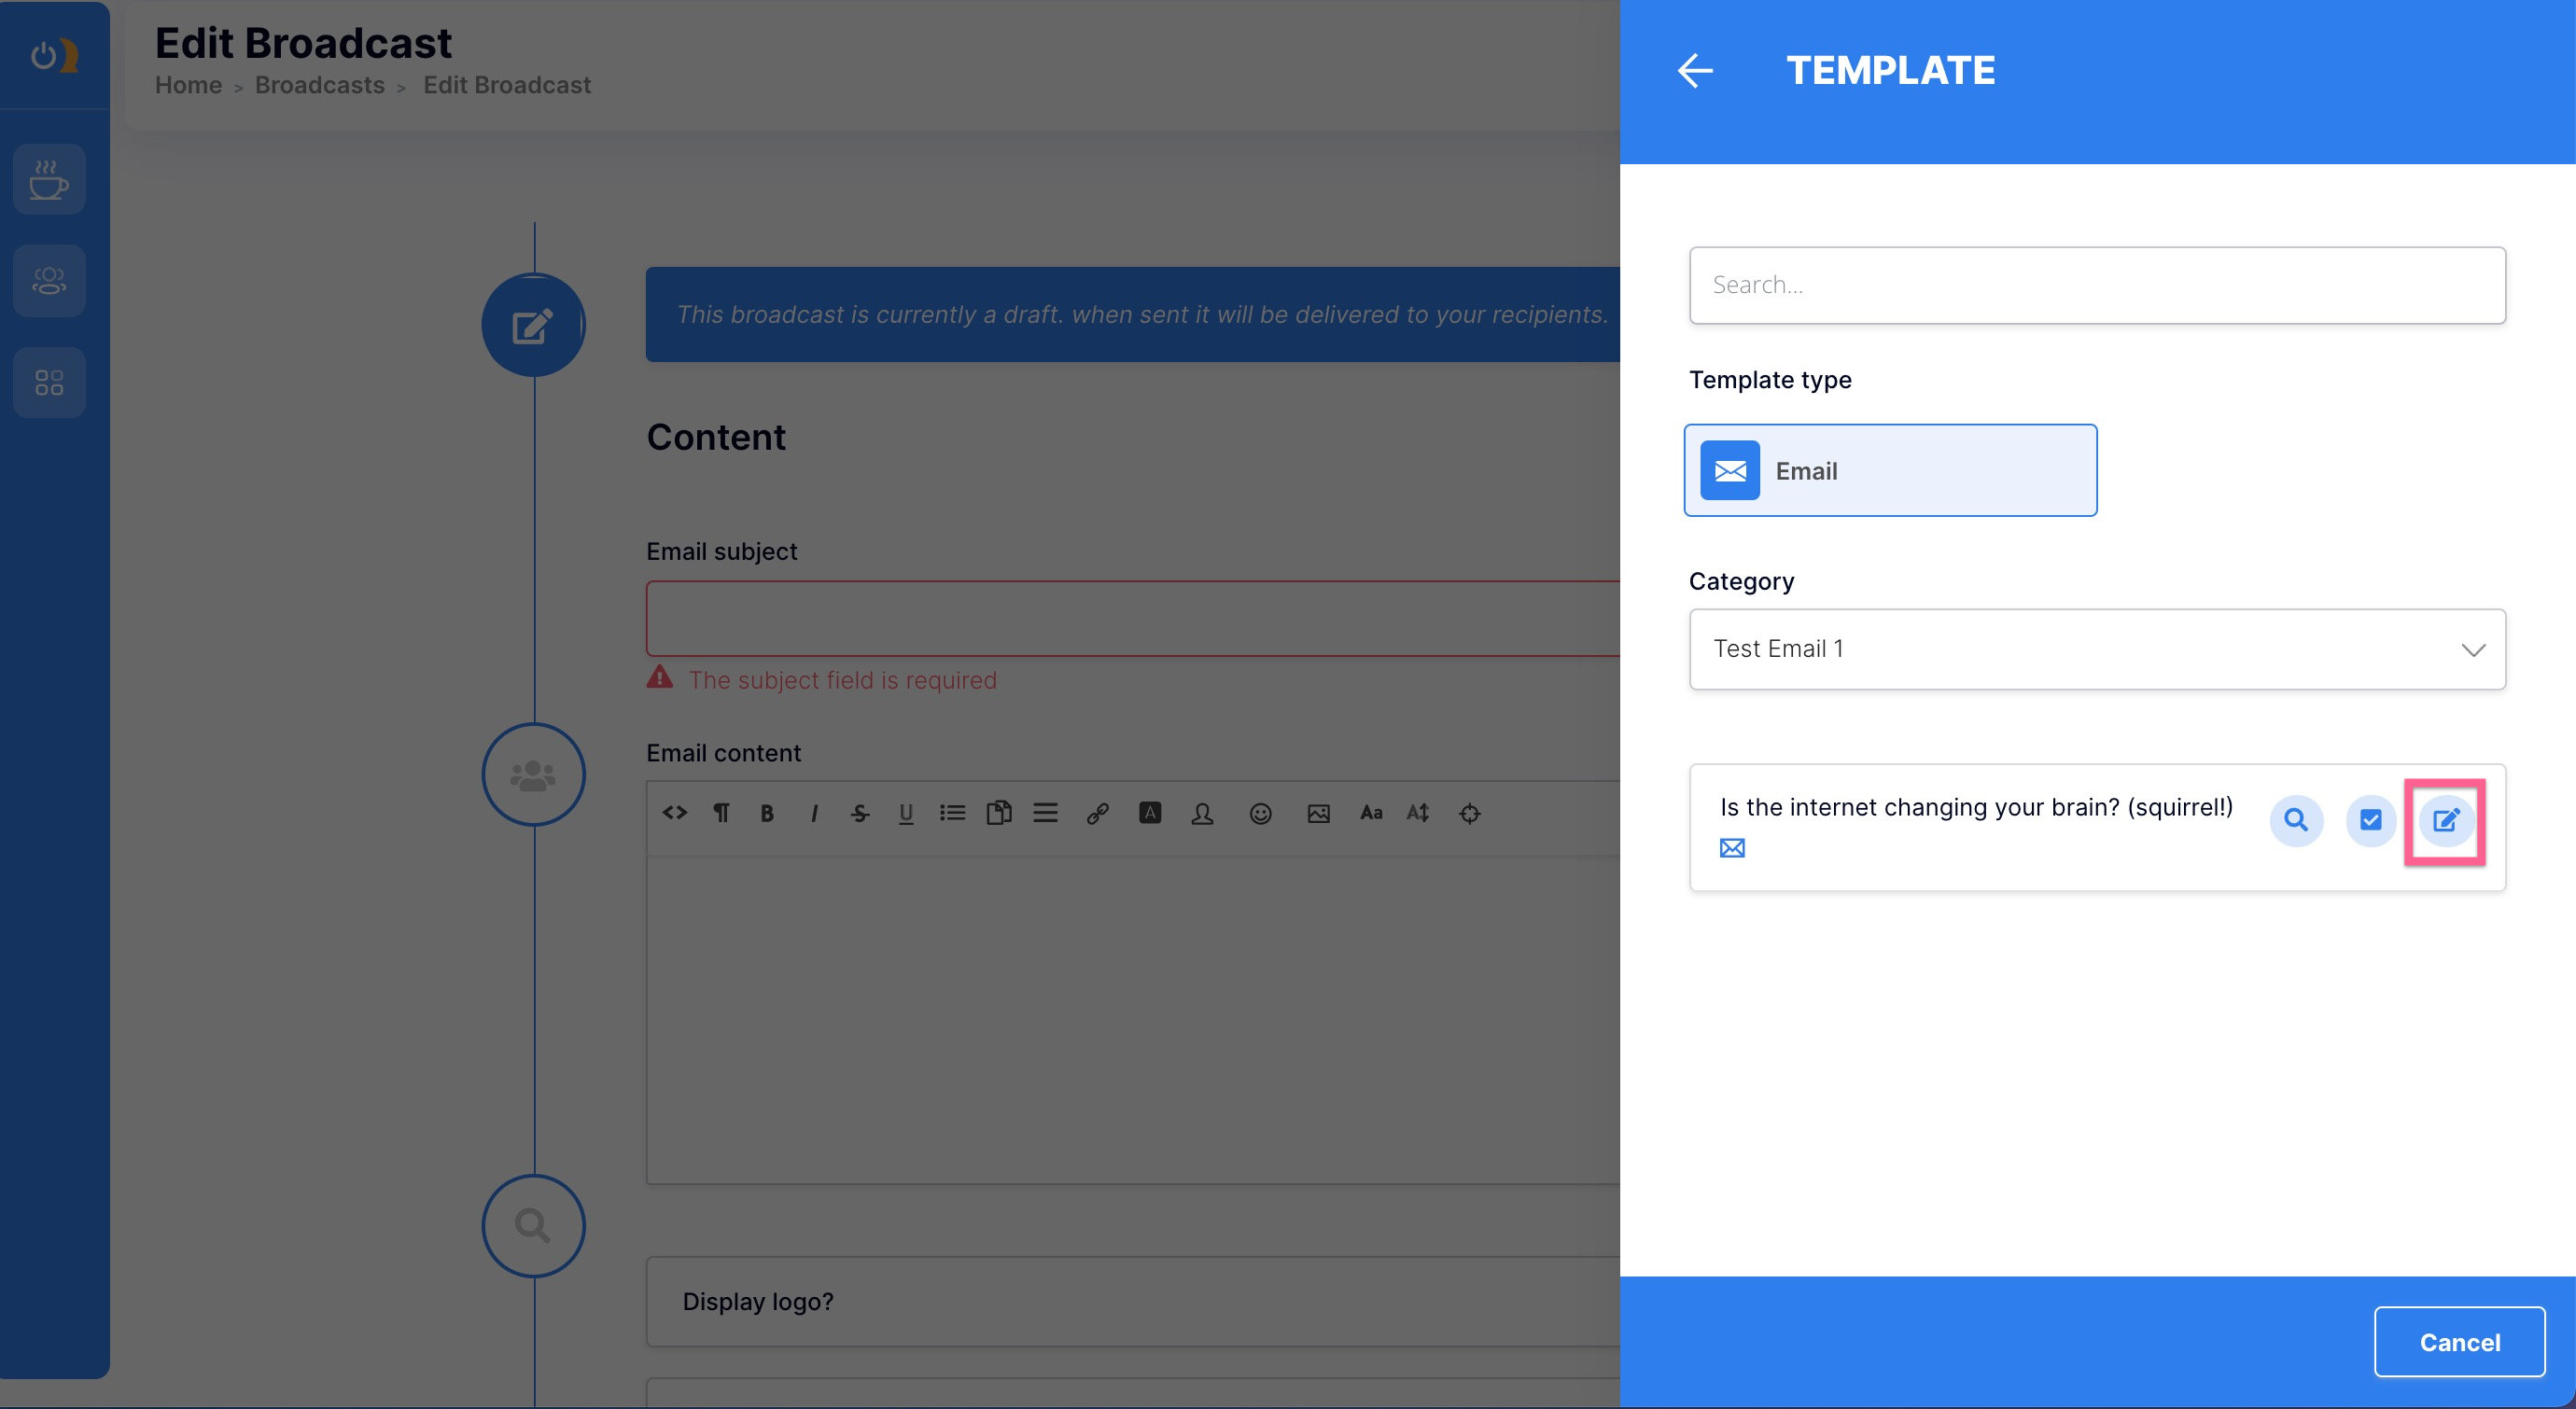
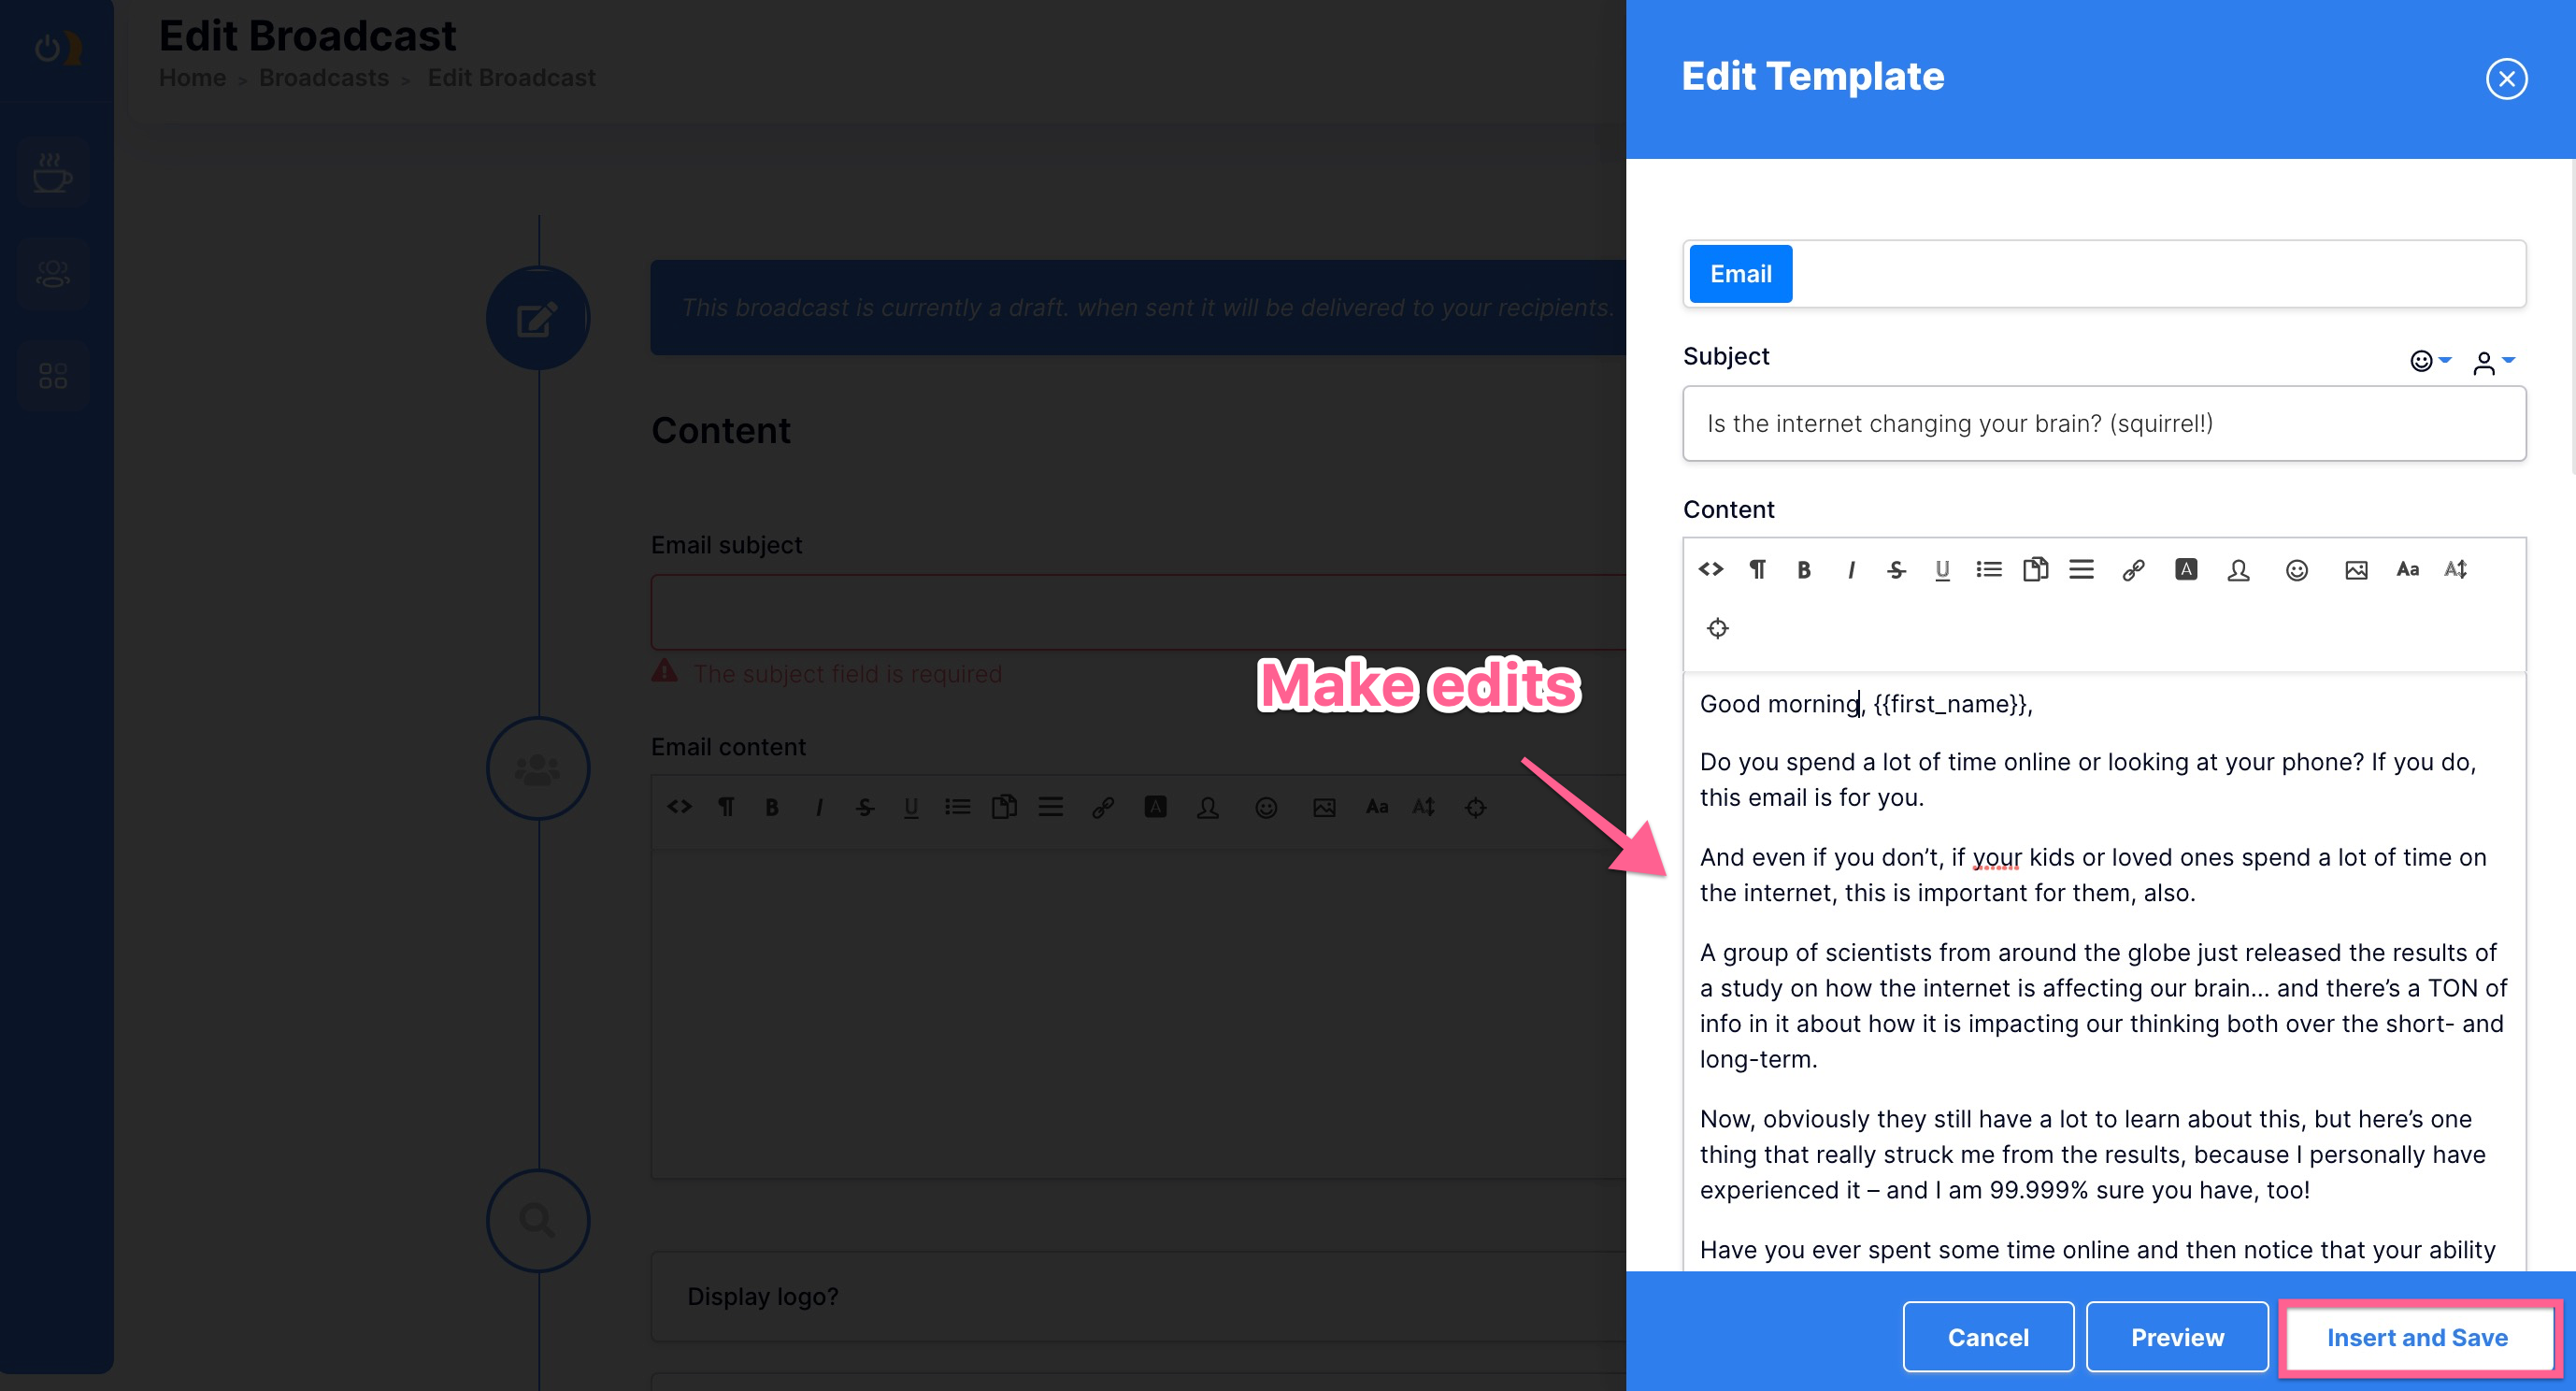
Edit a saved library template:
To edit a template, make a selection under Category and click the pencil icon to immediately start editing. Once your edits have been made, click Insert and Save.
Add custom fields and images to your broadcast email:
You may wish to personalize an existing template with custom fields, emojis, or embedded images. To do this, simply click within the content field and make your selection using the toolbar.
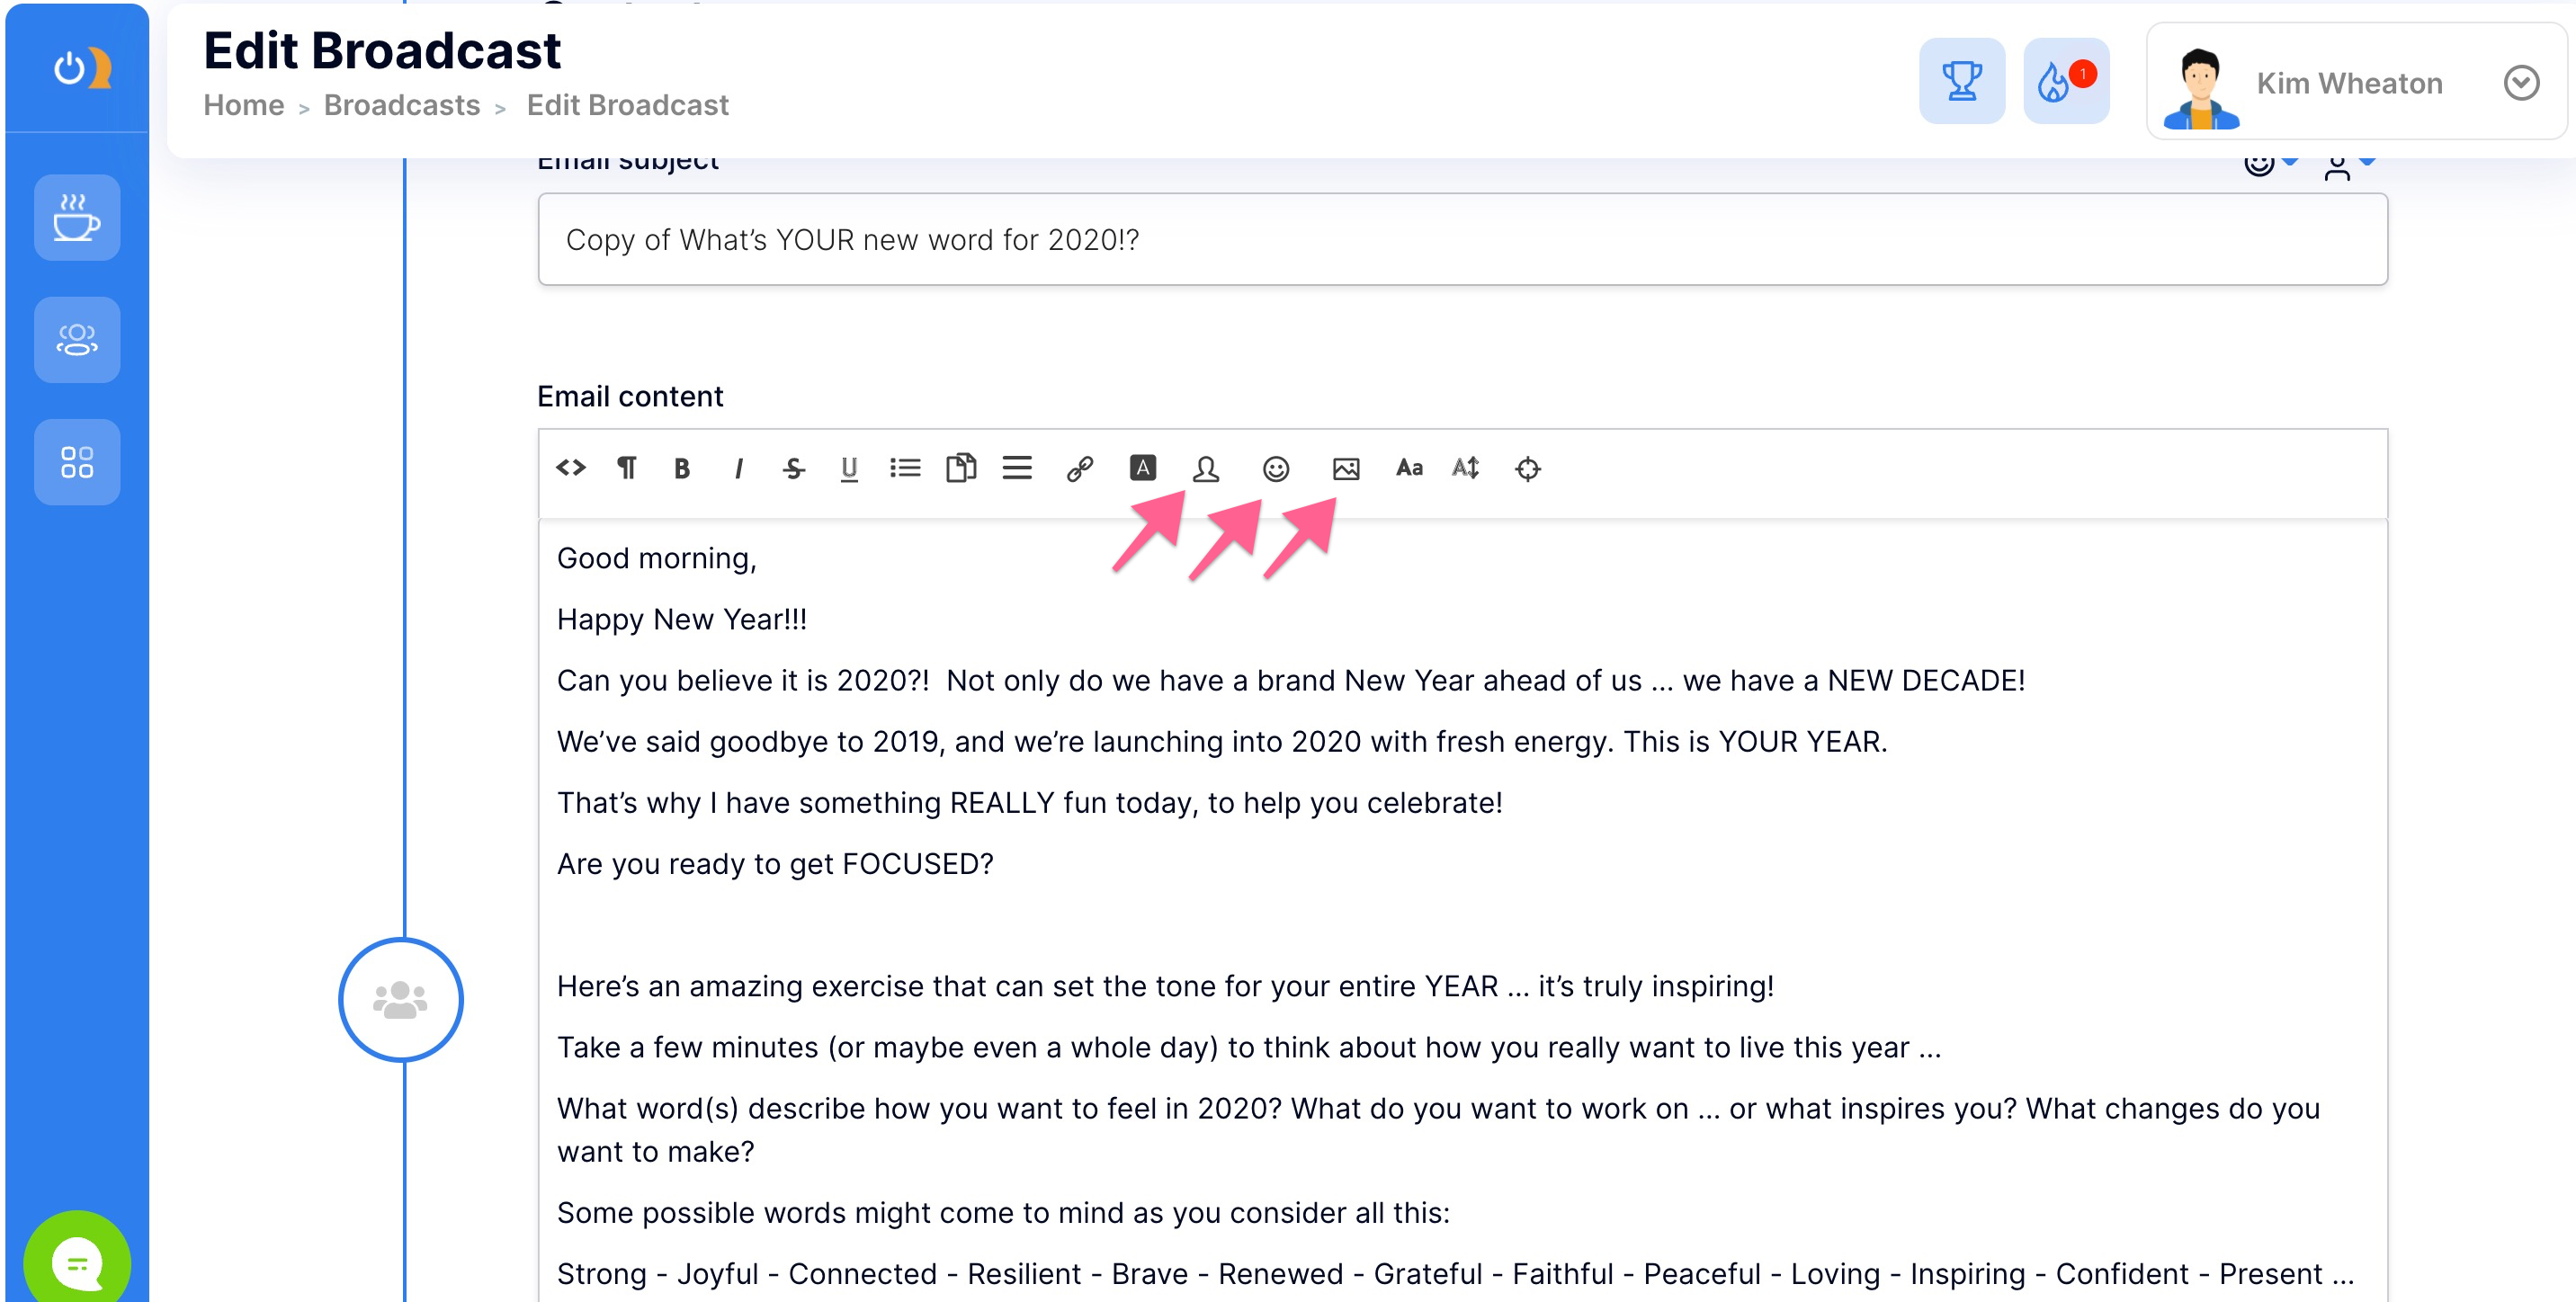
To embed an image, click the Image icon in the toolbar and choose from a library or
Preview your broadcast:
To preview the broadcast template, click the magnifying glass icon to view the broadcast email through the eyes of your customer.
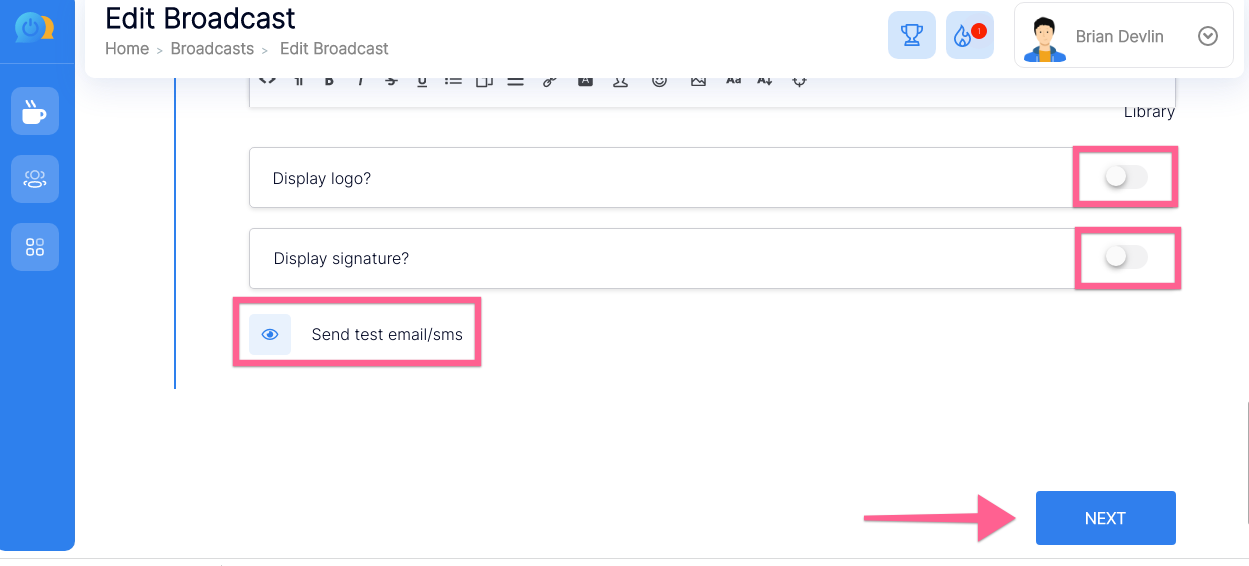
Add broadcast email logo, signature, and test your broadcast:
You can choose to display your company logo and/or signature within the broadcast by turning these toggles on. Send a test email to yourself to make sure the format is clean and the display is mobile responsive. Check that your email address is correct and click Send Preview. When you are satisfied with your broadcast, click Next.
Setting up your email broadcast "to" addresses and "from" address:
Choose who the broadcast email will be from, the reply-to email (either yours or the email address of the staff handling customer communications) & then choose the targeted list you are broadcasting to. You may choose to target your entire customer list or target sub-categories. To select your entire customer list, click All and Add Filter, then select All Subscribers. Click Add to complete the step.
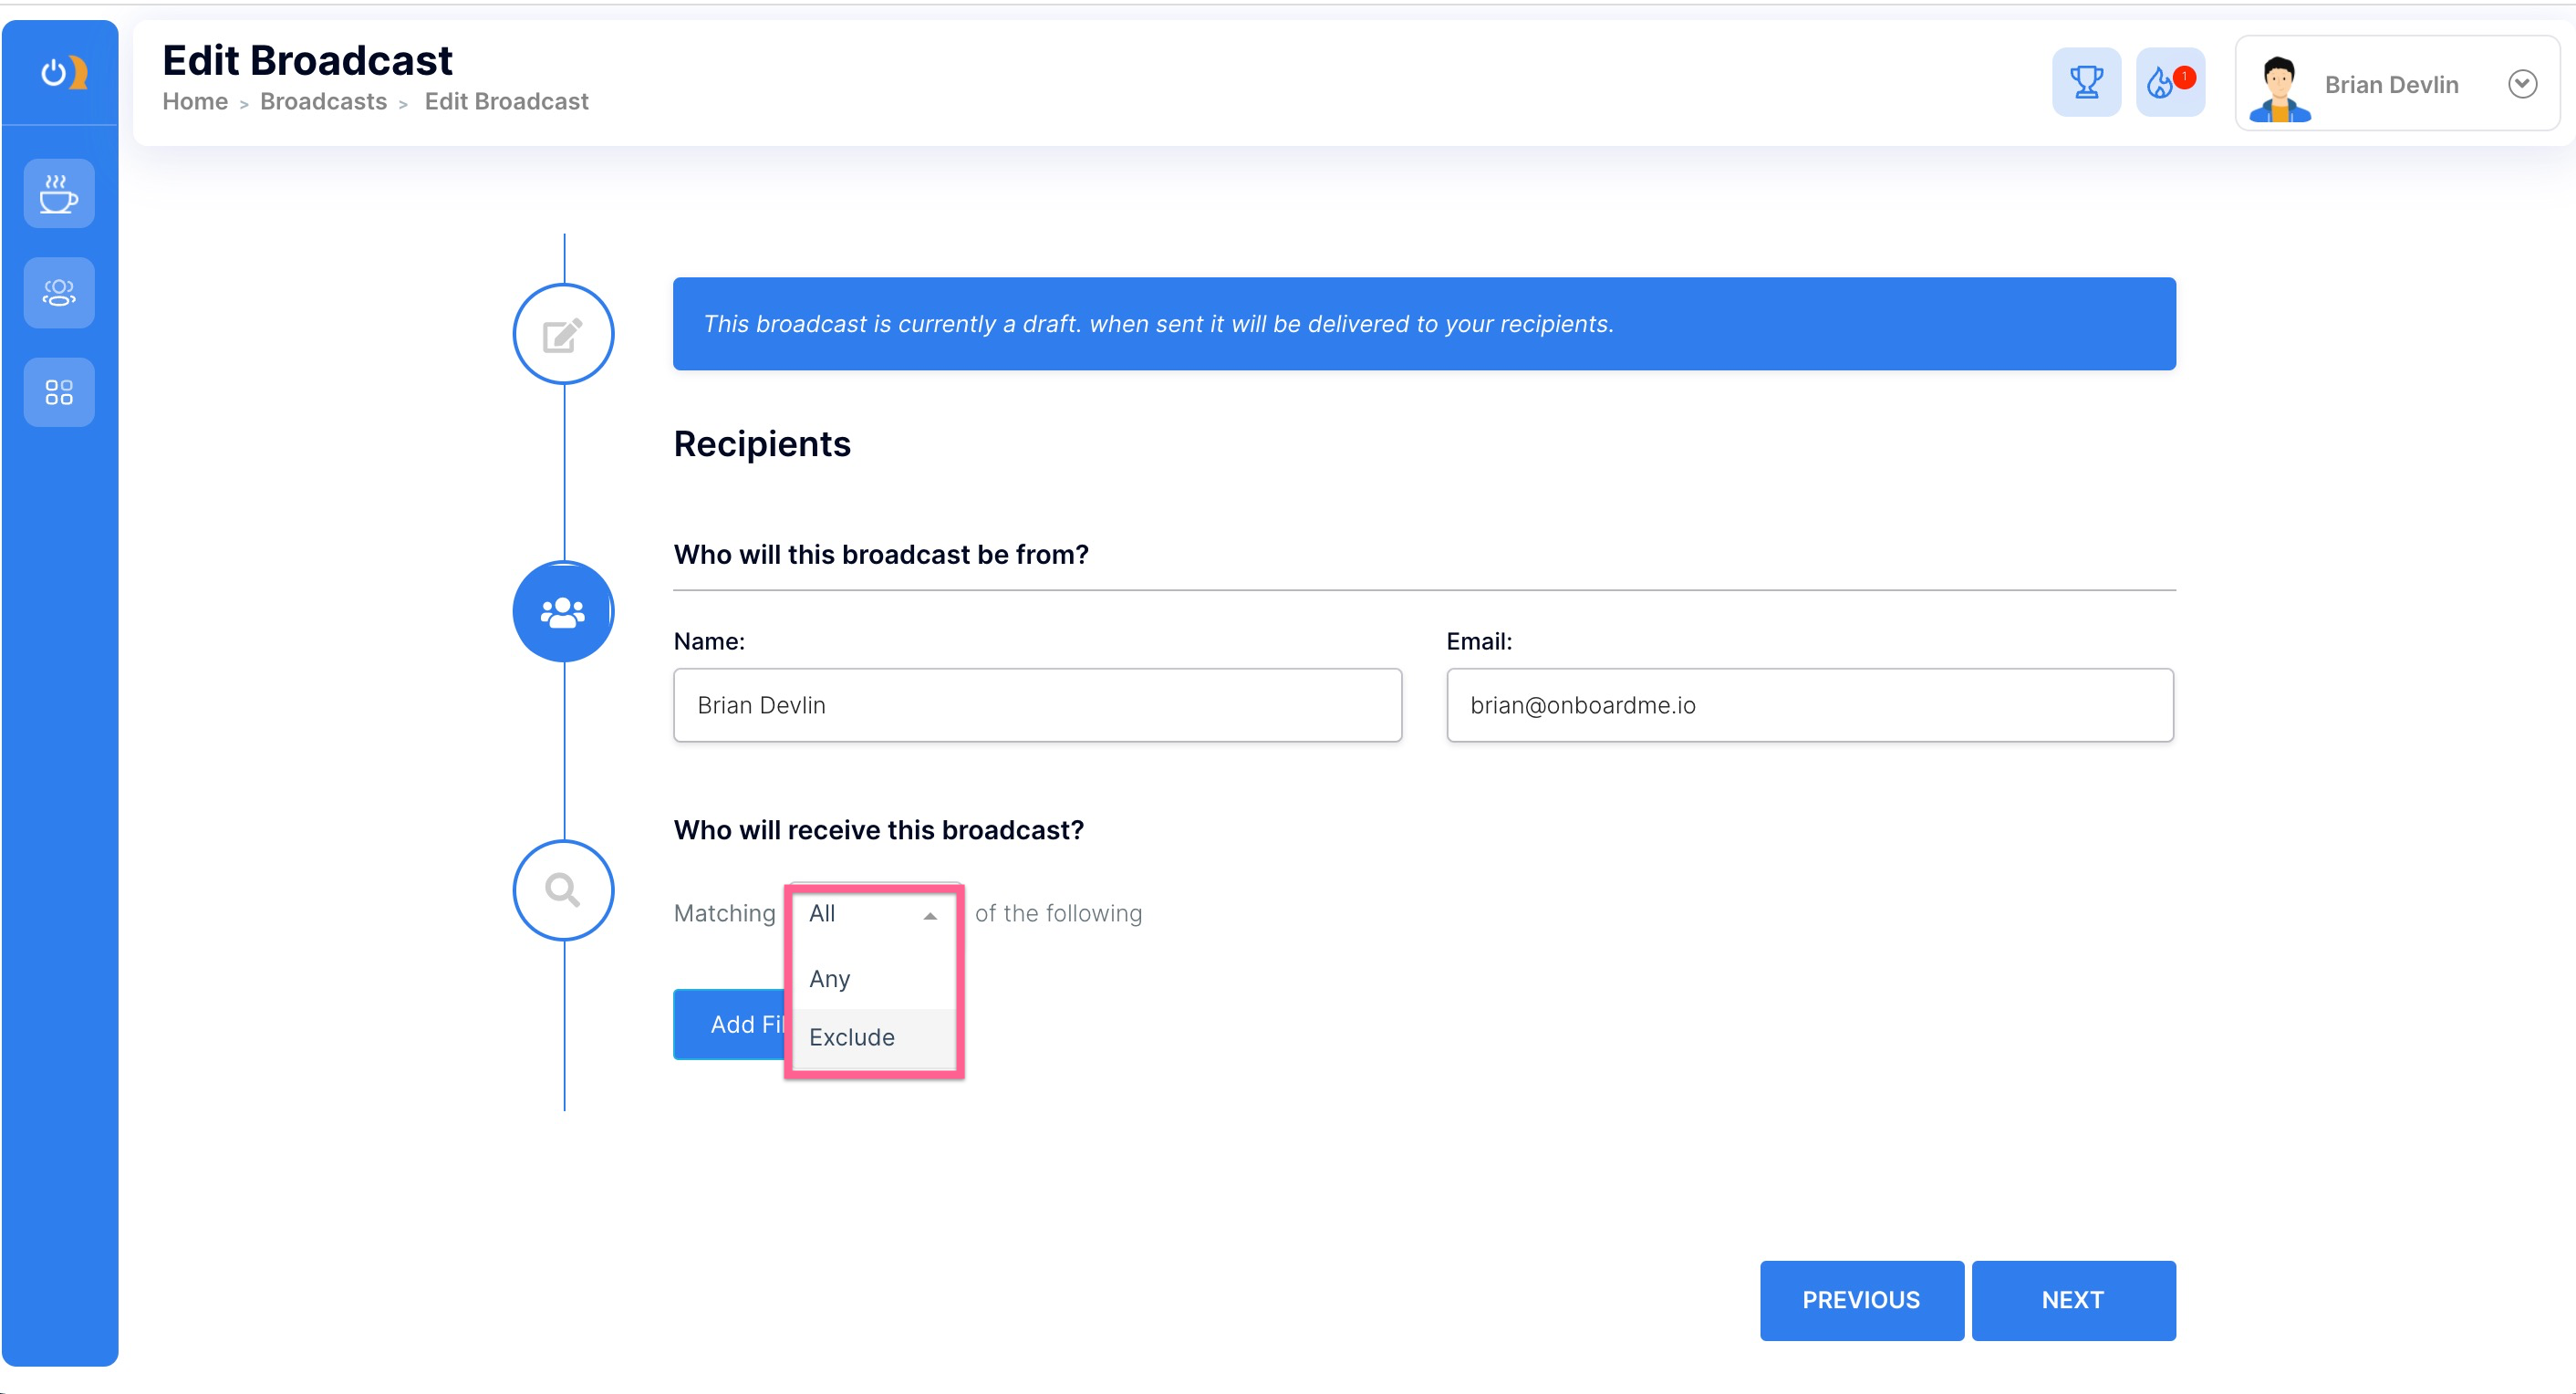
To target sub-categories, you first need to determine whether you would like to broadcast by excluding certain groups from your customer list or by selecting criteria that subdivide your list. Under "Who will receive this broadcast?" you have the option to select All, Any, or Exclude.
What it means to choose:
All: All of those sub-categories you select in the next window must be present in order for the broadcast to apply. For instance, if you are broadcasting to current clients who are female, aged 30-50 yrs old, there would be 3 criteria set in the next window to describe your target. Here you would select All because you don't want just one or two criteria to apply (you aren't targeting females AND also 30-50 yr olds, you are targeting 30-50 yr olds who are also female). A good way to think of this is that All = And. In order to receive your broadcast, the client must be a current member of your organization AND female AND 30-50 yrs old.
Any: Any of those sub-categories you select in the next window must be present in order for the broadcast to apply. For instance, if you are broadcasting to lost clients, cold leads, or geriatric clients, there would be 3 criteria set in the next window to describe your target. Unlike the example above, however, you would select Any before continuing to the next window because you don't need all criteria to apply (you aren't targeting geriatric clients who are lost and also new leads). A good way to think of this is that Any = Or. In order to receive your broadcast, the client must be a lost client OR a new lead OR geriatric.
Except: Another way to target sub-categories within your customer list is to remove certain criteria. For instance, you may want to broadcast an incentive to join your facility in the next month. Your criteria in the next window would exclude current members only, so the rest of your list would receive your broadcast (lost clients, leads, etc.). Multiple exclusions can be selected to designate those who will NOT receive your broadcast.
Make your choice of All, Any, or Except, then click Add Filter to segment your broadcast list accordingly.
Selecting your broadcast filters:
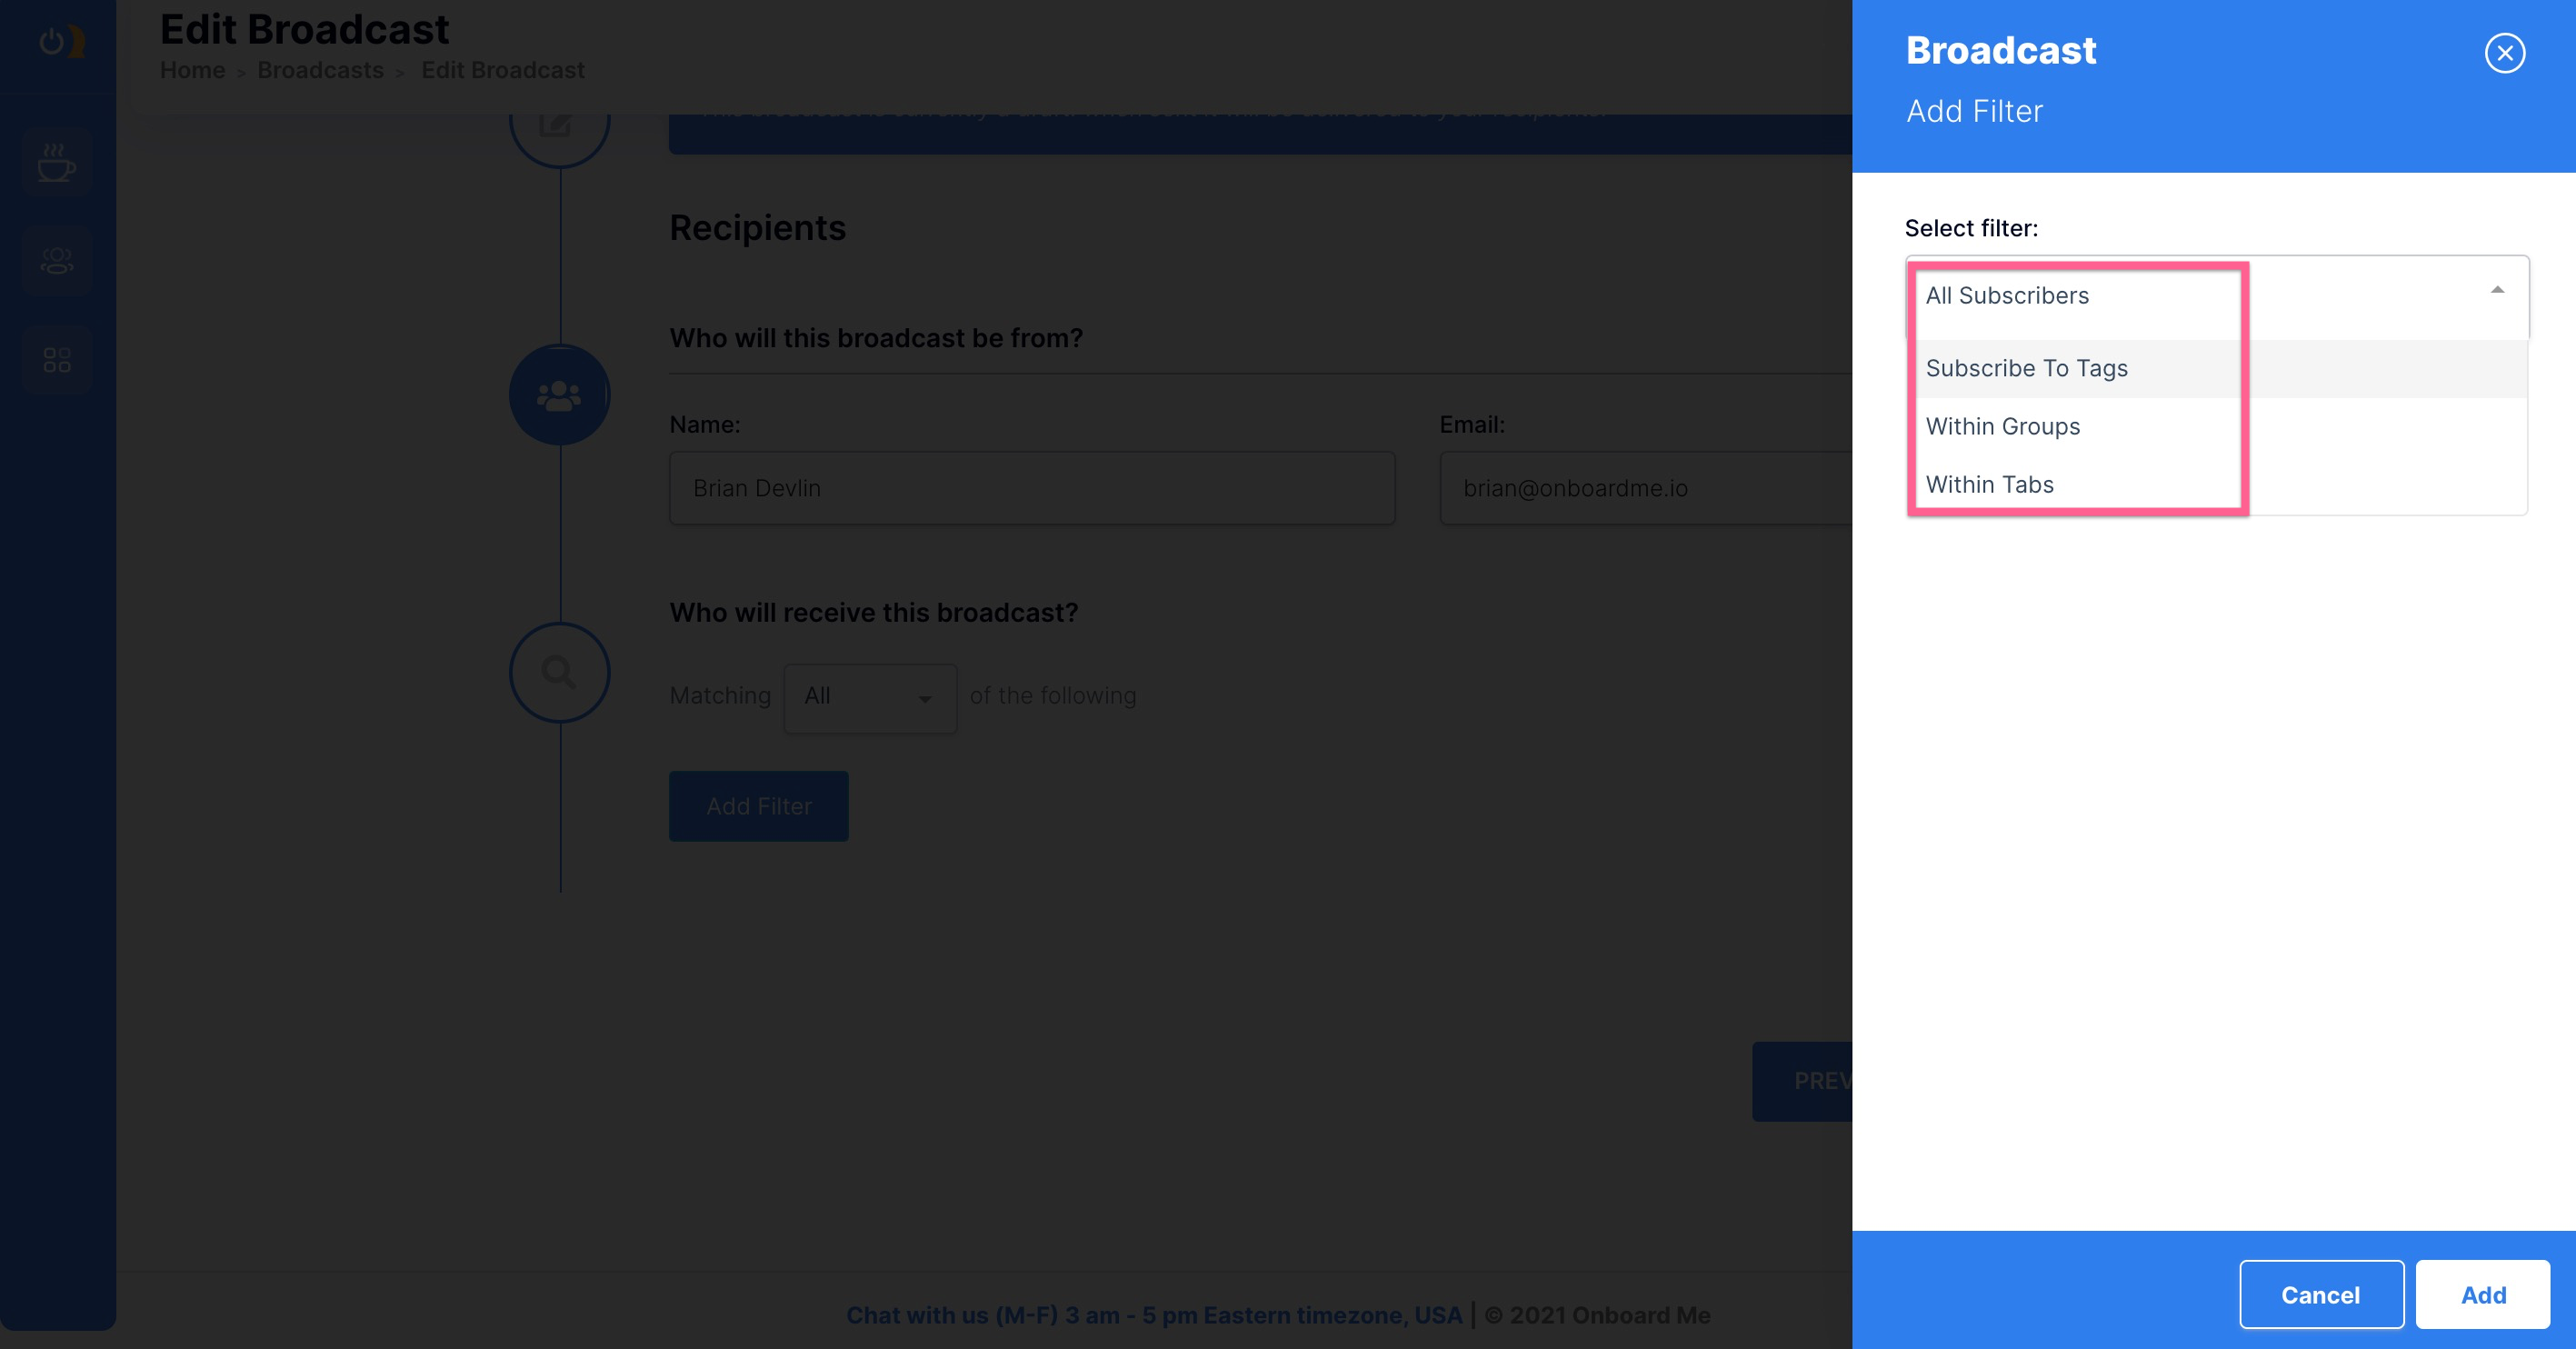
Now that you've decided HOW to assemble your broadcast list, you can select WHICH sub-categories you will be selecting. There are a few ways to do this. Once you click Add Filter, you can select from within Tags, Groups, and/or Tabs (and of course, you can select All Subscribers to email your entire list).
What it means to choose:
Tags: Tags are pre-labeled identifiers that segment a specific group within your list. Examples might include gender, age, goals, fitness level, diet preferences, etc. Tags can be attached to forms so that upon submission, client details can then be segmented and targeted with future broadcasts.
*If you need help creating tags, tagging, or using the Tag feature, click HERE.
Groups: These are simply combined tags. For instance, if you previously tagged men over 60 yrs old and tagged men 40-60 yrs old, you may also have created a group to combine these two tags (to easily promote to all men over 40 yrs old). To accomplish the same thing, you could have clicked Any on the previous screen and then simply clicked both tags to combine the two tagged age groups, ultimately broadcasting to men who are over 60 yrs old AND 40-60 yrs old.
*If you need help creating groups, grouping, or use the Groups feature, click HERE.
Tabs: Tabs are the categories seen in the home page drop-down menu: leads, trials, clients, staff, lost, etc. Your uploaded clients should have already been segmented into these tabs. Remember, you can select certain tabs for your broadcast, then narrow your target by also selecting additional tags or groups and setting the previous screen to All to target all overlapping criteria.
*If you need help segmenting your list (into Tabs), click HERE.
Once your filters have been chosen, click Add to apply them.
Schedule your broadcast to send immediately or at a later date:
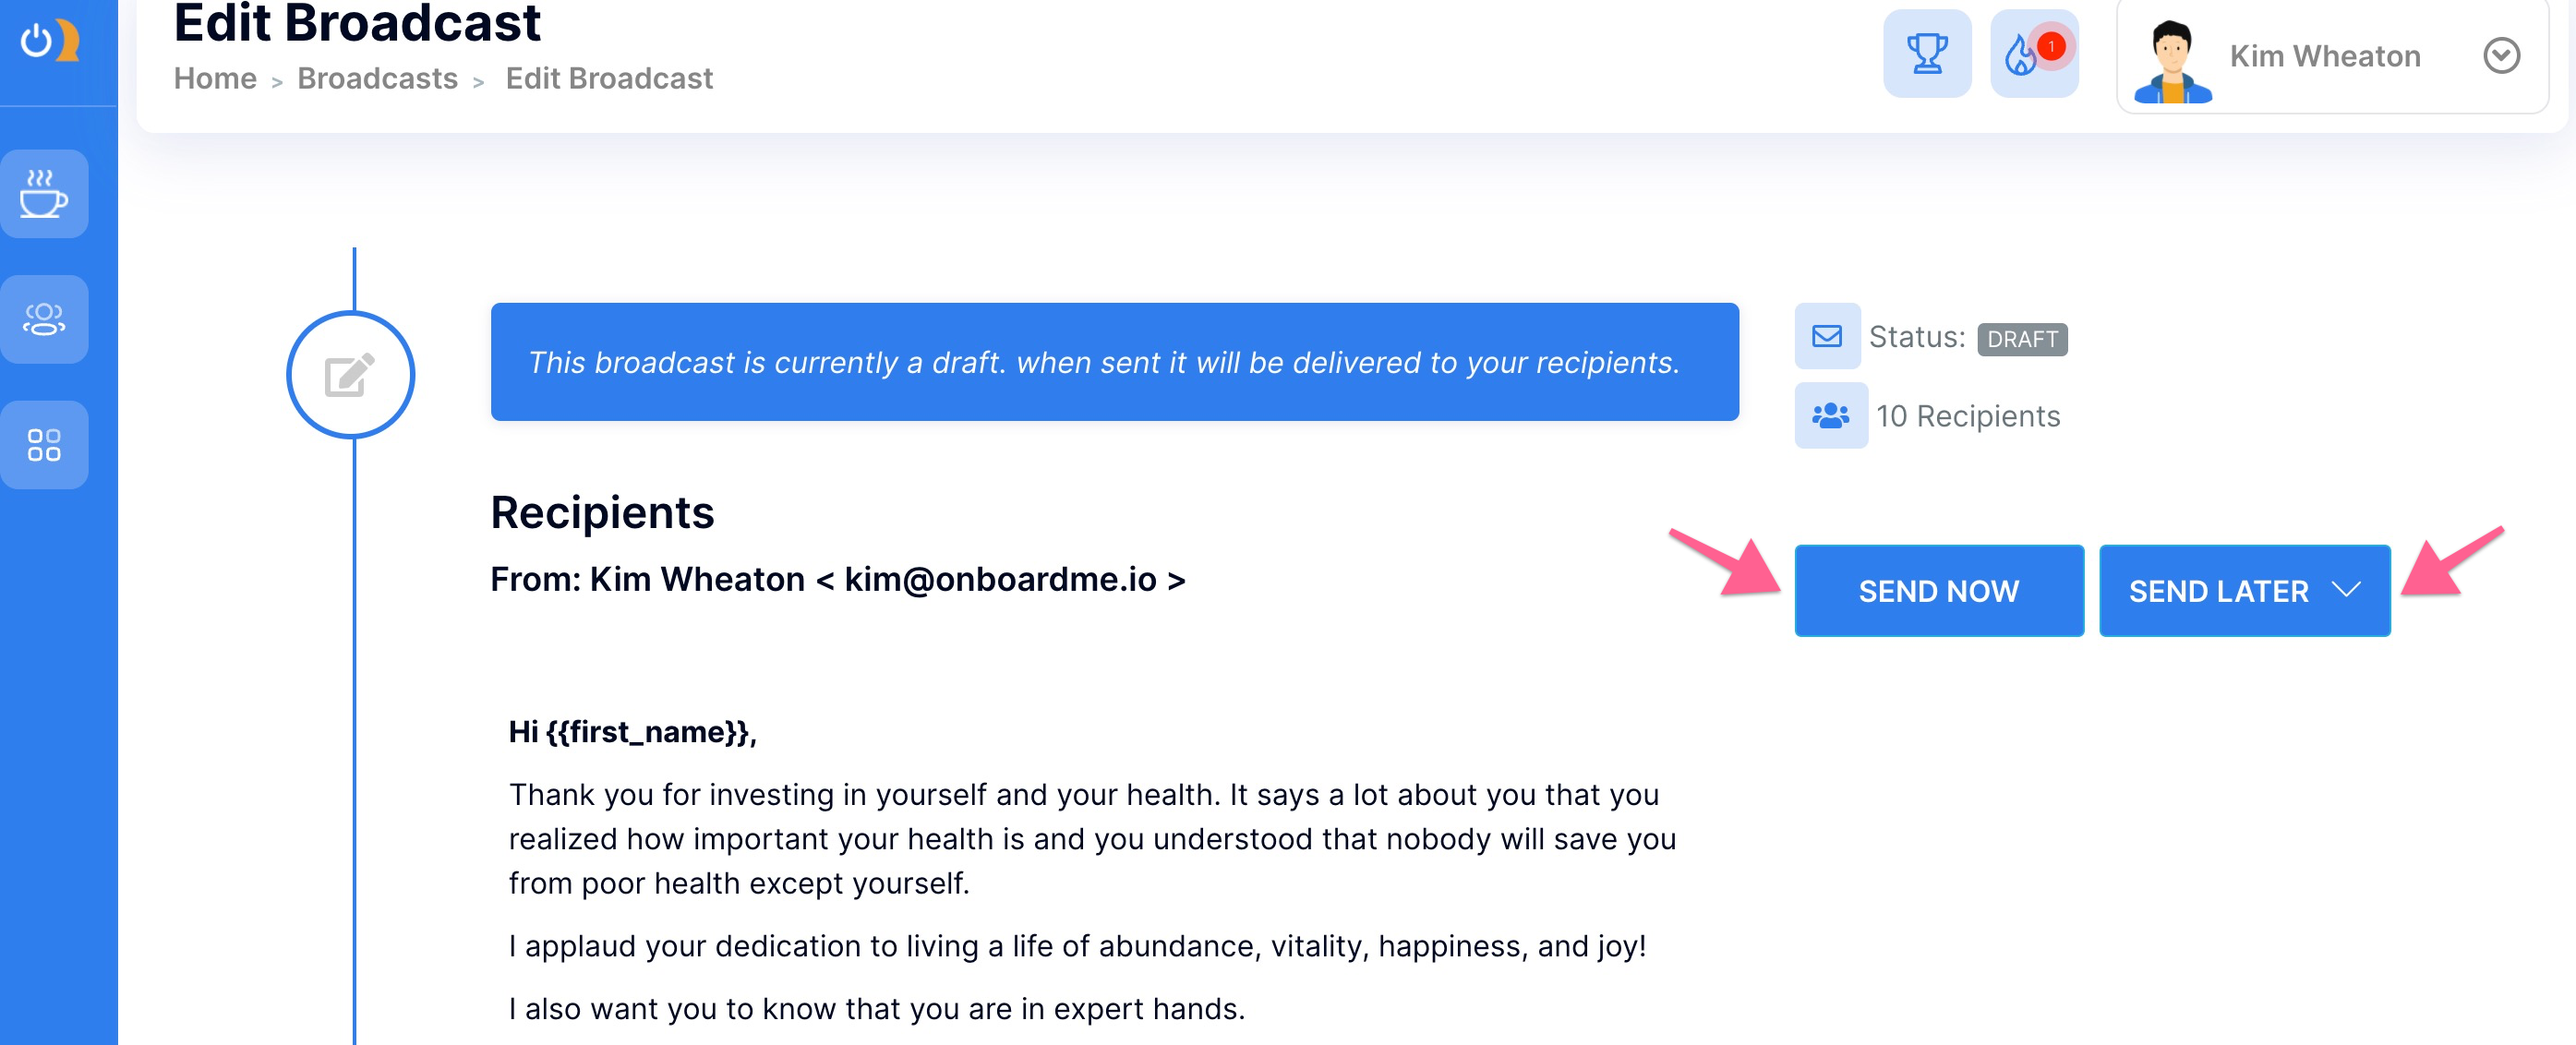
After you have set your filters, click Next, then click Save Draft. You will see two buttons on the upper right side of the screen: Send Now and Send Later. Click Send Now to launch your broadcast immediately. To send at a specific date and time, click Send Later.
After clicking Send Later, you will need to specify the scheduled time to deploy your broadcast. Don't forget to triple-check the accuracy of your time zone and make sure you specify whether the scheduled time is AM or PM! Once this area is filled out, click Que Broadcast.
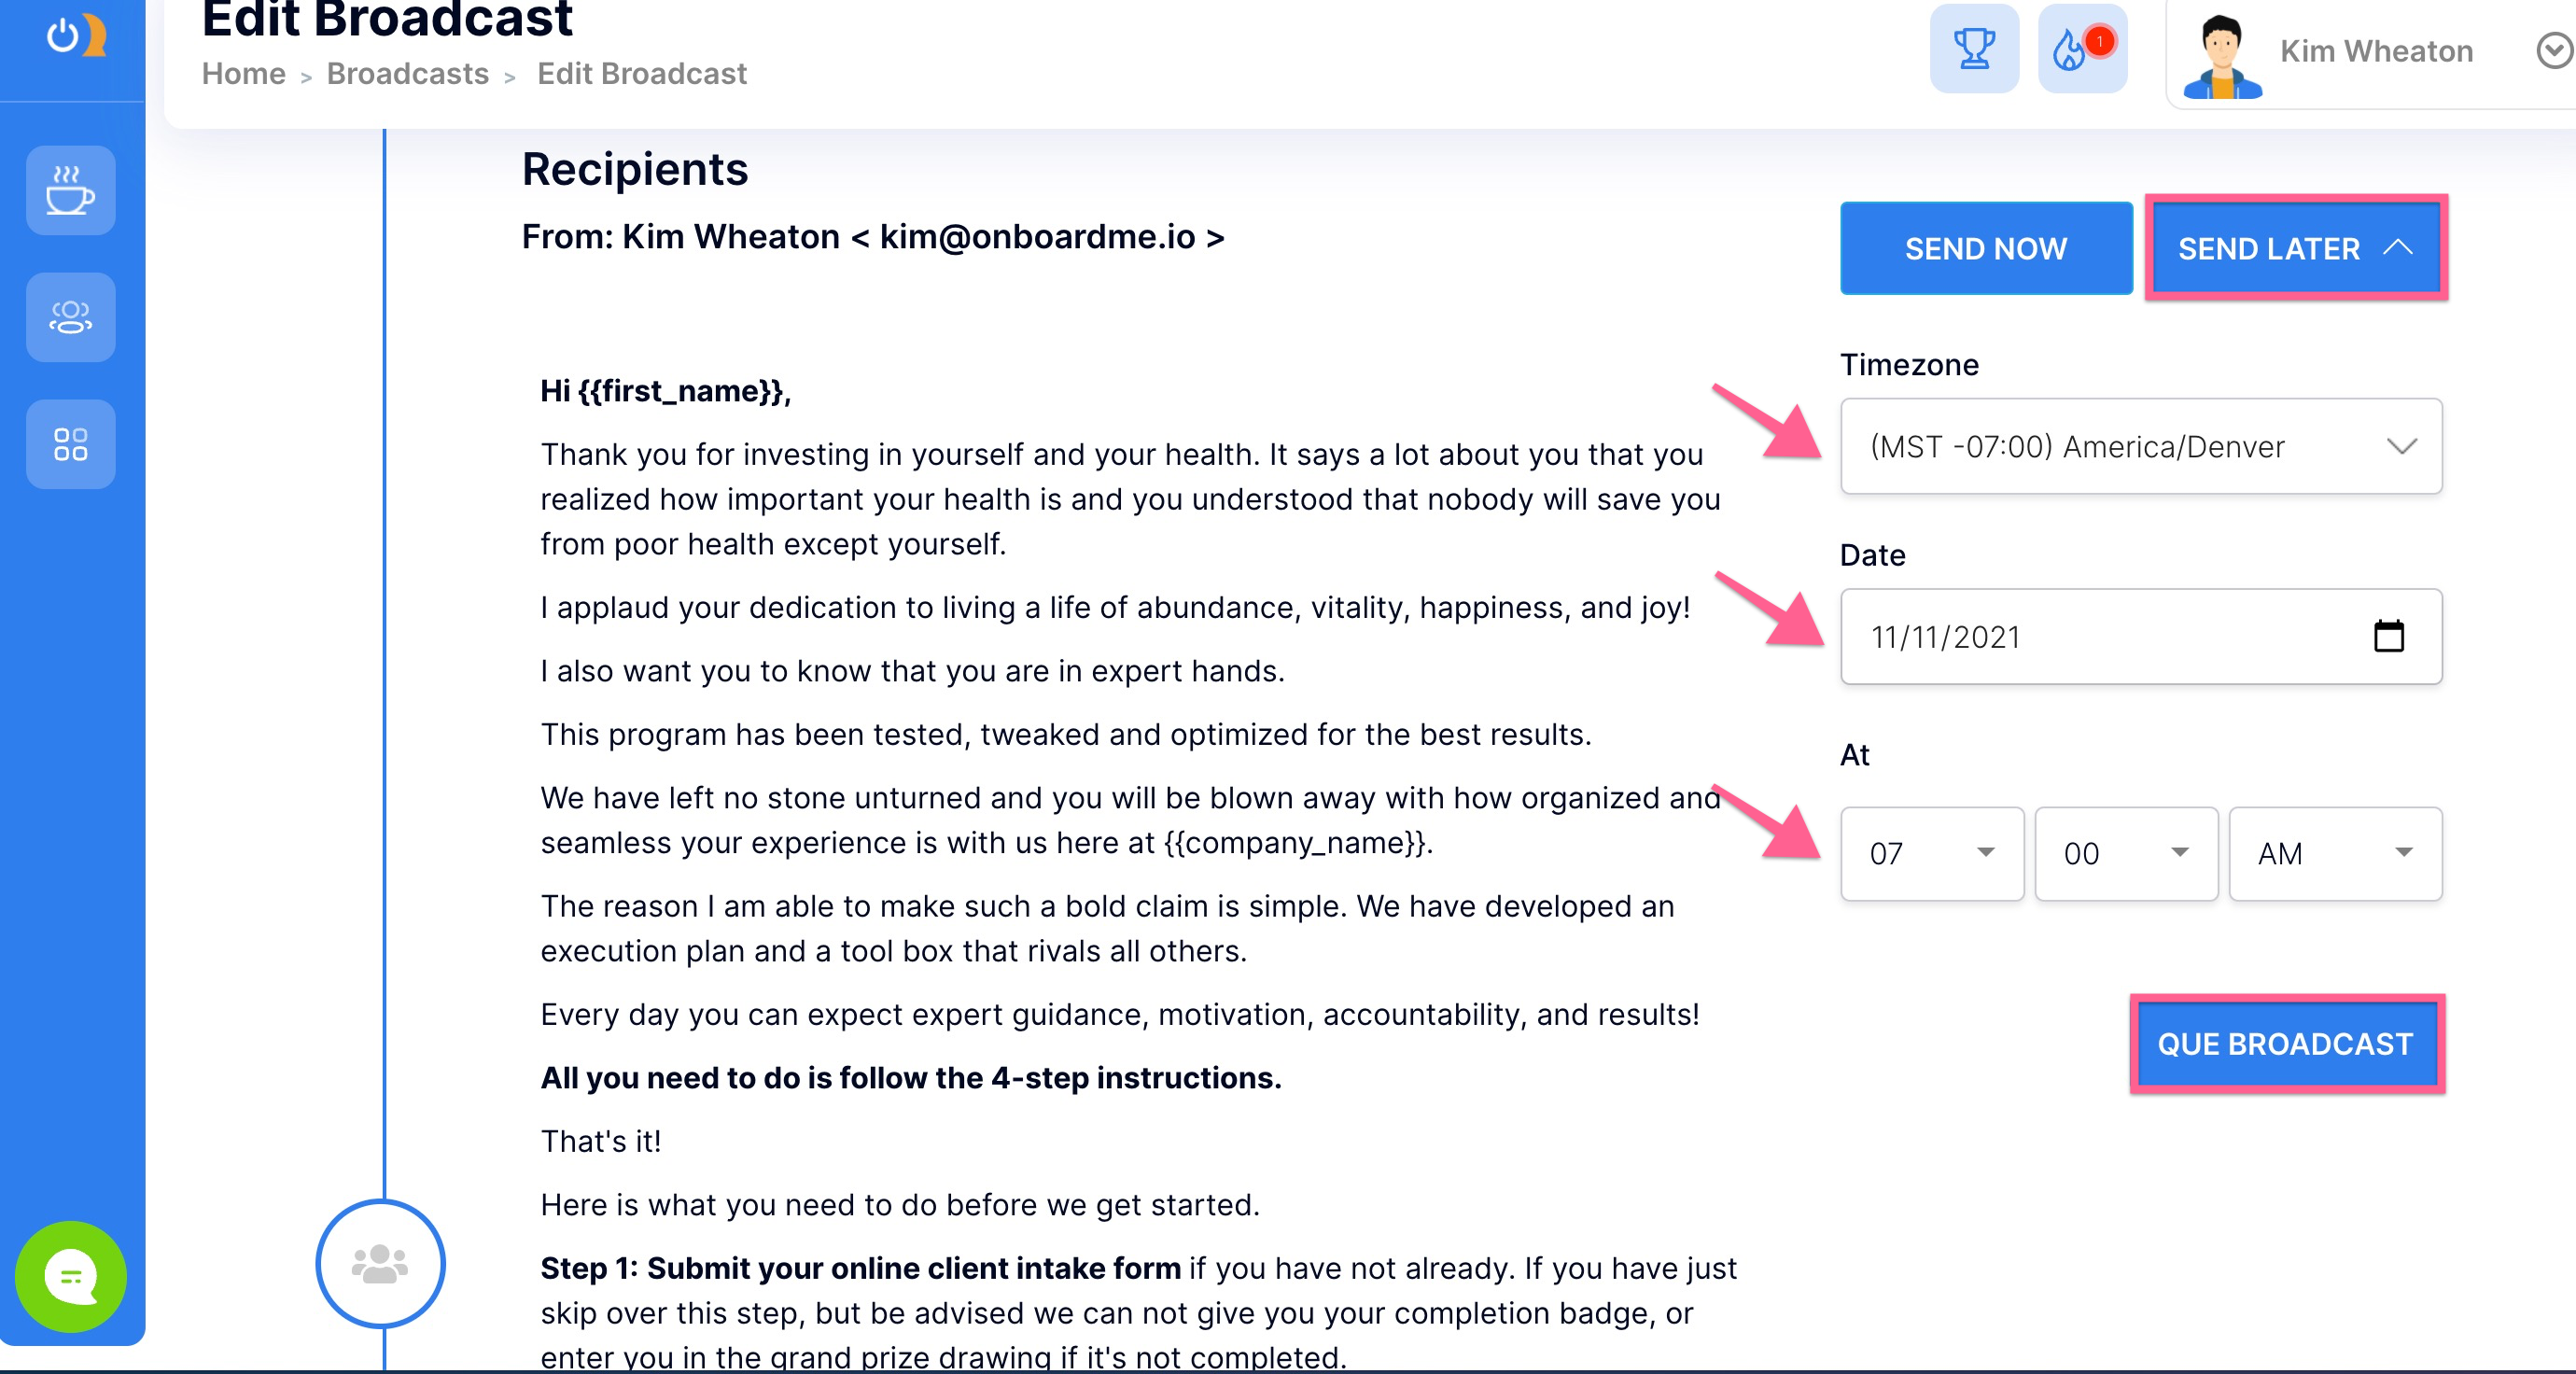
Now you can return to your broadcast page to view the qued broadcast.
View broadcast statistics:
After launching your broadcast email, you can access detailed statistics about its performance. For a quick summary of broadcasts sent, open rate, click rate, and unsubscribes, simply hover over the broadcast thumbnail.
To see more detailed statistics, click on the title of the broadcast. You will be able to view specific subscribers who received your email, opened it (and when), the click rate, and those who unsubscribed. Under each tab, you can click the "more" dots of any given subscriber to utilize launchpad actions from the analytics dashboard. Once your broadcast has circulated, you can send it again to those subscribers who did not open it the first time. Simply click the button to the right of your dashboard to do so.