


What Are Journeys?
Journeys are, simply put, conditional workflows.
They have a trigger and an action. A well-designed journey has the ability to streamline repetitive processes and create more freedom in your life.
This is probably the most feared yet most powerful feature in Onboard Me because a properly constructed journey can literally change the course of your business and your life.
Think of a journey as an automatic smart weapon that can deliver the right munitions at the right time, facilitating the goals of whoever created it.
Quick Training Links
- What does a sample journey look like?
- How Does The Journey Play Out In Real Life?
- Common Use Cases For Journeys
- Your Journeys Dashboard
- Dashboard Functions
- Creating Your First Journey
- Set Your Journey Trigger(s)
- Set Your Journey Actions
- Save Your Journey!
- Preview Your Journey
- Triggering Your journey
- Automating A Journey Via Fit Funnels (advanced)
- Commonly Asked Questions
What Does A Sample Journey Look Like?
Imagine an extremely talented personal trainer who has a website, phone, and great fitness program.
This trainer gets website visitors who are interested in pursuing training. Their next steps might include calling the trainer's number and waiting for an answer or leaving a message, sending an email via the "contact us" page on the trainer's website, or hunting down the trainer on social media to send a private message.
How long will it take for this talented fit pro to get burned out chasing leads, coordinating a training schedule through email (and all the methods still used by the bulk of professionals out there)? How long before warm leads turn cold due to communication lags and lost momentum?
Not long.
Now, let's bring journeys into the picture.
A visitor hits the trainer's website, clicks an interest button, a form pops up asking helpful questions and offering a consult/free training session.
The headline reads: "What number should we text your pass to?"
The visitor enters his/her name, email, and phone number into the form and clicks "Text My Pass!"
What happens next is really cool:
Through something called a webhook, the website form communicates with Onboard Me and adds the contact's information under the Leads tab of the trainer's Contacts dashboard.
Onboard Me also adds a pre-created tag to the contact's profile. Tag name: New VIP Lead.
You see, weeks ago, this talented fit pro took 20 minutes to create something called a Journey.
The trigger to this journey was a tag with the name: New VIP Lead
Now, let's look at what will happen while the trainer is asleep, working out, watching TV, or learning new techniques based on the journeys actions:
How Does The Journey Play Out In Real Life?
Immediately, trainer Kim receives a text message:
You have a new VIP website lead, Kim!
Jack Jackson
814-555-1212
jack@jackjonson.com
5-minutes later, prospect Jack gets a text message from you:
Hi Jack!
Thanks for your interest in our VIP Pass.
Let's hop on a quick call and discuss your goals.
Book a time with me here:
Link to the scheduler
10 minutes later Jack is entered into a 10-day text message and email campaign to get him to book his call.
The campaign (sequence) showcases Kim's amazing success stories with her clients, helping overcome Jack's potential objections to training.
In the P.S. of each email, there is a reminder to book the discovery call.
2 days later, Kim's assistant, PJ, gets a text from Onboard Me:
PJ,
Jack Jackson has been in the VIP Pass pipeline for 2 days and hasn't booked a call.
Please reach out to see if he needs help scheduling.
814-555-1212
This continues for 10 days...
After 10 days, if Jack has not booked a discovery call, Onboard Me will move his name to the Lost tab and simultaneously add him to the weekly newsletter list in the software.
If Jack Jackson books a call, all follow-up messaging will stop and his name will be moved into a NEW journey that prepares him for/reminds him of his upcoming appointment.
As you can see, this fitness professional will have an absolutely booked consultation schedule, having exerted no extra effort except the 20 minutes it took to create his time-saving journey.
Common Use Cases For Journeys:
- New lead follow-up system
- Discovery call or tour pre
- Pre-selling process
- New client onboarding
- Running fitness challenges
- Running product launches
- Ascending customers
- Getting testimonials and reviews
- Selling courses (playbooks)
Your Journeys Dashboard
On your dashboard, you will see a few icons and a create button. Each journey's placeholder (thumbnail) will be displayed with quick action buttons. Here is what your journeys dashboard should look like, with icons and buttons labeled for easy navigation.
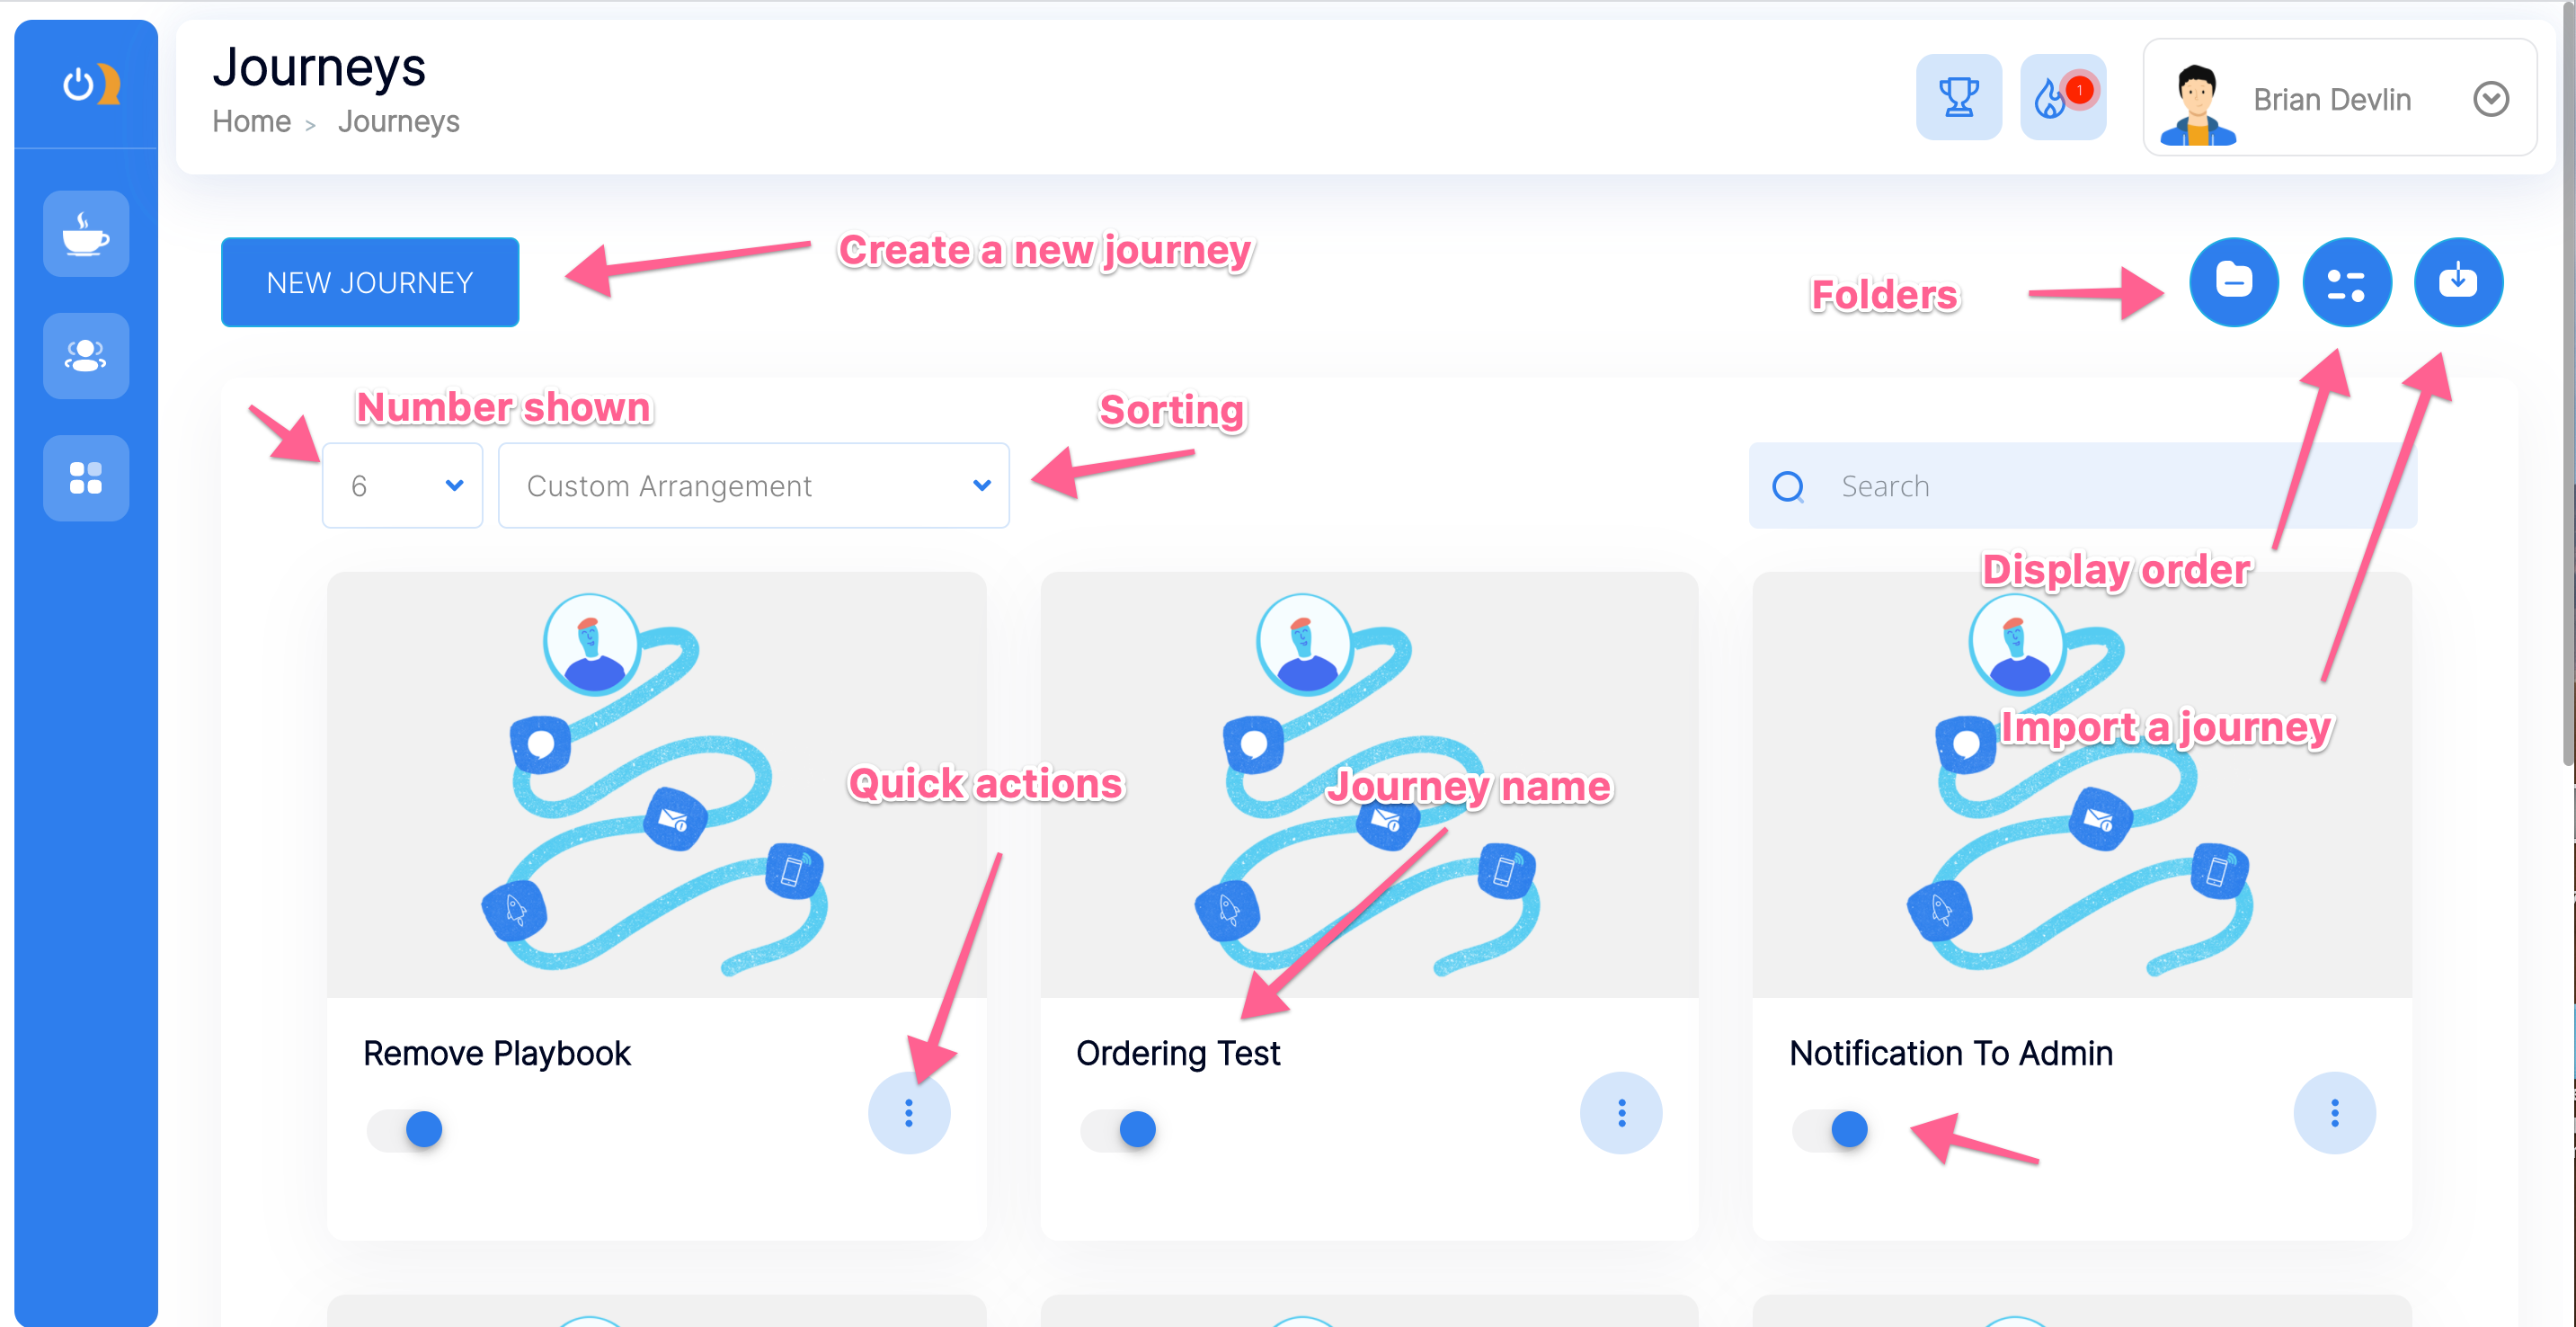
Dashboard Functions
Importing a journey
Importing a journey is as easy as logging into your Onboard Me account. While logged in, simply "click" any link that has been shared with you.
You can also use the import feature shown below:
Sorting your journey thumbnails
If you are like most of our Onboard Me users you love an organized dashboard. We make it simple to sort your journeys on your main dashboard. Simply click the sorting icon, arrange the titles according to how you would like to see them on the page, and save your sorting.
Creating folders
Want to take organizing to a whole new level? You can create broader categories to represent a group of journeys. Simply create a folder, name it, and then select the journeys that should belong to it.
Let's say you have 12 different lead follow-up journeys and you want them all in one folder. Just create a Lead Follow-ups folder and move those journeys into it for easy retrieval later on.
Disabling your journey
Want to stop your journey from delivering to new contacts? Just slide the toggle on your journey thumbnail to the OFF position.
Quick journey options
To allow for certain journey actions without using the editor, you can select the MORE menu by clicking the three dots located on your page thumbnail.
Here are the actions you can take with the quick journey options:
- Edit your journey
- Preview your journey
- Share your journey to another Onboard Me user
- Move your journey to an existing folder
- Share your journey to one of your other locations
- Duplicate your journey
- And delete your journey (sad moment)

Updating your journey thumbnail image
When you create a new journey we give you a beautiful default image you can keep or you can add your own custom thumbnail image.
We even give you the Canva templates. If you would rather look around, Onboard Me provides a free image library where you can search for fitting thumbnail images.
Creating Your First Journey
Creating your journey is simple! Just click the New Journey button on your dashboard, give it a name, set a trigger, and choose your actions.
First: Click the New Journey button on your journeys dashboard
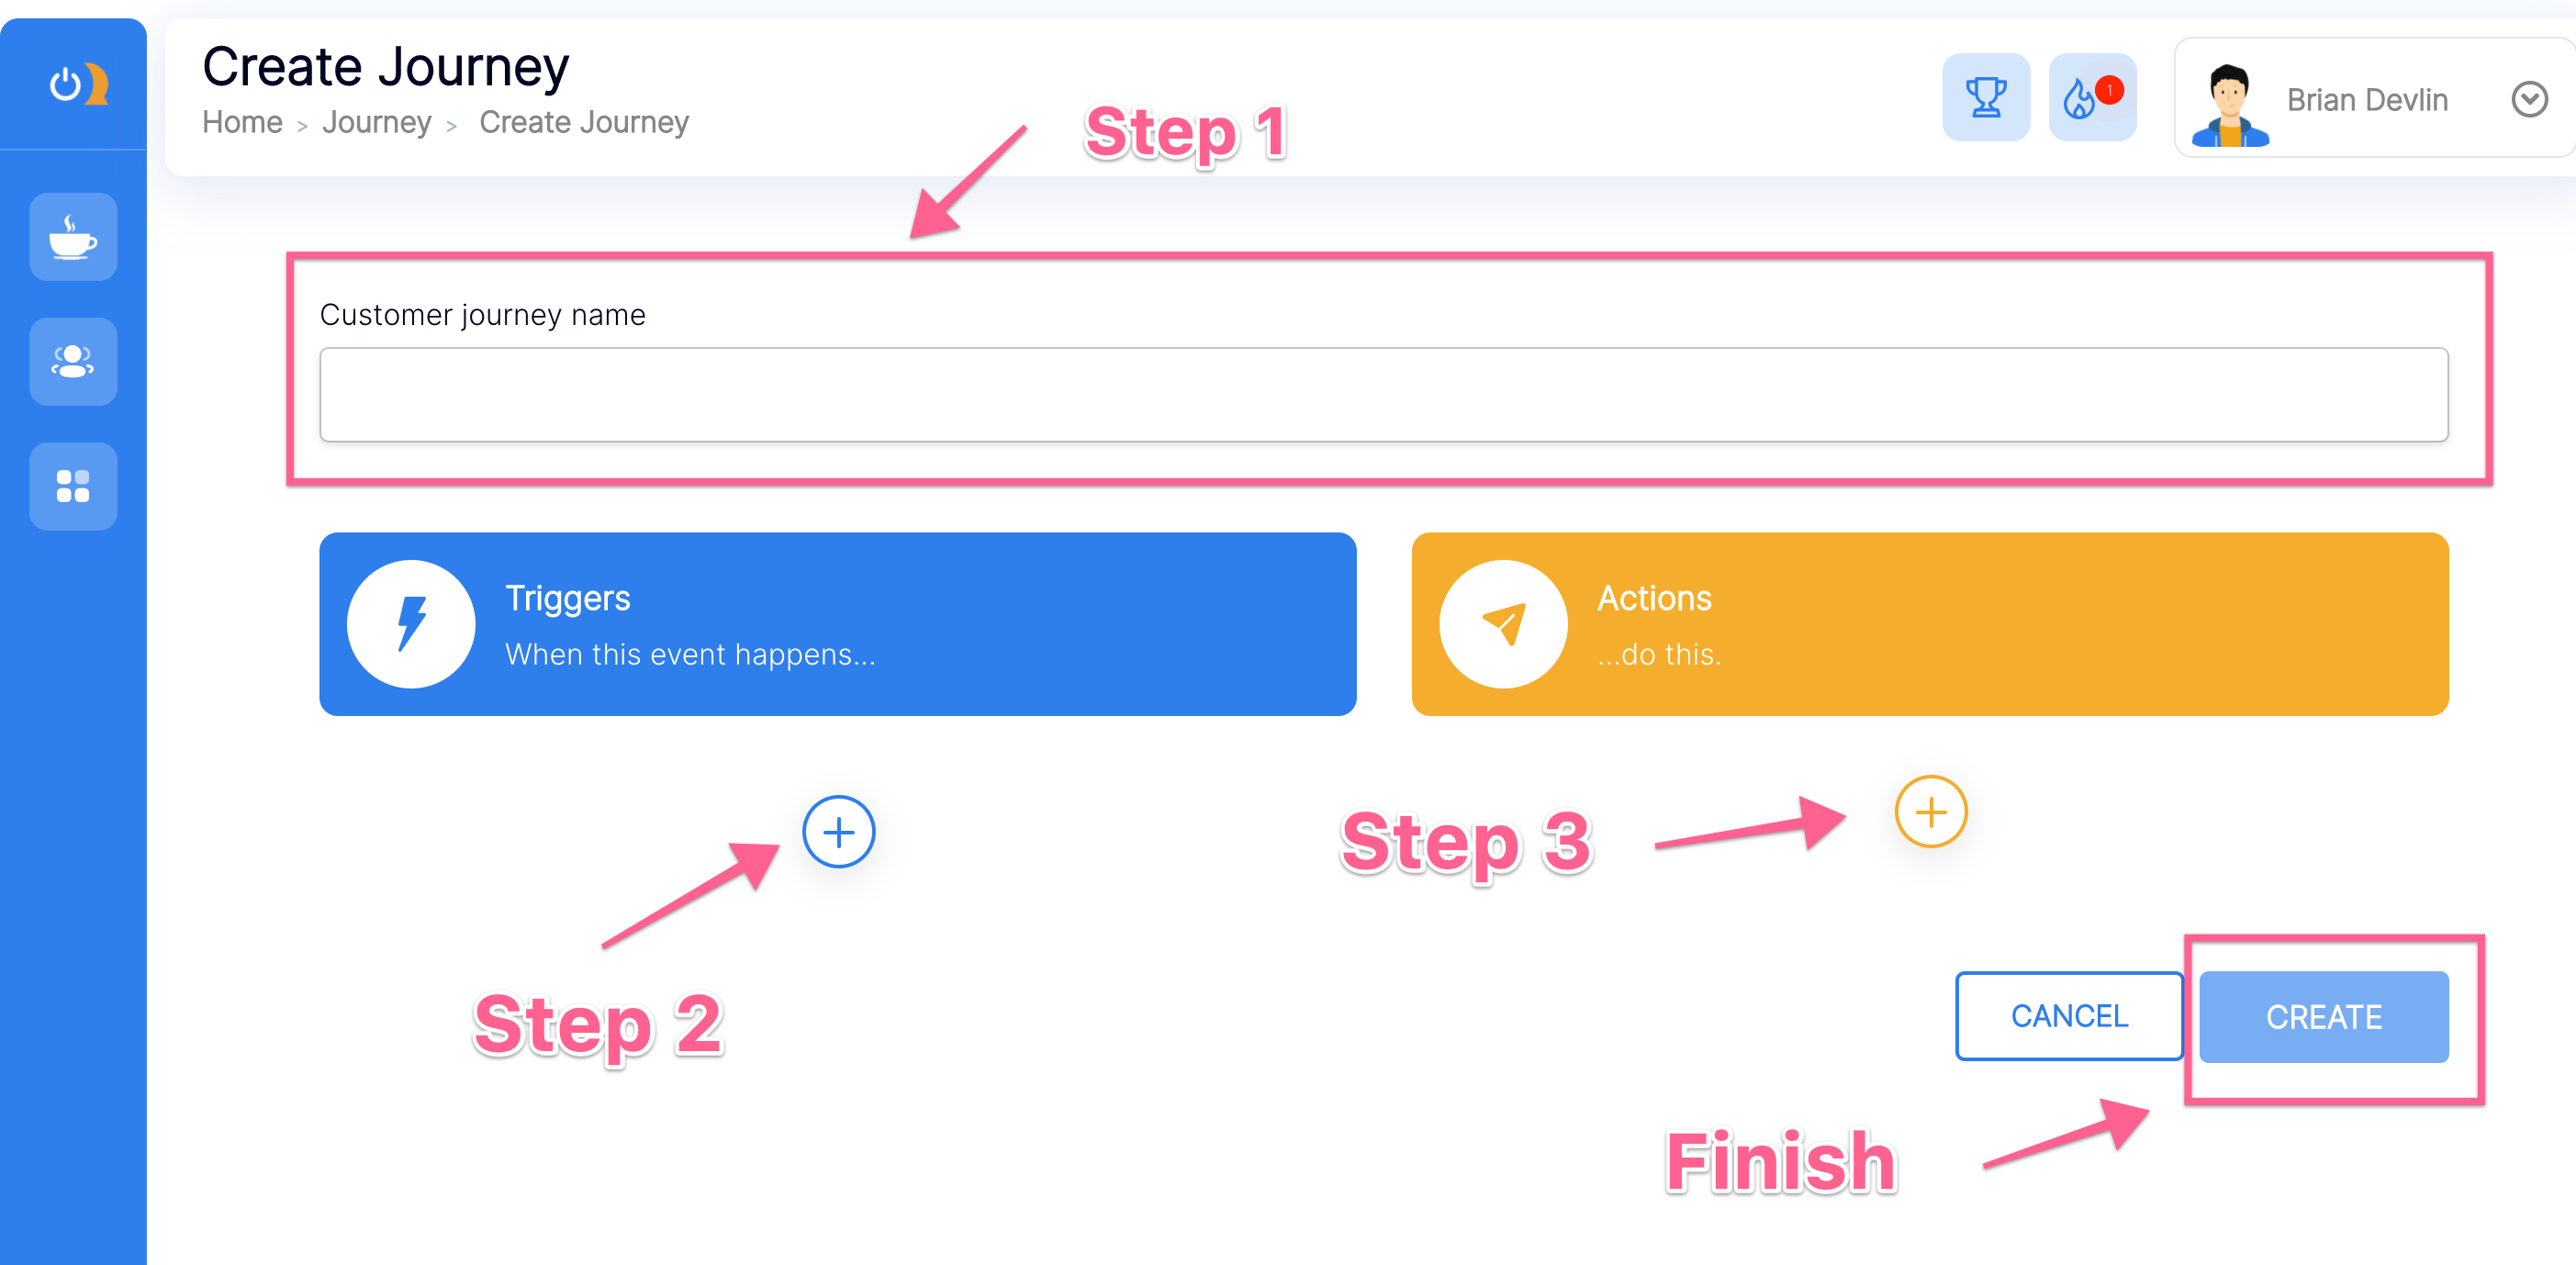
Journey name
Choose a name that relates to the trigger. Example If the trigger to your 21-day keto challenge will be adding the tag 21 Day Keto Challenge, name your journey 21 Day Keto Challenge.
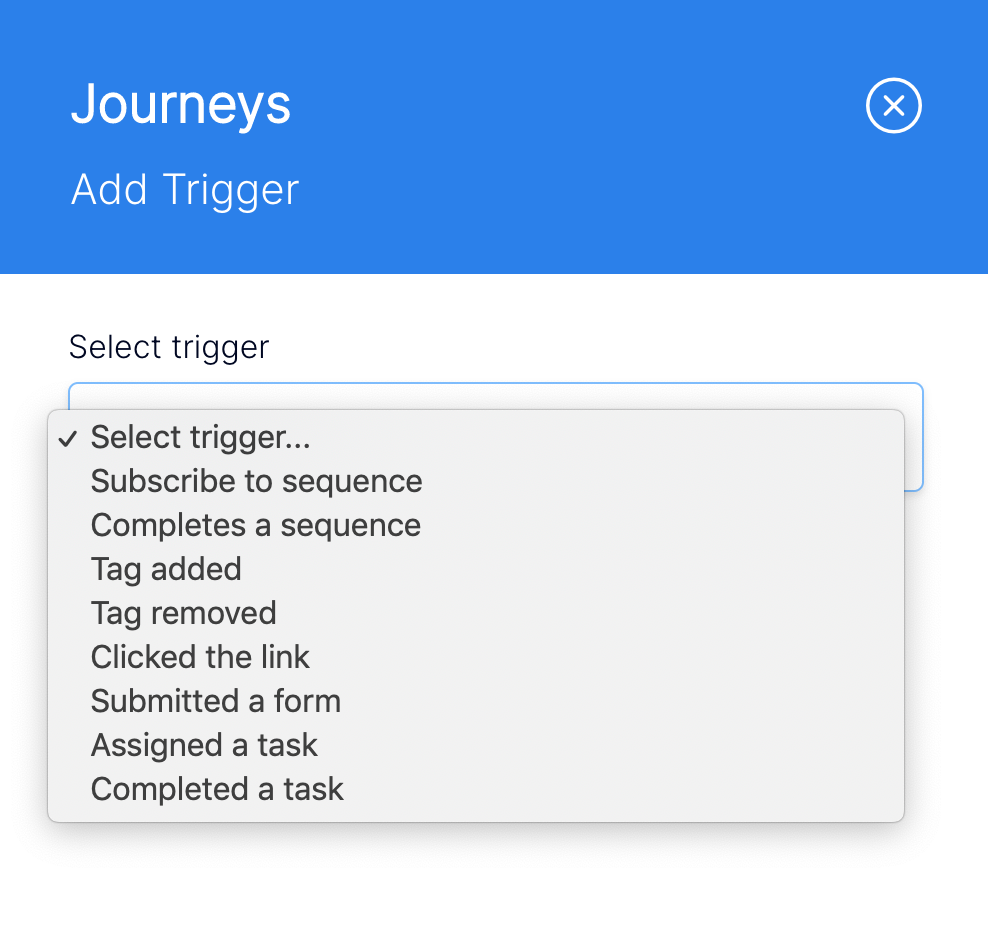
Set Your Journey Trigger(s)
A journey is like a smart gun. It fires just the right ammo at just the right time. All guns need a trigger pulled to fire. Decide which trigger suits you best.
Our most common and popular triggers are:
- Tag Added (added manually or via a webhook or previous journey)
- Form Submitted (when your contact submits one of your forms)
Our more advanced and less commonly used triggers are:
- Tag Removed (Removed manually or via a webhook or previous journey)
- Sequence Started (When your contact is assigned a sequence)
- Sequence Completed (When a contact receives the last message in a sequence)
- Task Completed (When a contact marks a task as completed)
- Task Assigned (When you assign a task to a contact manually or through a journey)
- Link Click (when a contact clicks a pre-set link in an Onboard Me email)
- Submitted a progress report (Useful if you want to create some sort of automated follow-up or education actions)
Here are your available triggers:
You can add multiple triggers to any journey but we recommend starting with Tag Added or Form Submitted to get your feet wet.
Set Your Journey Actions
Once you have selected your triggers you will need to choose your ammunition (actions). We highly recommend your journeys be limited to 5 actions or fewer, until you get a feel for the power of this tool.
You can always bolt on more actions to your journey in the future, but in the learning phase, less is more.
Think about what you might currently be doing in your business manually (or paying an assistant to do). Could this be delegated to an automated journey?
Example:
Say you want to create a new client onboarding journey for a personal training client.
Your desired actions might be:
- Send the client a welcome letter with "getting started" instructions
- Give the client a liability waiver and obtain a signature
- Have the client complete a health history form and goal setting worksheet
- Book the client's kick-off session
- Give the client access to their playbook (dripped workouts and meal plans)
Your journey action stack would then be:
- Send template - New client welcome letter
- Send form - Personal training waiver
- Send form - Health history questionnaire
- Send page - Kick-off call booking page
- Assign playbook - Month 1 Personal Training
Then you would simply add the appropriate delays for each step, update your delivery messages, and add any conditions that you want Onboard Me to follow.
So this one journey would replace 5 repetitive tasks in your business that you might be doing one-by-one with Gmail or via a virtual assistant.
Are you starting to see how Onboard Me can free up time and save you lots of money?
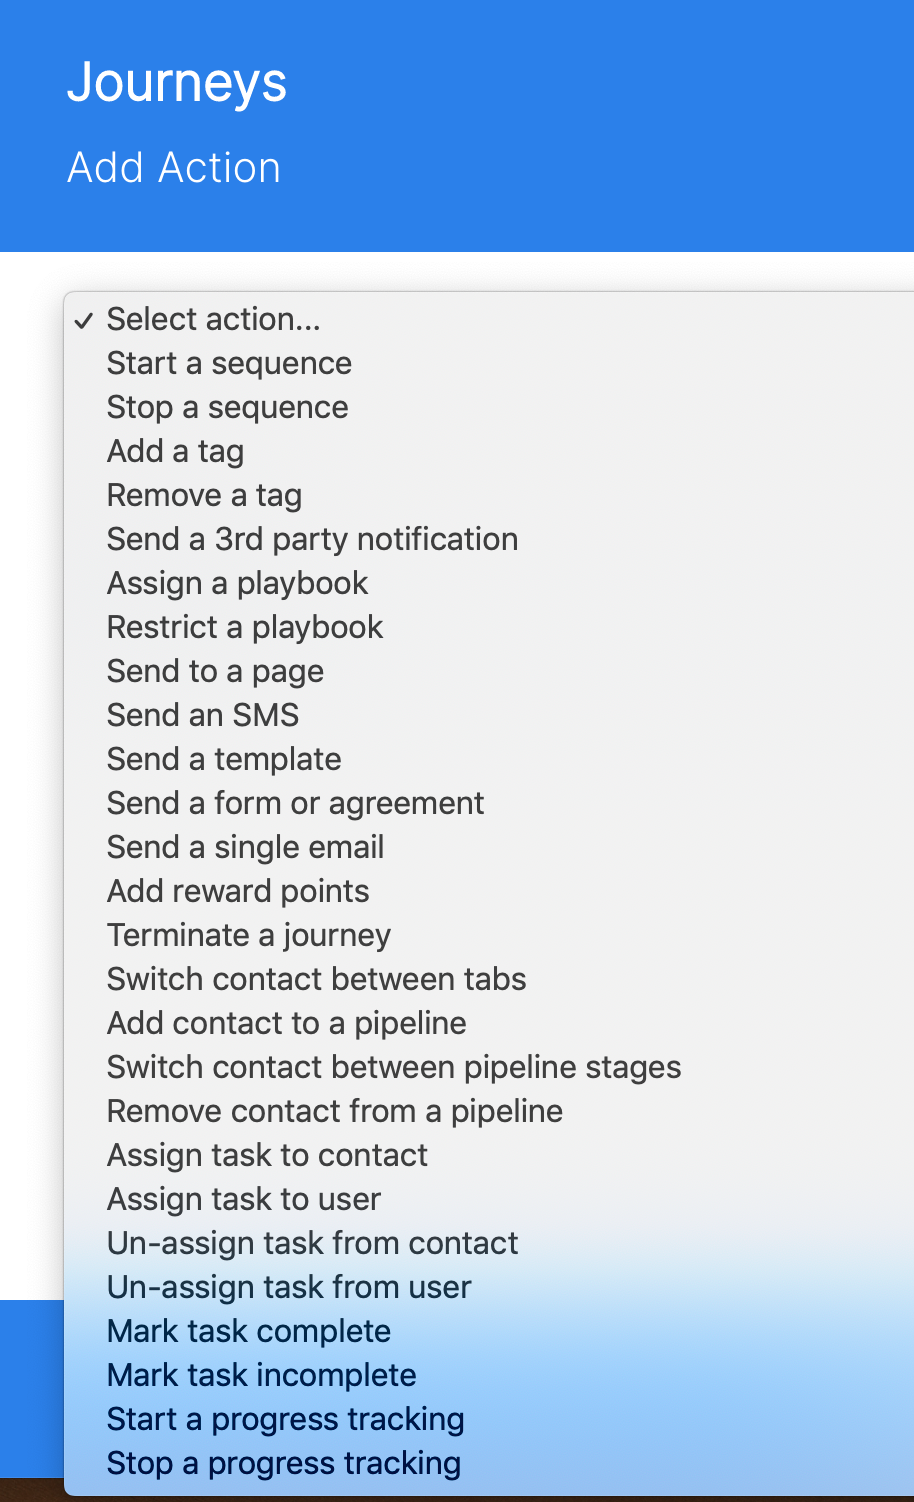
Here are your available journey actions. We recommend starting simple and then increasing action complexity as needed.
Save Your Journey!
To finalize your journey you MUST click the Create button. Failing to do so will result in losing all your hard work so
DO NOT forget to save!
Preview Your Journey
To preview your journey after you have successfully created it on your journeys dashboard, locate your journey thumbnail and click the "more" or quick actions menu, then click select preview. You will be shown a birds-eye view of your journey, listed according to your delays.
Triggering Your journey
To trigger your journey, the trigger condition needs to be fulfilled.
Example: If your journey trigger is "Tag added," then you would need to tag the contact manually, using your contact launchpad (or bulk action menu for multiple contacts).
You can also accomplish this through an automated event, like when a lead/client signs up on a landing page, submits a form, ends a sequence, or completes an assigned task. Your automated event can be set Onboard Me or an off-app trigger tool like Zapier.
We strongly recommend starting by manually triggering your journeys or using form submissions until you are ready for more advanced methods. This will avoid overwhelm and prevent flaws in execution.
Automating A Journey Via Fit Funnels (advanced)
This is generally recommended when trying to pull leads into your sales pipelines (or into "step one" of a sales consultation process).
Creating a connection between a Fit Funnels landing page and Onboard Me journeys: Fit Funnels is our funnel-builder sister app. As an Onboard Me Pro member, you have full access to this.
Prerequisites: To make this happen here is what you need in advance:
1. A finished landing page with an opt-in form or a lightbox
2. A journey that is completed and published (follow the direction on this page)
3. A pre-established trigger tag in your tags menu (reference the tag added selection above)
Step 1) Create your webhook, save and copy to clipboard
Step 2) Add your webhook to Fit Funnels (on the page form or lightbox settings)
Step 3) Adjust your name attributes
Step 4) Save your settings
Step 5) Test your opt-in and tagging with a dummy contact
Step 6) Enable your journey.
You should now be set up to handle 1000's of leads with no extra work or following up.
Commonly Asked Questions
1. I have made changes in my Journey. How will that affect my contacts?
The changes will reflect to future clients who will be added to the Journey, but won't affect the existing ones. You can restart the journey for your existing clients so they'd get the changes.
First, terminate the journey by going to your contacts dashboard, mark the checkbox of your selected contact, Bulk action>Journeys>Terminate Journey.
Then remove the tag by clicking Bulk action>Tag>Remove tag.
Last, reapply the trigger tag. Bulk Action>Tag>Add Tag.
2. Can I see who's in my Journey?
Yes! Go to the journey you want to check, then click on the History Log at the bottom part.