


What Are Forms?
Welcome to Forms! Forms are, simply put, data collection and analysis tools. They have a header, hero or cover section, media section, content section, and a robust questions area. You can host forms on your own domain and have your forms indexed by the search engines.

Quick Training Links
- Here are some common use cases for forms
- Your Forms Dashboard Overview
- Forms Dashboard Functions
- Creating Your First Form
- Update Your Basic Form settings
- Advanced Form Settings (Optional)
- Set Your Form Header
- Set Your Form Cover Area
- Set Your Main Form Media Or Start Video
- Add Your Form Questions
- Set Your Form Footer
- Making Quick Edits To Your Live Form
- Set Your From Sidebar Content
- Preview Your Form
- Give Contacts Access To Your Form Manually
- Give Contacts Access To Your Form Automatically
- Troubleshooting Form Issues
Here are some common use cases for forms:
- Lead quizzes
- Pre-qualification systems
- Health histories or PAR-Q's
- Liability waivers
- Membership agreements
- Sales agreements
- Customer feedback forms
- Suggestion boxes
- Team member reports
- Onboarding steps
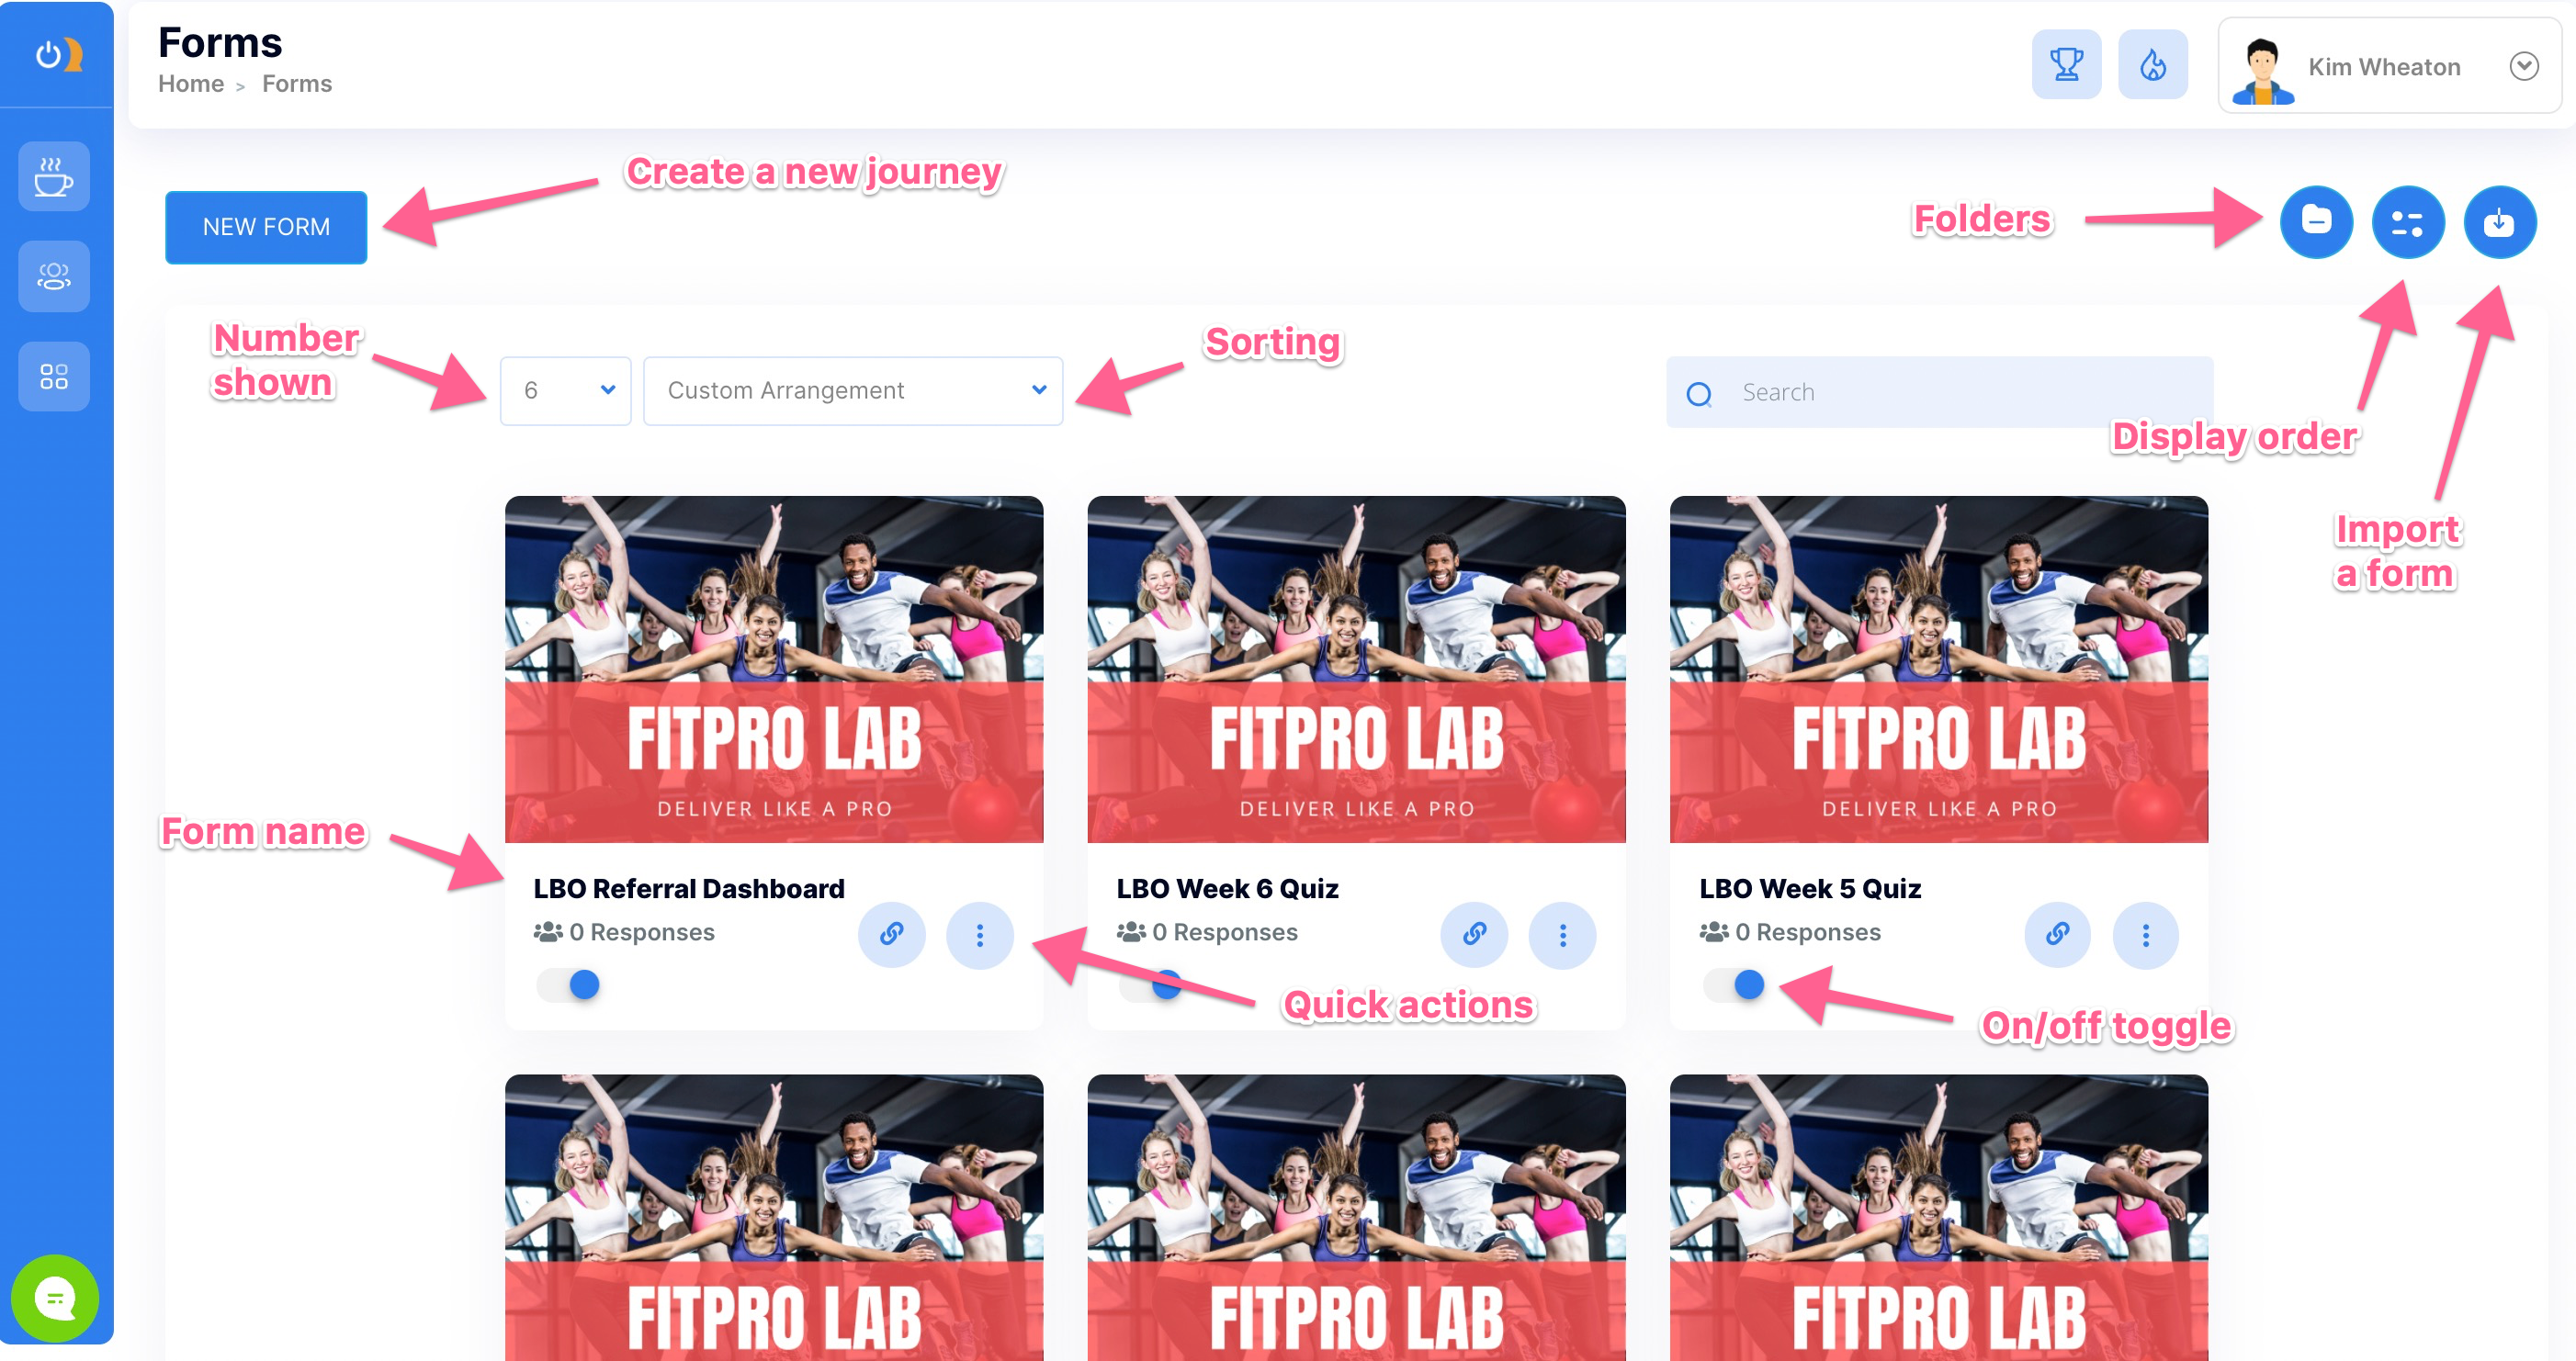
Your Forms Dashboard Overview
On your dashboard, you will see a few icons and a create button. Each form's placeholder (thumbnail) will be displayed with quick action buttons. Here is what your forms dashboard should look like, with icons and buttons labeled for easy navigation.
Forms Dashboard Functions
Importing a form
Importing a form is as easy as logging into your Onboard Me account. While logged in, simply click any link that has been shared with you.
You can also use the import feature shown below:
Sorting your thumbnails
If you are like most of our Onboard Me users, you love an organized dashboard. We make it simple to sort how your forms show up on your main dashboard. Simply click the sorting icon, arrange the titles as you would like them to be shown on the page, and save your sorting.
Creating folders for your forms
Want to take forms organization to a whole new level? You can create broader categories to represent a group of forms. Simply create a folder, name it, then select the forms that should belong to it.
For instance, let's say you have 6 different sales agreements for your 6 programs and you wanted them all in one folder. Just create a "Sales Agreements" folder and move those forms into it for easy retrieval.
Disabling your form
Want to remove your form from the inter-webs? Just slide the toggle on your form thumbnail to the OFF position and choose a "sorry" screen or a custom redirect to a URL of choice. COMING SOON!
Quick form options
To allow for certain form actions without entering the editor, you can select the MORE menu by clicking the three dots located on your form thumbnail.
A look at what you can do with these quick options:
- Edit your form
- Get a live link to your published form
- Preview your form
- Share your form with another Onboard Me user
- Move your form to an existing folder
- Add your form to one of your other business locations
- Duplicate your form
- Edit your form delivery messages
- Delete your form (sad moment)
Updating your form thumbnail image:
When you create a new page we give you a beautiful default image you can either keep or replace/customize. We even give you Canva templates. If you would rather search for an image, Onboard Me provides a free library where you can look around before selecting the best option for your thumbnail.
Creating Your First Form
Creating your form is simple! Just click the New Form button on your dashboard, give it a name, and decide if you want to use your saved styling or just go with the default until you can update later.
Form name and styling
Choose a name that will be easy to categorize later. Example: 6 Week Challenge Waiver. It could be added to a Waivers folder.
In your admin settings > content > saved styling you can pre-create your preferred content like colors, images, links, etc. Watch this tutorial to see how to set this styling up first: HERE. For now, we will leave that setting OFF and use the default blue, updating as we go.
Update Your Basic Form settings
In the top right corner of your form editor, you will see a gear icon. This is where you will find and adjust your form's deeper settings. You will see that your form settings are organized by sections called accordions. Simply click to open the accordion and adjust the settings. Make sure you hit SAVE when finished.
Form settings
Here you will choose the way your questions are displayed to a visitor.
- Long-form is ideal for longer formats like health questionnaires or agreements.
- Multi-step is ideal for intake processes and opt-ins
Opt-in settings
Opt-in settings are extremely robust. Here is a list of what you can currently configure in your forms opt-in settings (new options and advanced templates coming soon):
*Leave this toggle in the OFF position for anonymous forms
- The option to add an explainer or call-to-action video to your opt-in area
- The option to customize the opt-in area headline
- The option to switch the opt-in to Member ID only
- The option to select which opt-in fields will be shown on a form
- The option to store the form submission in the contact's profile
- The option to email a copy of the form to a contact who submits the form
- The option to require an e-signature with date/time stamp and IP record to submit the form
- The option to add tag(s) to the contacts who submit the form
- The option to issue reward points to the contacts who submit the form

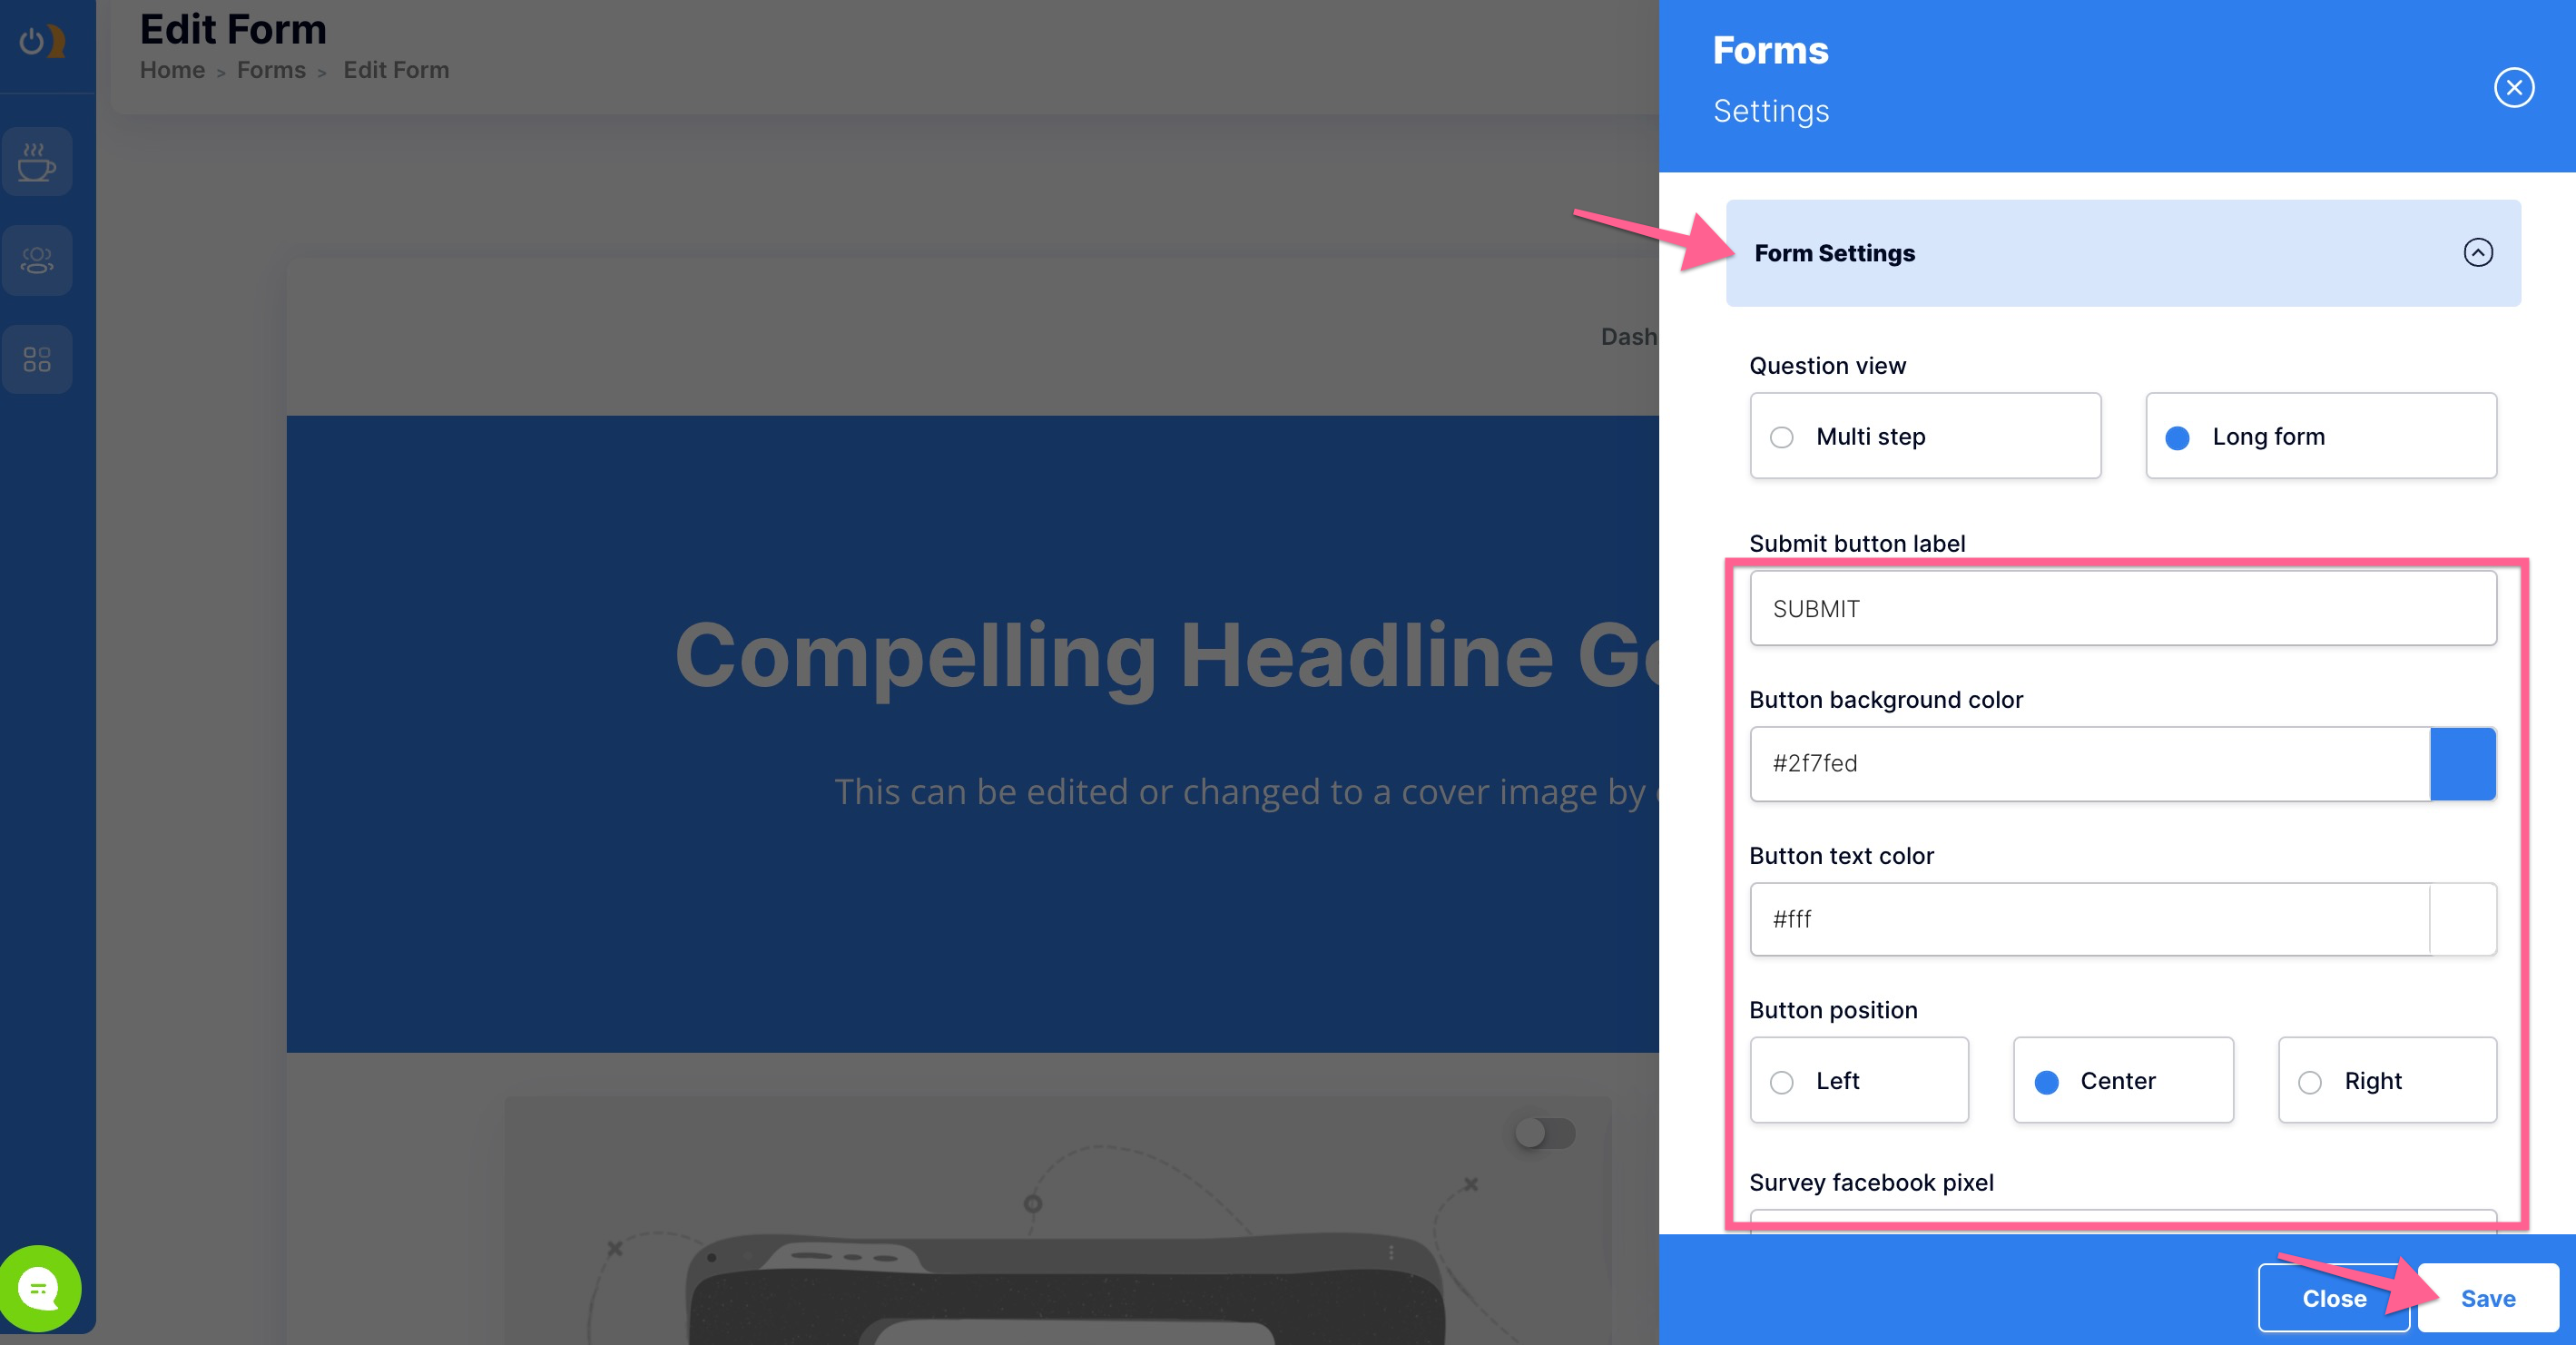
Submit button settings
Here you can:
Update the colors and text of your forms submit button and match the look and feel to your brand
Thank you page settings
You have 3 options when it comes to "what happens next" when a contact submits the completed form.
- Custom Redirect: This means you can redirect the respondent to any URL on the internet.
- Default thank you page: This is a pre-formatted page with a simple thank you message you can edit.
- Custom thank you page: This allows you to customize the look, feel, and content of your thank you page including adding images, videos, and call-to-action buttons.
When to use each type:
Redirect: A great way to use a redirect is prior to a sale. Let's say you launch an early bird or pre-sale special. You email your list and link to this type of form. The form is a simple name, email, and phone opt-in that redirects the user to your OM checkout page upon submission. This way, if they abandon the checkout, you can follow up manually or automatically using a journey.
Default thank you page: This would be used when you are just gathering useful information. An example of the best time to use a default thank you page is when a contact fills out a survey or poll.
Custom thank you page: This would be used when submitting the form as part of a multi-step process you wish to automate. A great example would be a prequalification form for a 28-day kickstart. Upon submission, the contact is sent to a custom TY page with a video (explaining that there is limited space, so "click the button to schedule your discovery call" before the spot is officially reserved).
Notifications settings
You have the option to get notified every time someone submits your form. You direct the notification to any email or phone number (as a text), or to both. This third option is great if you have a virtual assistant or admin doing any follow-ups with respondents.
Three notification types:
- Send anyone an email
- Send anyone a text
- Send both.
You can also customize your notification message content for each form.

Advanced Form Settings (Optional)
Tracking settings
Occasionally you may wish to track visitors to your form, and who hits your thank you page in order to create custom audiences for advertising. You can paste the tracking code into your form settings and your thank you page settings.
An example use case: running Facebook ads to a newsletter sign-up form. Each contact that hits the sign-up form would be pixeled (tracked with a cookie).
You could then build a custom audience made up of all contacts who hit the sign-up form but did not hit the thank you page. These would be your "failed opt-ins."
Next, you would set up a retargeting campaign in your Facebook ads manager, letting your custom audience know they forgot to complete the process (and if they take immediate action now, they will get your amazing Keto Recipe Playbook, etc.).
You can learn more about retargeting from courses in Facebook advertising.

Seo settings
In the SEO area, you can update your page title tags, add keywords, and meta descriptions that search engines, like Google or Bing, can use to index your pages for better rank on inbound searches. Conversely, you can also turn off your search engine visibility if you don't want your page to be found by searches.
Social settings
Sharing a link to your page on social media is a fantastic way to get exposure to your business or brand. In these settings, you can upload a custom image and headline that will show up if you post a link to your page on a social media platform like Facebook, Instagram, or Twitter.
The recommended size for a social share image is 1200 x 630 and sites like Canva have many pre-made templates you can use to easily design a shareable image.
Favicon
A favicon is a tiny image, present on the browser tab of any open web page. It helps visitors see which tab they are in by the image or logo associated with your business. Favicons can be updated here. The recommended image size for the favicon is 64 x 64 pixels.
Set Your Form Header
Your form header is an optional bar that contains your company name, author image, and your logo. You can toggle it on or off for visibility. Any change made will be updated in real-time on the live form.
Header visibility and images
Using the toggle at the top right you can decide if you want visitors to see your logo, company name, and author image or not. With an easy "click to edit" design, adding and removing header imagery is a breeze.
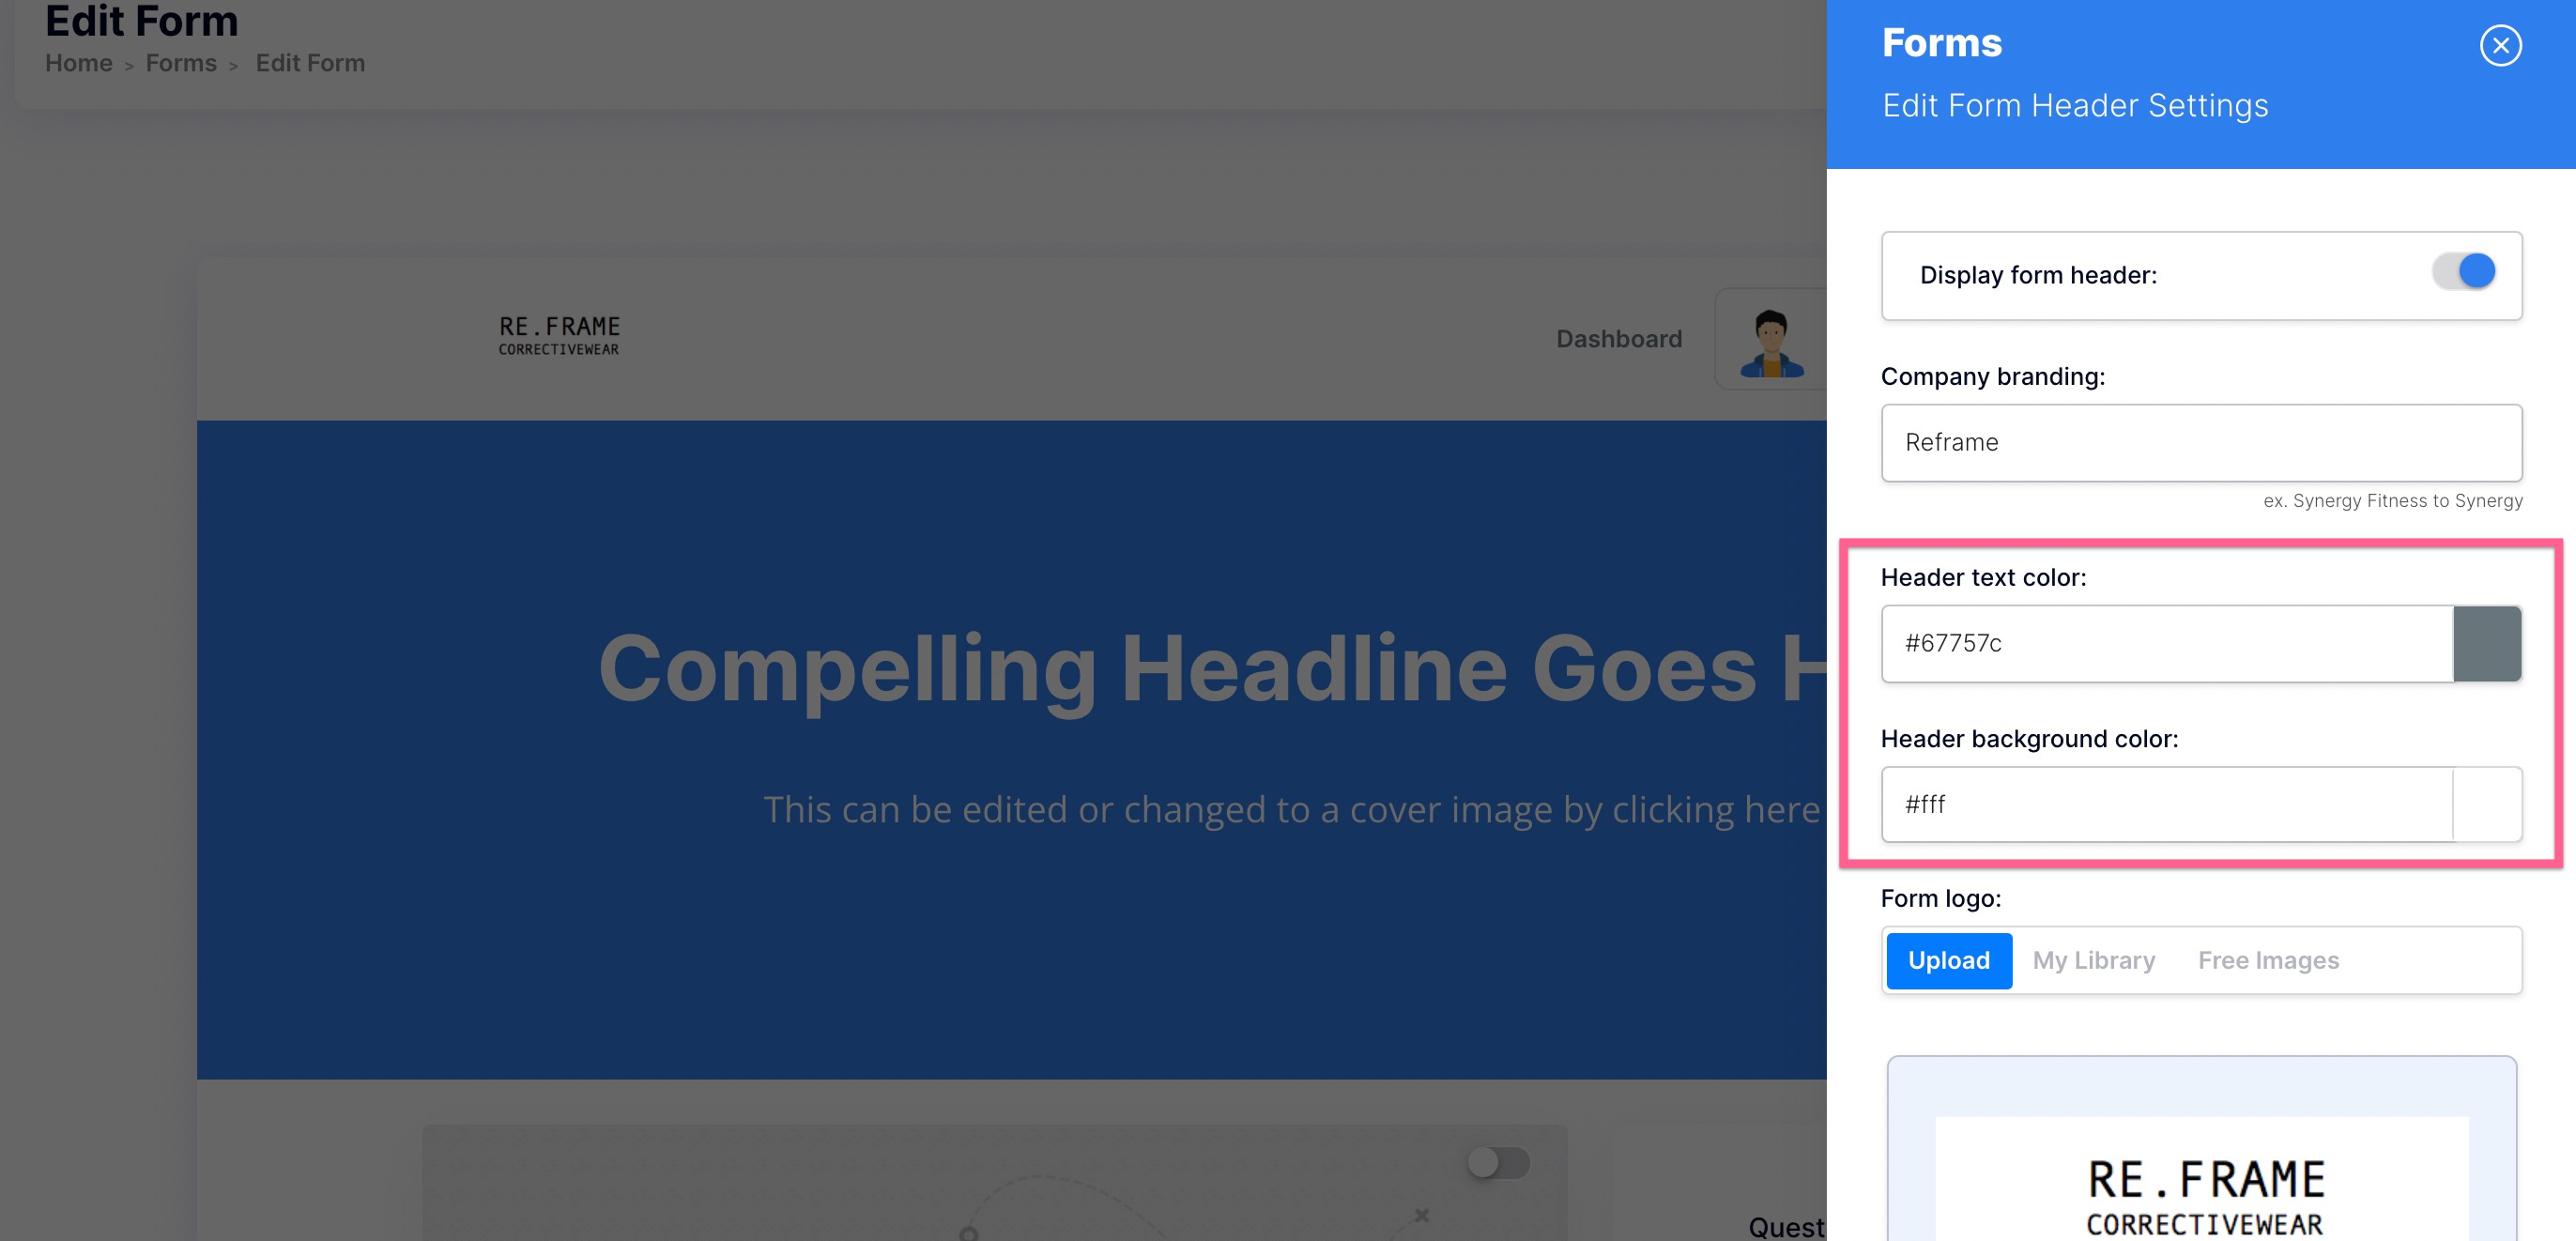
Header styling
This setting allows you to choose your bar color, company name, text color, logo, and author image
Set Your Form Cover Area
Your cover, otherwise known as the hero area, is where you can create a beautifully branded experience. Using a custom image with overlay, custom background color, headline/sub-headline, your visitor can get an idea about what to expect at quick glance.
Cover visibility
Using the toggle at the top right you can decide if you want visitors to see your cover, headline and sub-headline or custom cover image.
Cover styling and images
This styling setting allows you to choose your cover color, add a headline and sub-headline. Upload your own image, choose from your saved library, or just search for a free image using our library
Set Your Main Form Media Or Start Video
Your media area allows you to quickly link to (or embed) a video/image that will function as a start screen. Example: A video explaining the application process for becoming a client before filling out the discovery form.
Media visibility
Using the toggle at the top right you can decide if you want visitors to see your focal media or not.
Media type
You can embed a video in the media area using embed code or a link. Supported types are Wistia, Loom, Vimeo, YouTube, and Screencast-o-Matic.

Add Your Form Questions
You have the option to add a huge selection of question types to your forms. Display your questions as long-form or multi-step, and determine if all questions must be answered (or initials must be provided) upon submitting. You can also add subtext or explainer text to each question.
Here are the 7 main question types available to you in the classic forms editor.
- Multiple choice (one answer)
- Multiple choice (multiple answers
- Comment or essay box
- True / False
- Short answer
- Upload
- Agreement
Each question type has two options:
- To make answering the question required to proceed or submit the form
- To make adding initials required to proceed or submit the form.
Set Your Form Footer
Your form footer is great for displaying your company name, copyright info, privacy policy, terms/conditions, and links to your various social media pages. You can also adjust the colors to match your branding. Most users set their footers in the saved styling area in admin settings so they can easily use the same footer colors and content for every form they create.
Footer visibility and styling
Using the toggle on the top right of the footer you can easily update your footer's visibility to page visitors in real-time. This will reflect in real-time on your live published page.
Footer content
Your footer contains vital info about your company and can be used to build brand awareness and rank you higher in the search engines. Here is what you can display on your footer.
- Company name
- Facebook business page
- Instagram page
- Twitter page
- Privacy policy link
- Terms and conditions page link
Making Quick Edits To Your Live Form
Making quick edits to your published live form is easy! Just go to your form's dashboard and click the title (on your form's thumbnail).
Once in the form editor just click the area of the form you wish to change. Make the desired changes in the service panel and hit save.
Set Your From Sidebar Content
Questions completed area
This is only available when your form is set to Multi-Step question flow. It will show the form respondent which question they are on. Example: Questions Completed 5/8
You can also update the color of the progress par to match your company brand colors.

Form bio
In the book, Influence, by Robert Cialdini, he teaches about the triggers that cause people to act in predictable ways. One of these triggers is authority. Authority is when someone owns space in your mind as being a credible expert.
If your content is accompanied by your photo, a story about all the lives you have restored using ketogenic dieting and it mentions that you are an MS, CPT, RD, and LMT, you will most likely have a higher trust and credibility rating in your prospect's mind.
Creating your bio is a breeze and can be added to your saved styling in your admin settings as well.
Preview Your Form
At any time during the editing process, you can preview your saved form by navigating to the top of your form editor and sliding the preview toggle to the right.
You can preview what your form will look like to visitors on:
- Desktop
- Tablet Portrait
- Tablet Landscape
- Phone portrait
- Phone landscape
To go back to edit mode and make a quick change just slide the toggle back to the left and your back in edit mode.
Give Contacts Access To Your Form Manually
There are 4 common ways to give contacts access to a form manually:
1. Use the launchpad in your contact center:
2. Use the bulk action menu in your contact center.
3. Post the live link to your form on social media and drive traffic to the link through social media posting or live streams.
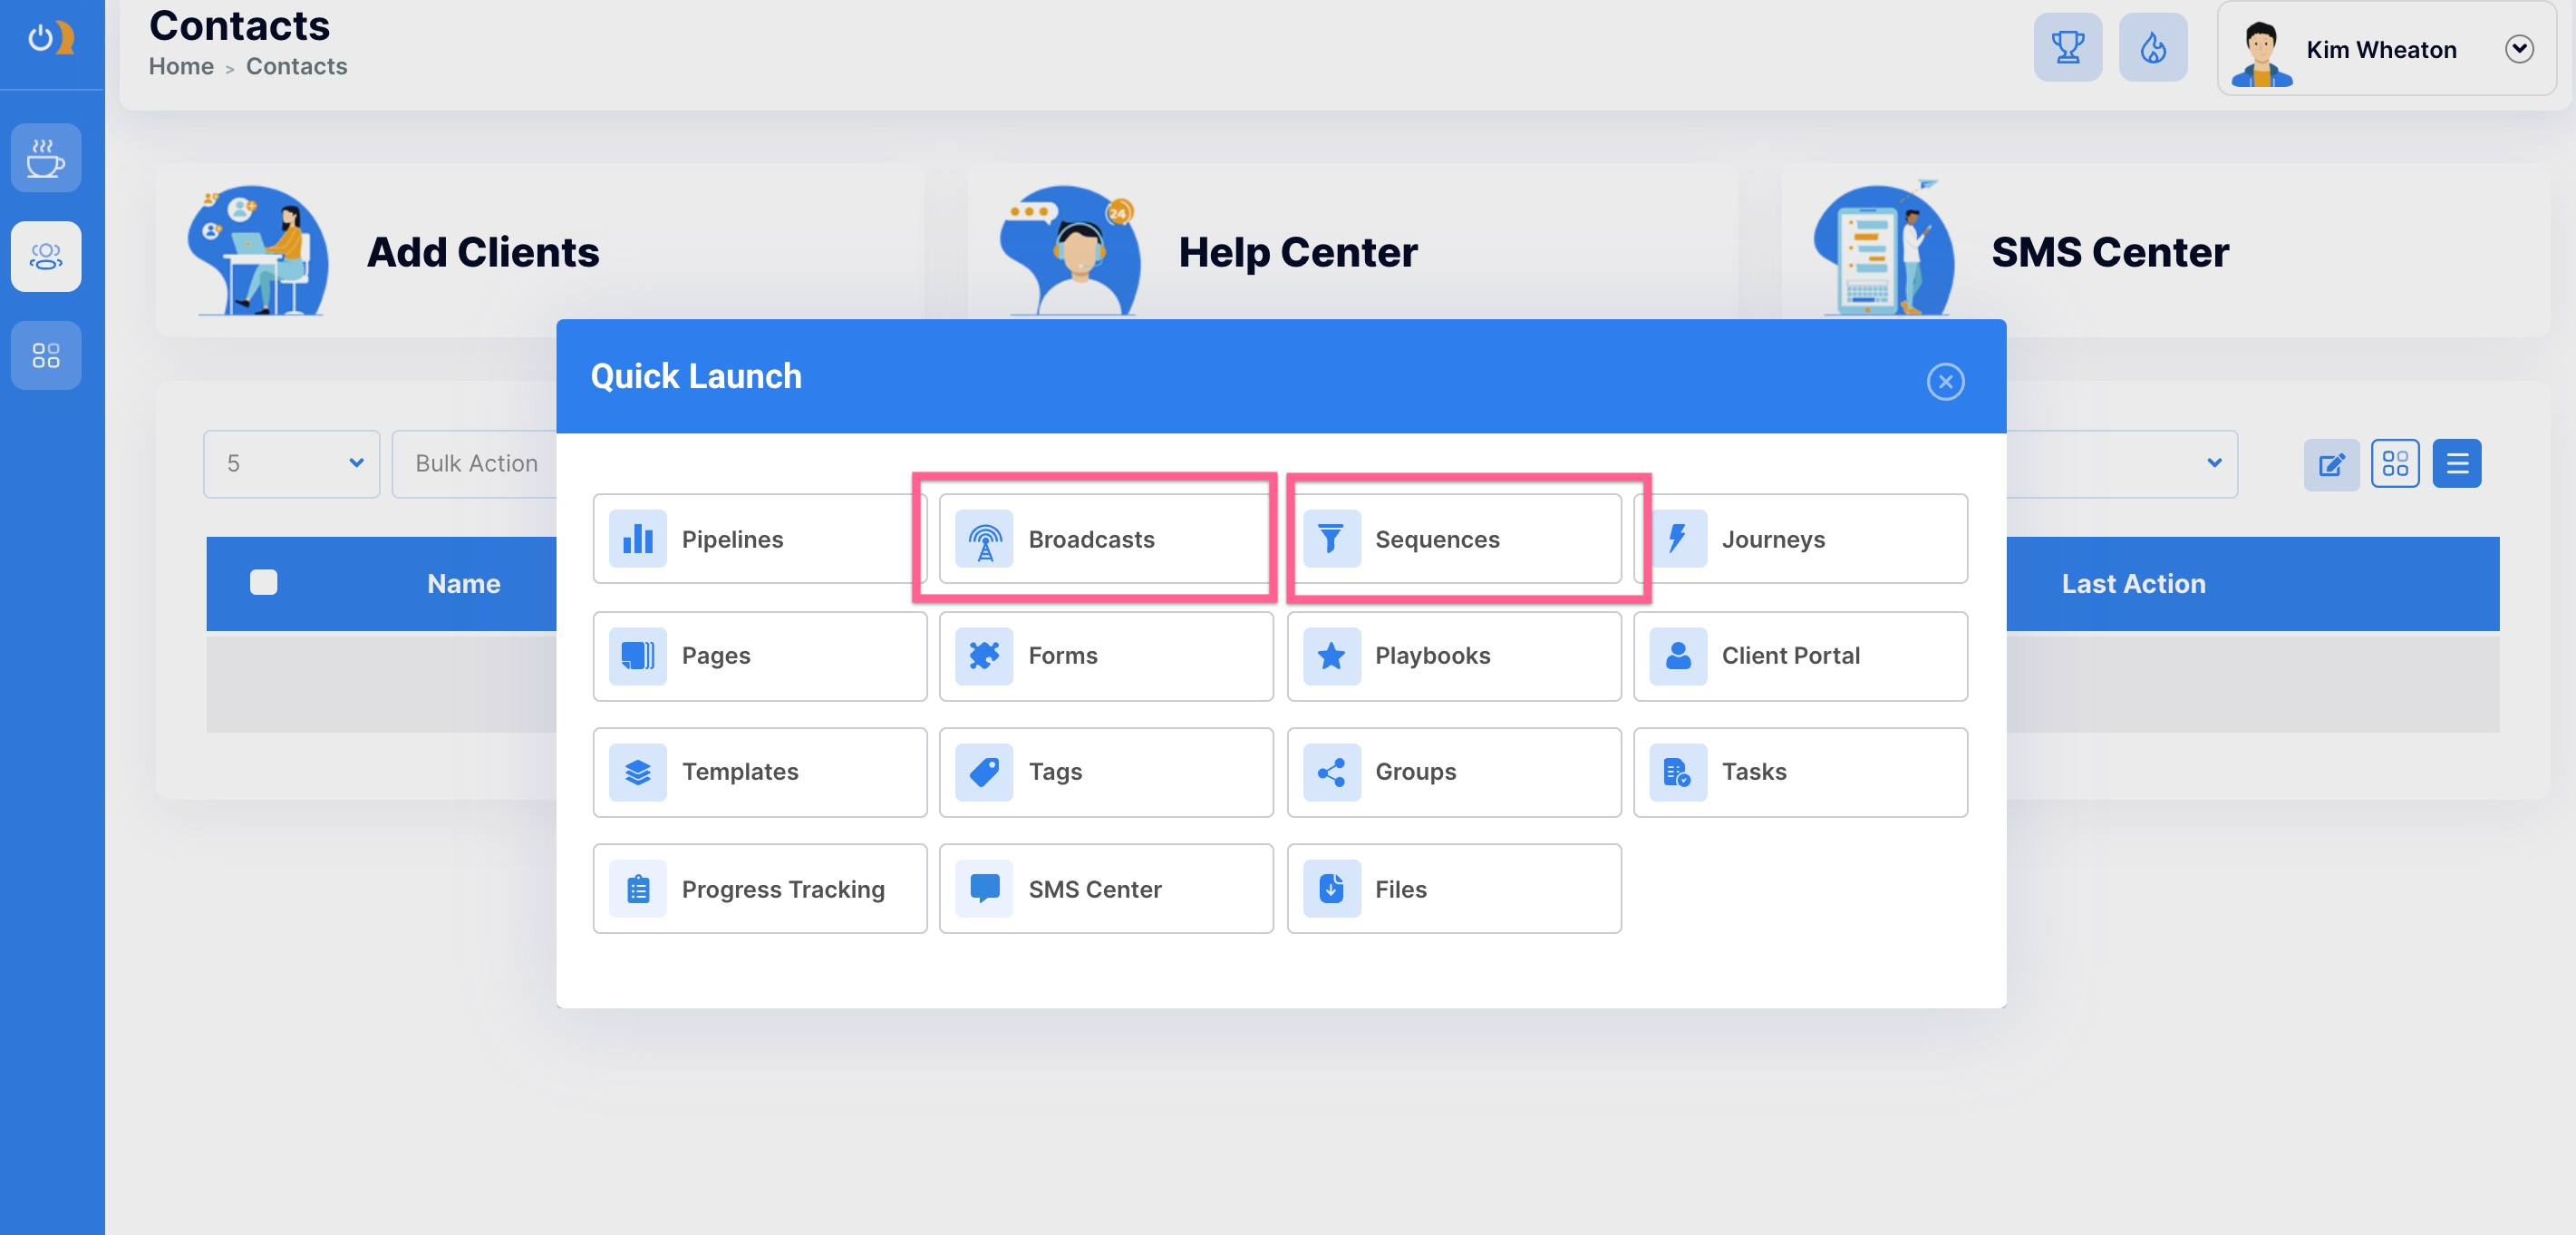
4. Email your form link to your list using the broadcasts or sequences feature.
Give Contacts Access To Your Form Automatically
This can be done using the Journeys feature and in your journey by adding "Send a form" from the actions menu. A complete journeys tutorial can be found HERE.
Troubleshooting Form Issues
To be added as needed.