


What Are Playbooks?
Welcome to Playbooks! Simply put, playbooks are mini-courses or execution plans. They have a header, a hero or cover section, a media and content section, and a robust content area. You can host your playbooks in your client portal on your own domain.

Quick Training Links
- Common Use Cases For Playbook
- Your Playbooks Dashboard Overview
- Playbooks Dashboard Functions
- Creating Your First Playbook
- Update Your Basic Playbook Settings
- Set Your Playbook Header
- Set Your Playbook Cover Area
- Add Your Main Playbook Content (Steps)
- Add Your Nested Playbook Content (Additional Tabs)
- Set Your Playbook Footer
- Making Quick Edits To Your Live Playbook
- Set Your Playbook Sidebar Content
- Preview Your Playbook
- Give Contacts Access To Your Playbook Manually
- Give Contacts Access To Your Playbook Automatically
- Troubleshooting Playbook Issues
Here are some common use cases for playbooks:
- Mini-courses
- Execution plans for clients
- Online coaching tools
- Onboarding guides
- Team member training tools
- Membership sites
- Fitness challenge guides
- Paid content vaults
- Exercise libraries
- Recipe manuals
- High ticket program delivery
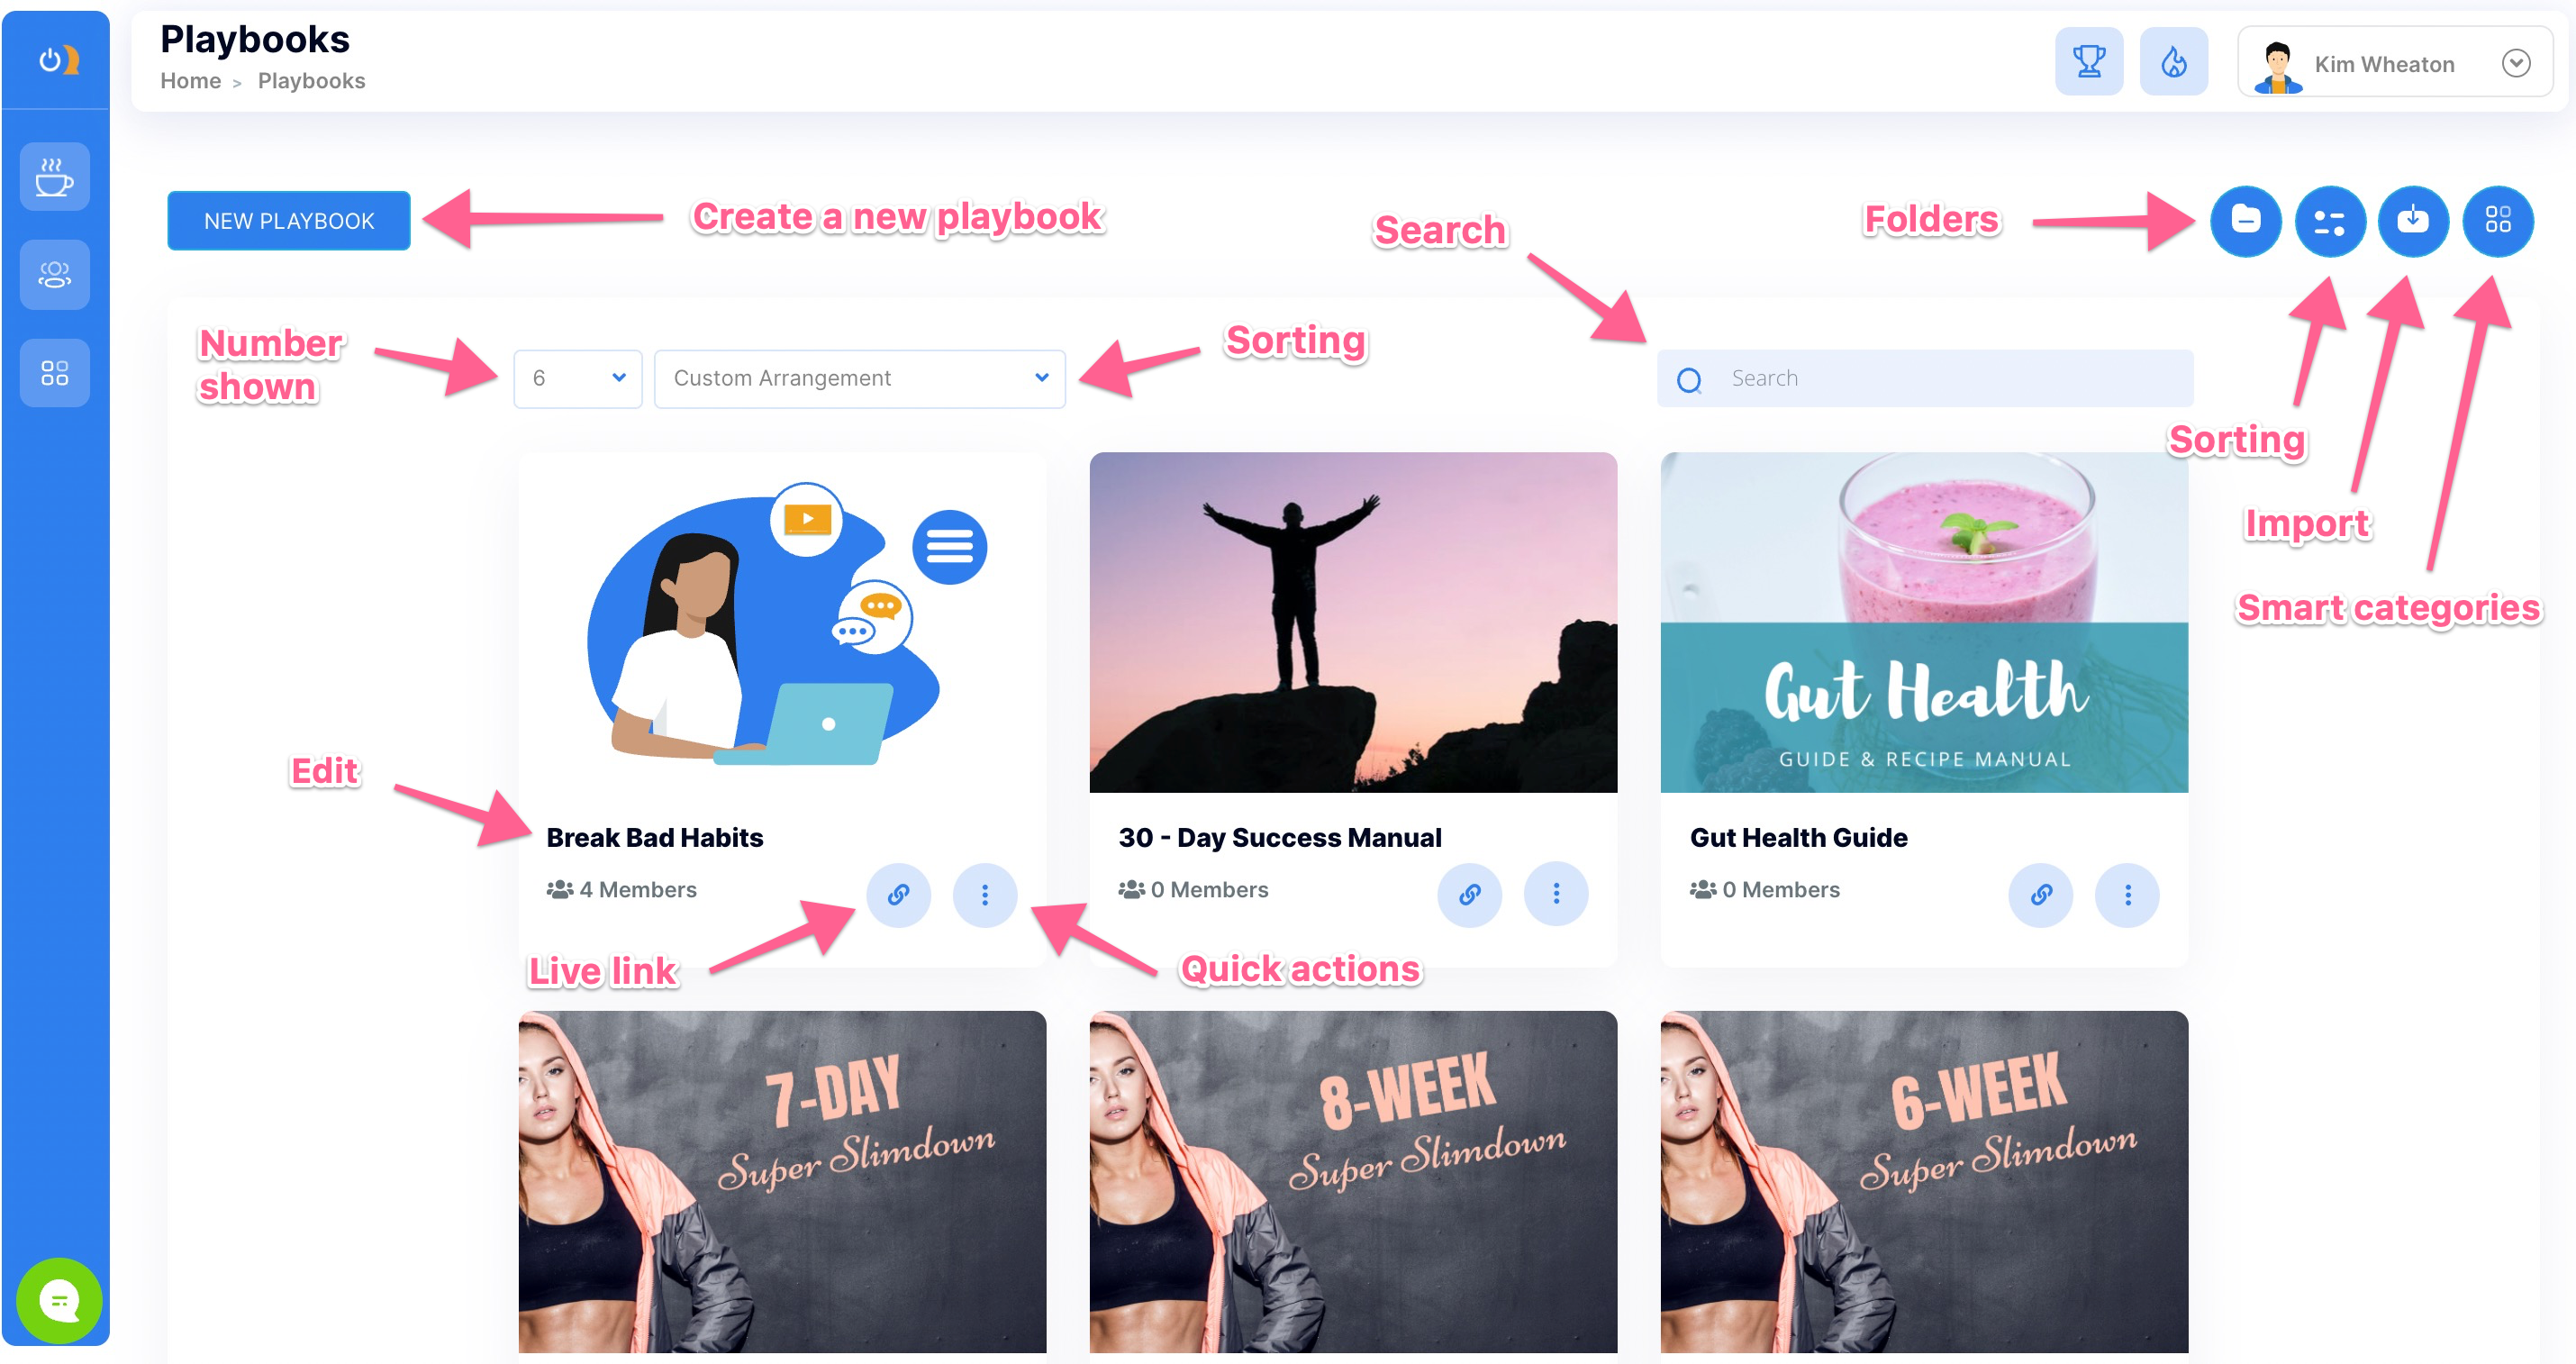
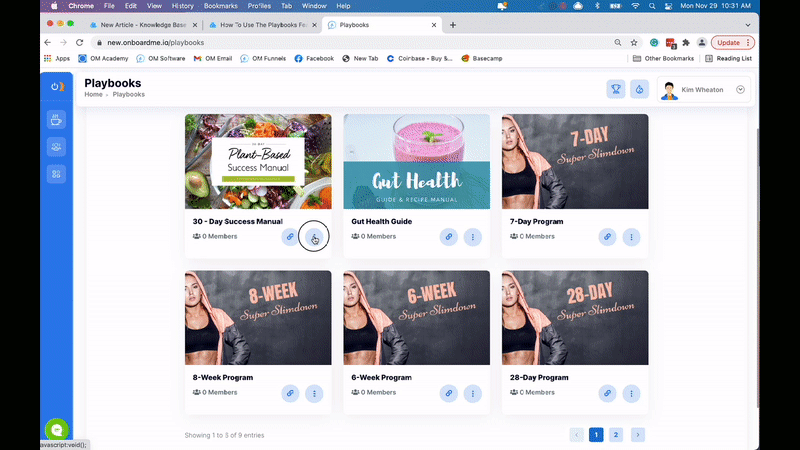
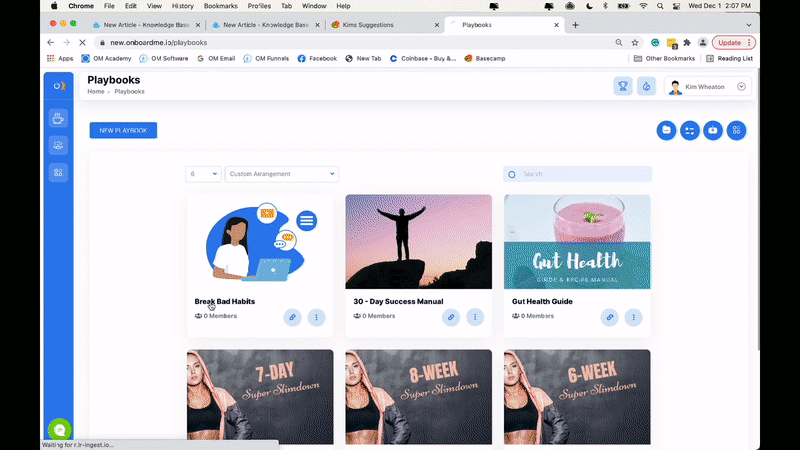
Your Playbooks Dashboard Overview
On your dashboard, you will see a few icons and a create button. Each playbook placeholder (thumbnail) will be displayed with quick action buttons. Here is what your playbooks dashboard should look like, with icons and buttons labeled for easy navigation.
Playbooks Dashboard Functions
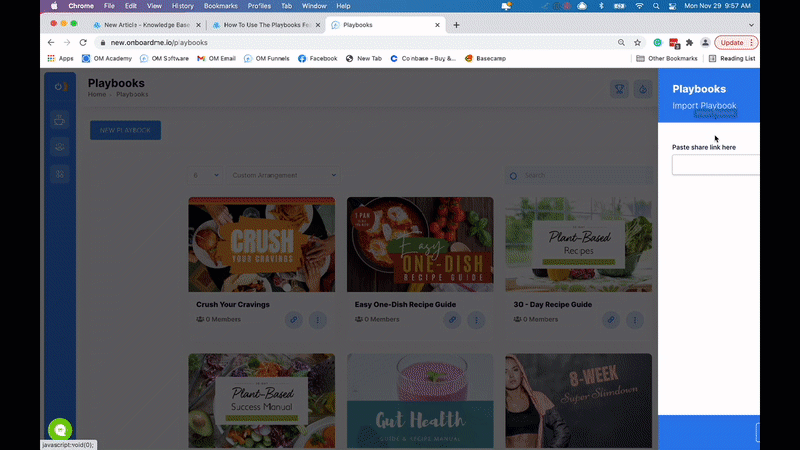
Importing a playbook
Importing a playbook is as easy as logging into your Onboard Me account. While logged in, simply click any shared link you have been given.
You can also use the import feature shown below:
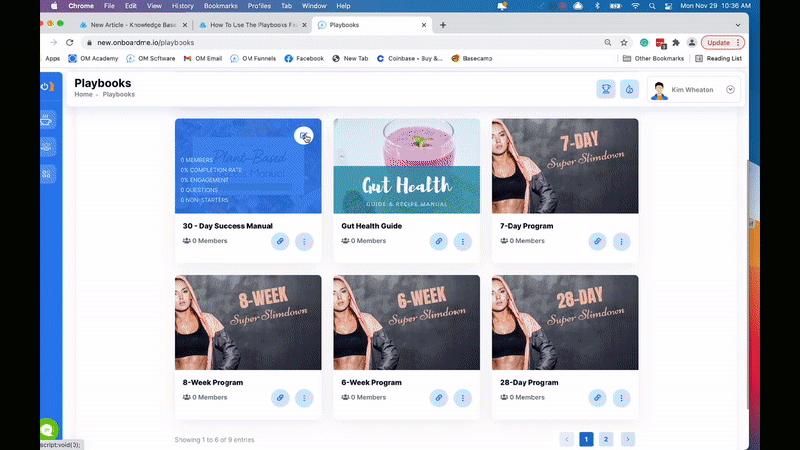
Sorting your playbooks
If you are like most of our Onboard Me users, you love an organized dashboard. We make it simple to sort how your playbooks show up on your main dashboard. Simply click the sorting icon, arrange the titles in the way you would like them to be displayed on the page, and save your sorting.
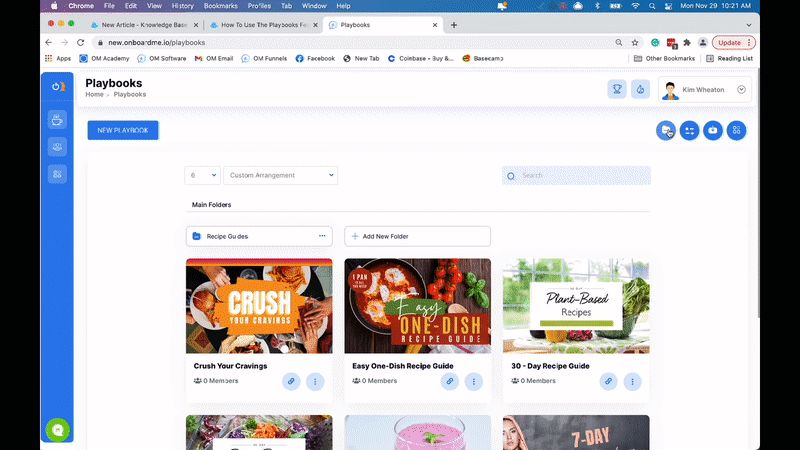
Creating folders for your playbooks
Want to take playbooks organization to a whole new level? You can create broader categories to represent a group of playbooks. Simply create a folder, name it, and select the playbooks that should belong to it.
For instance, let's say you have 6 different recipe guides for the 6 meal programs you offer, and you'd like them all to be in one folder. Just create a Recipe Guides folder and move those playbooks into it.
Disabling your playbooks
Want to remove your playbook from the inter-webs? Just slide the toggle on your playbook thumbnail to the OFF position and choose a "sorry" screen or a custom redirect to a URL/web address of your choosing. COMING SOON!
Quick playbook options
To take action on your playbooks without entering the editor, you can select the MORE menu by clicking the three dots located on your playbook thumbnail.
Here are the actions you can take with quick options:
- Edit your playbook
- Review your user analytics
- Assign contacts to your playbook
- Grab a quick portal link where your playbook is available to members
- Preview your live playbook in real-time
- Share or sell your playbook with other coaches
- Move your playbook to a folder of your choosing
- Share your playbook to the dashboard of another business location
- Duplicate your playbook
- Edit the messages seen when the playbook logins are delivered to clients
- Delete your playbook (sad moment)
Updating your playbook thumbnail image
When you create a new playbook we give you a beautiful default image you can either keep or replace/customize. We even give you the Canva templates. If you would rather search for an image, Onboard Me provides a free library where you can look around before selecting the best option for your thumbnail.
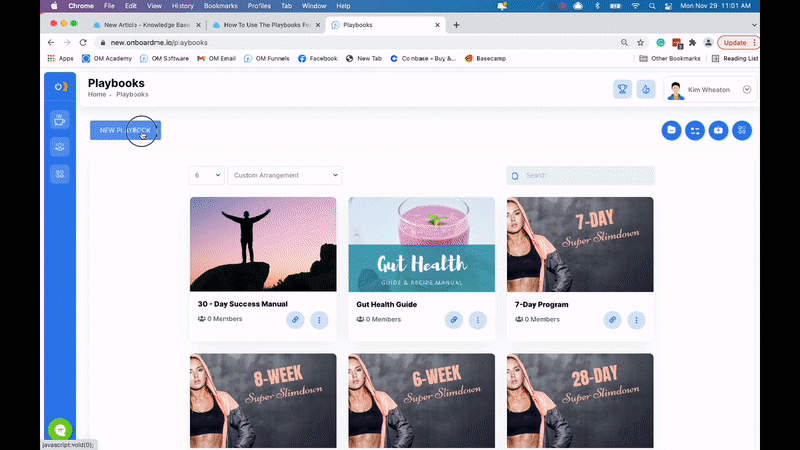
Creating Your First Playbook
Creating your playbook is simple! Just click the New Playbook button on your playbooks dashboard, give it a name and portal description and decide if you want to use your saved styling or just go with the default until you can update it later.
Playbook name and saved styling
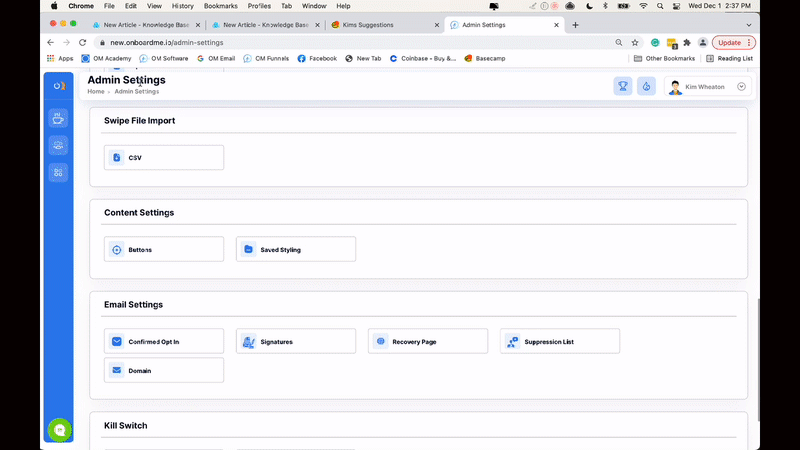
Choose a name that will be easy to categorize later. Example: 6-Week Challenge. It could be added to a challenges folder in the future. Your styling can be pre-created using your preferred content like colors, images, links, etc. in your admin settings (admin settings > content > saved styling). For now, let's just leave that setting OFF and use the default blue, updating as we go.
Playbook description for client portal menu
This is what your clients will see on their playbook thumbnail in their portal
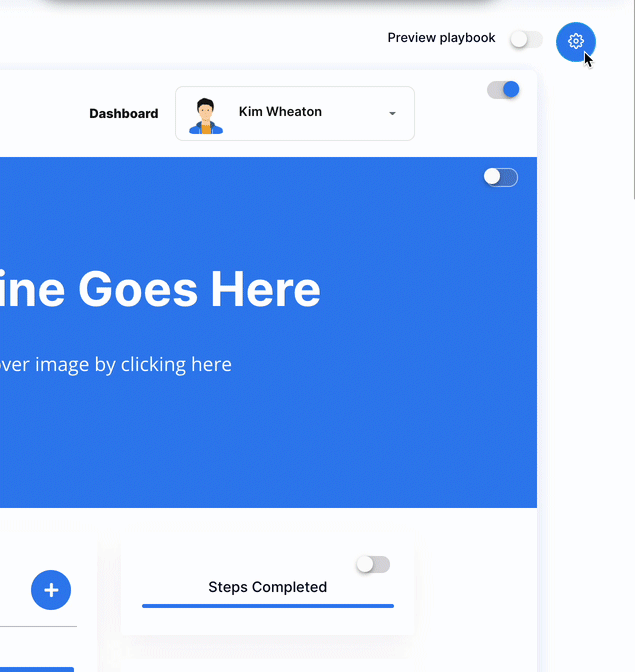
Update Your Basic Playbook Settings
In the top right corner of your playbook editor, you will see a gear icon. This is where you will find and adjust your playbook's deeper settings. Make sure you hit the SAVE button when finished.
Client portal URL
This is where you can get the link to your portal to post on your website for members to log in.
- Host on our domain
- Host on your own domain
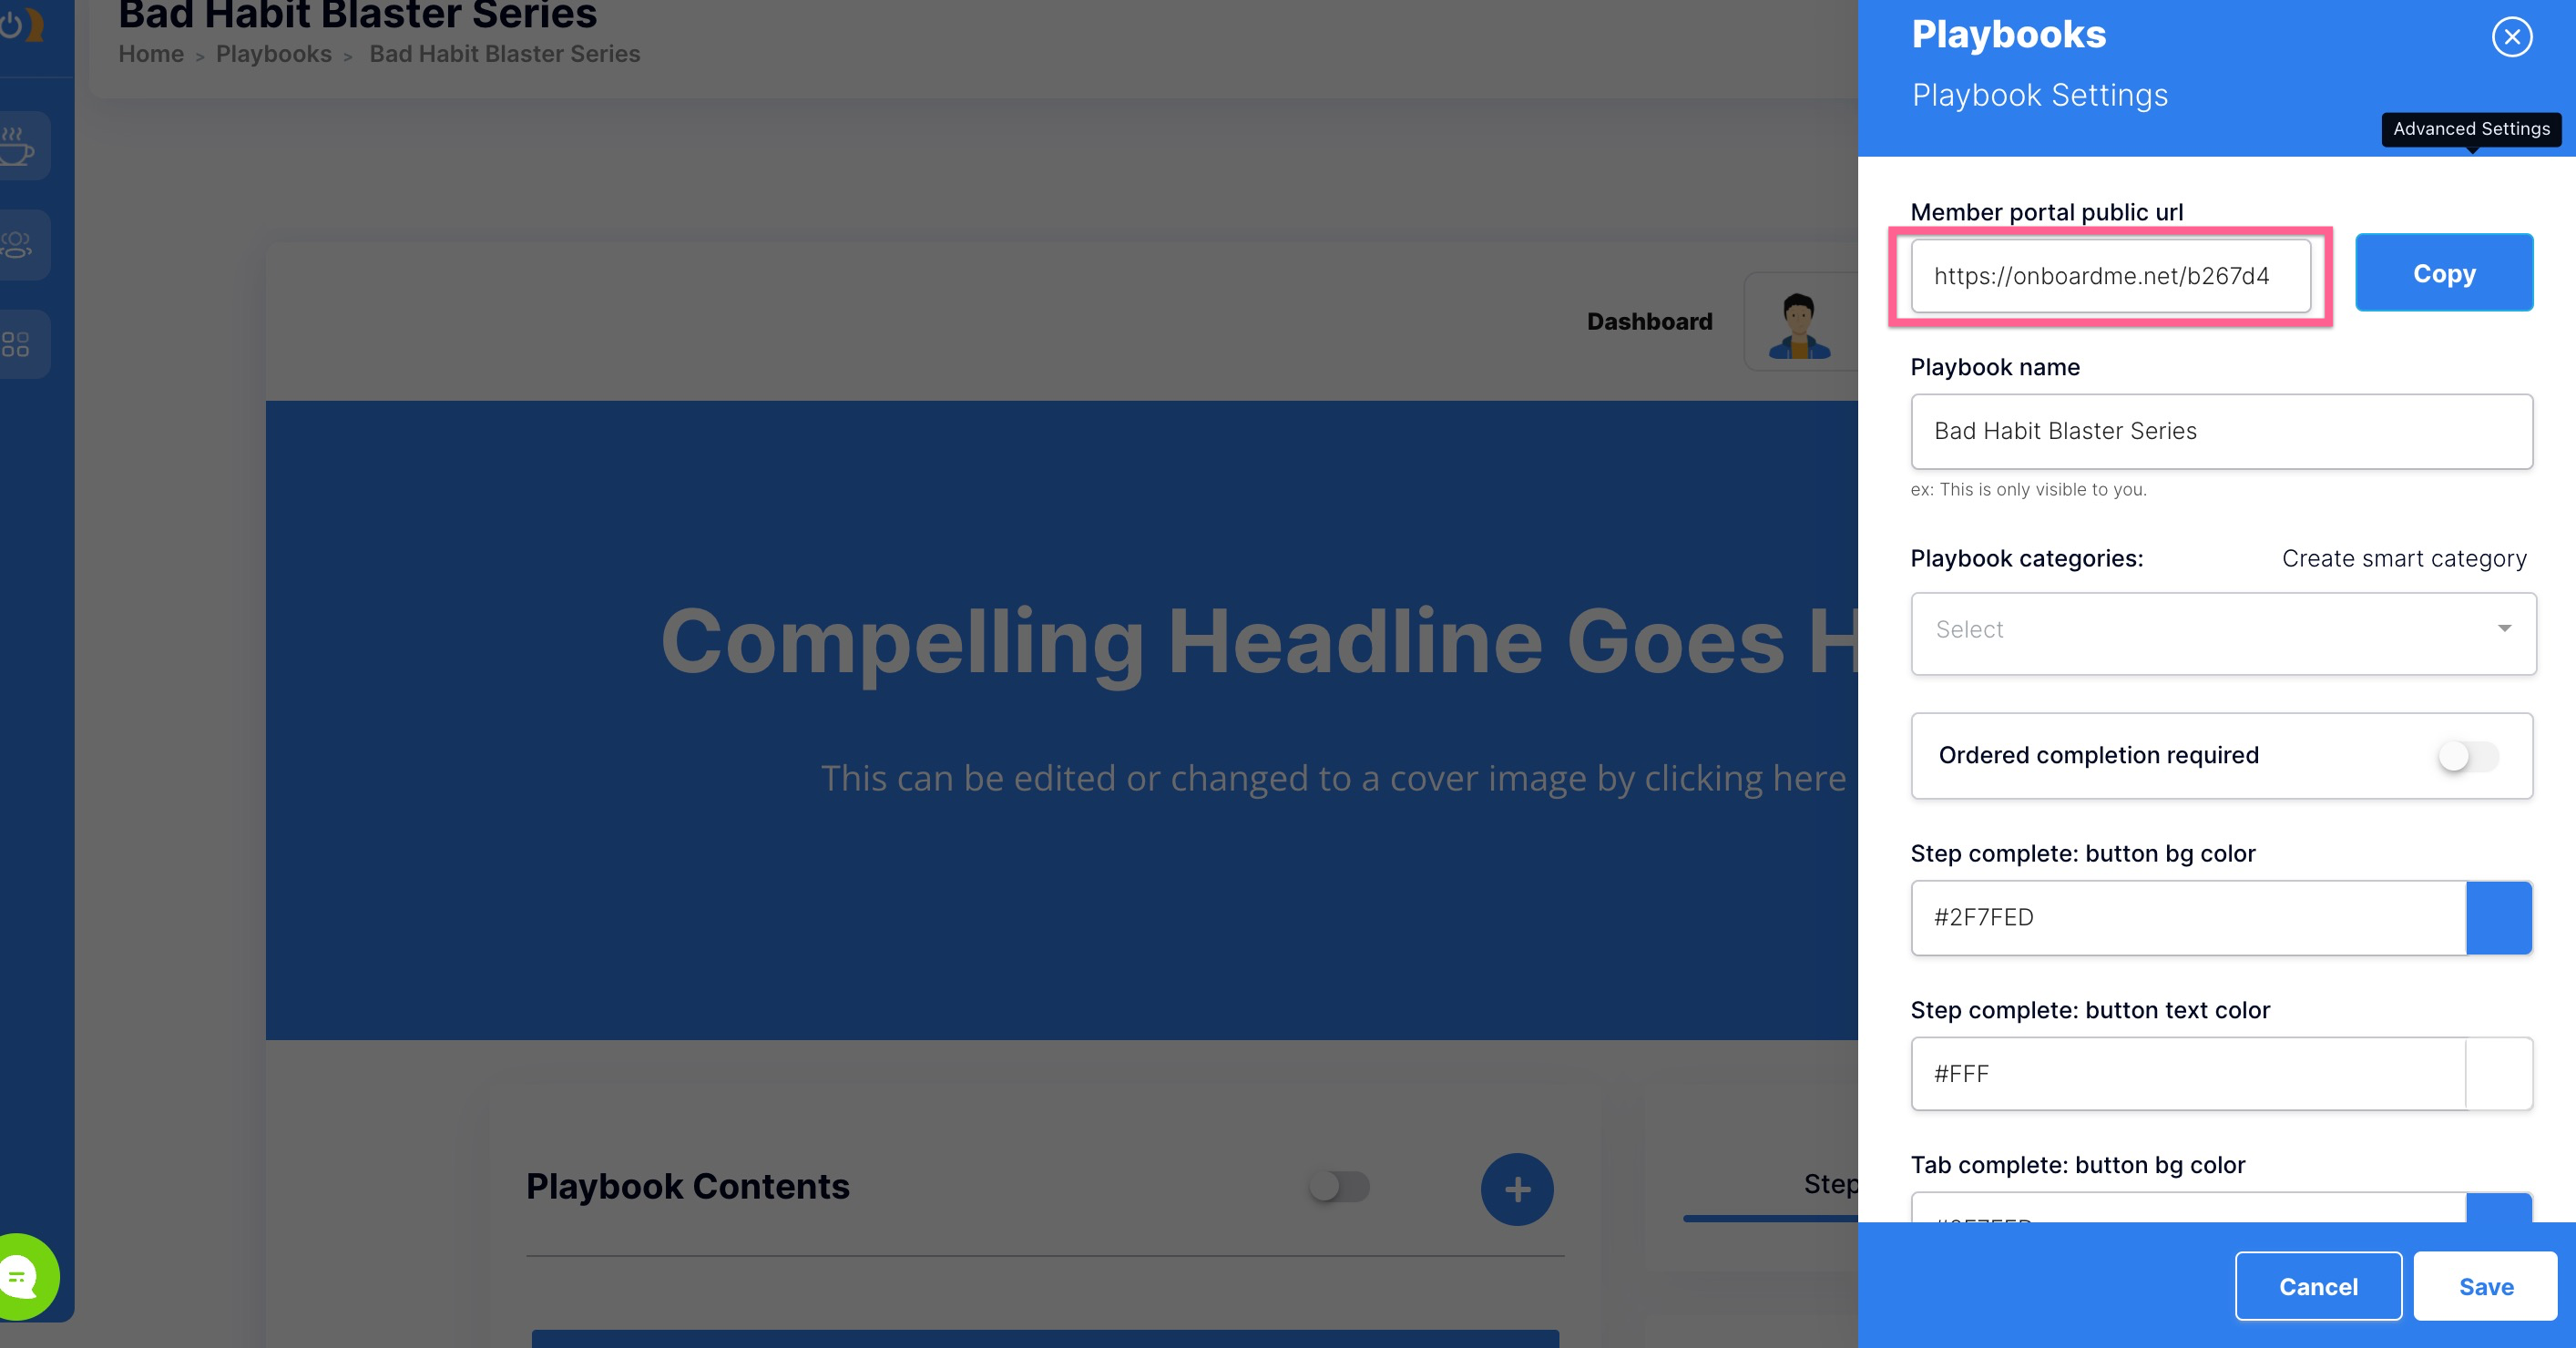
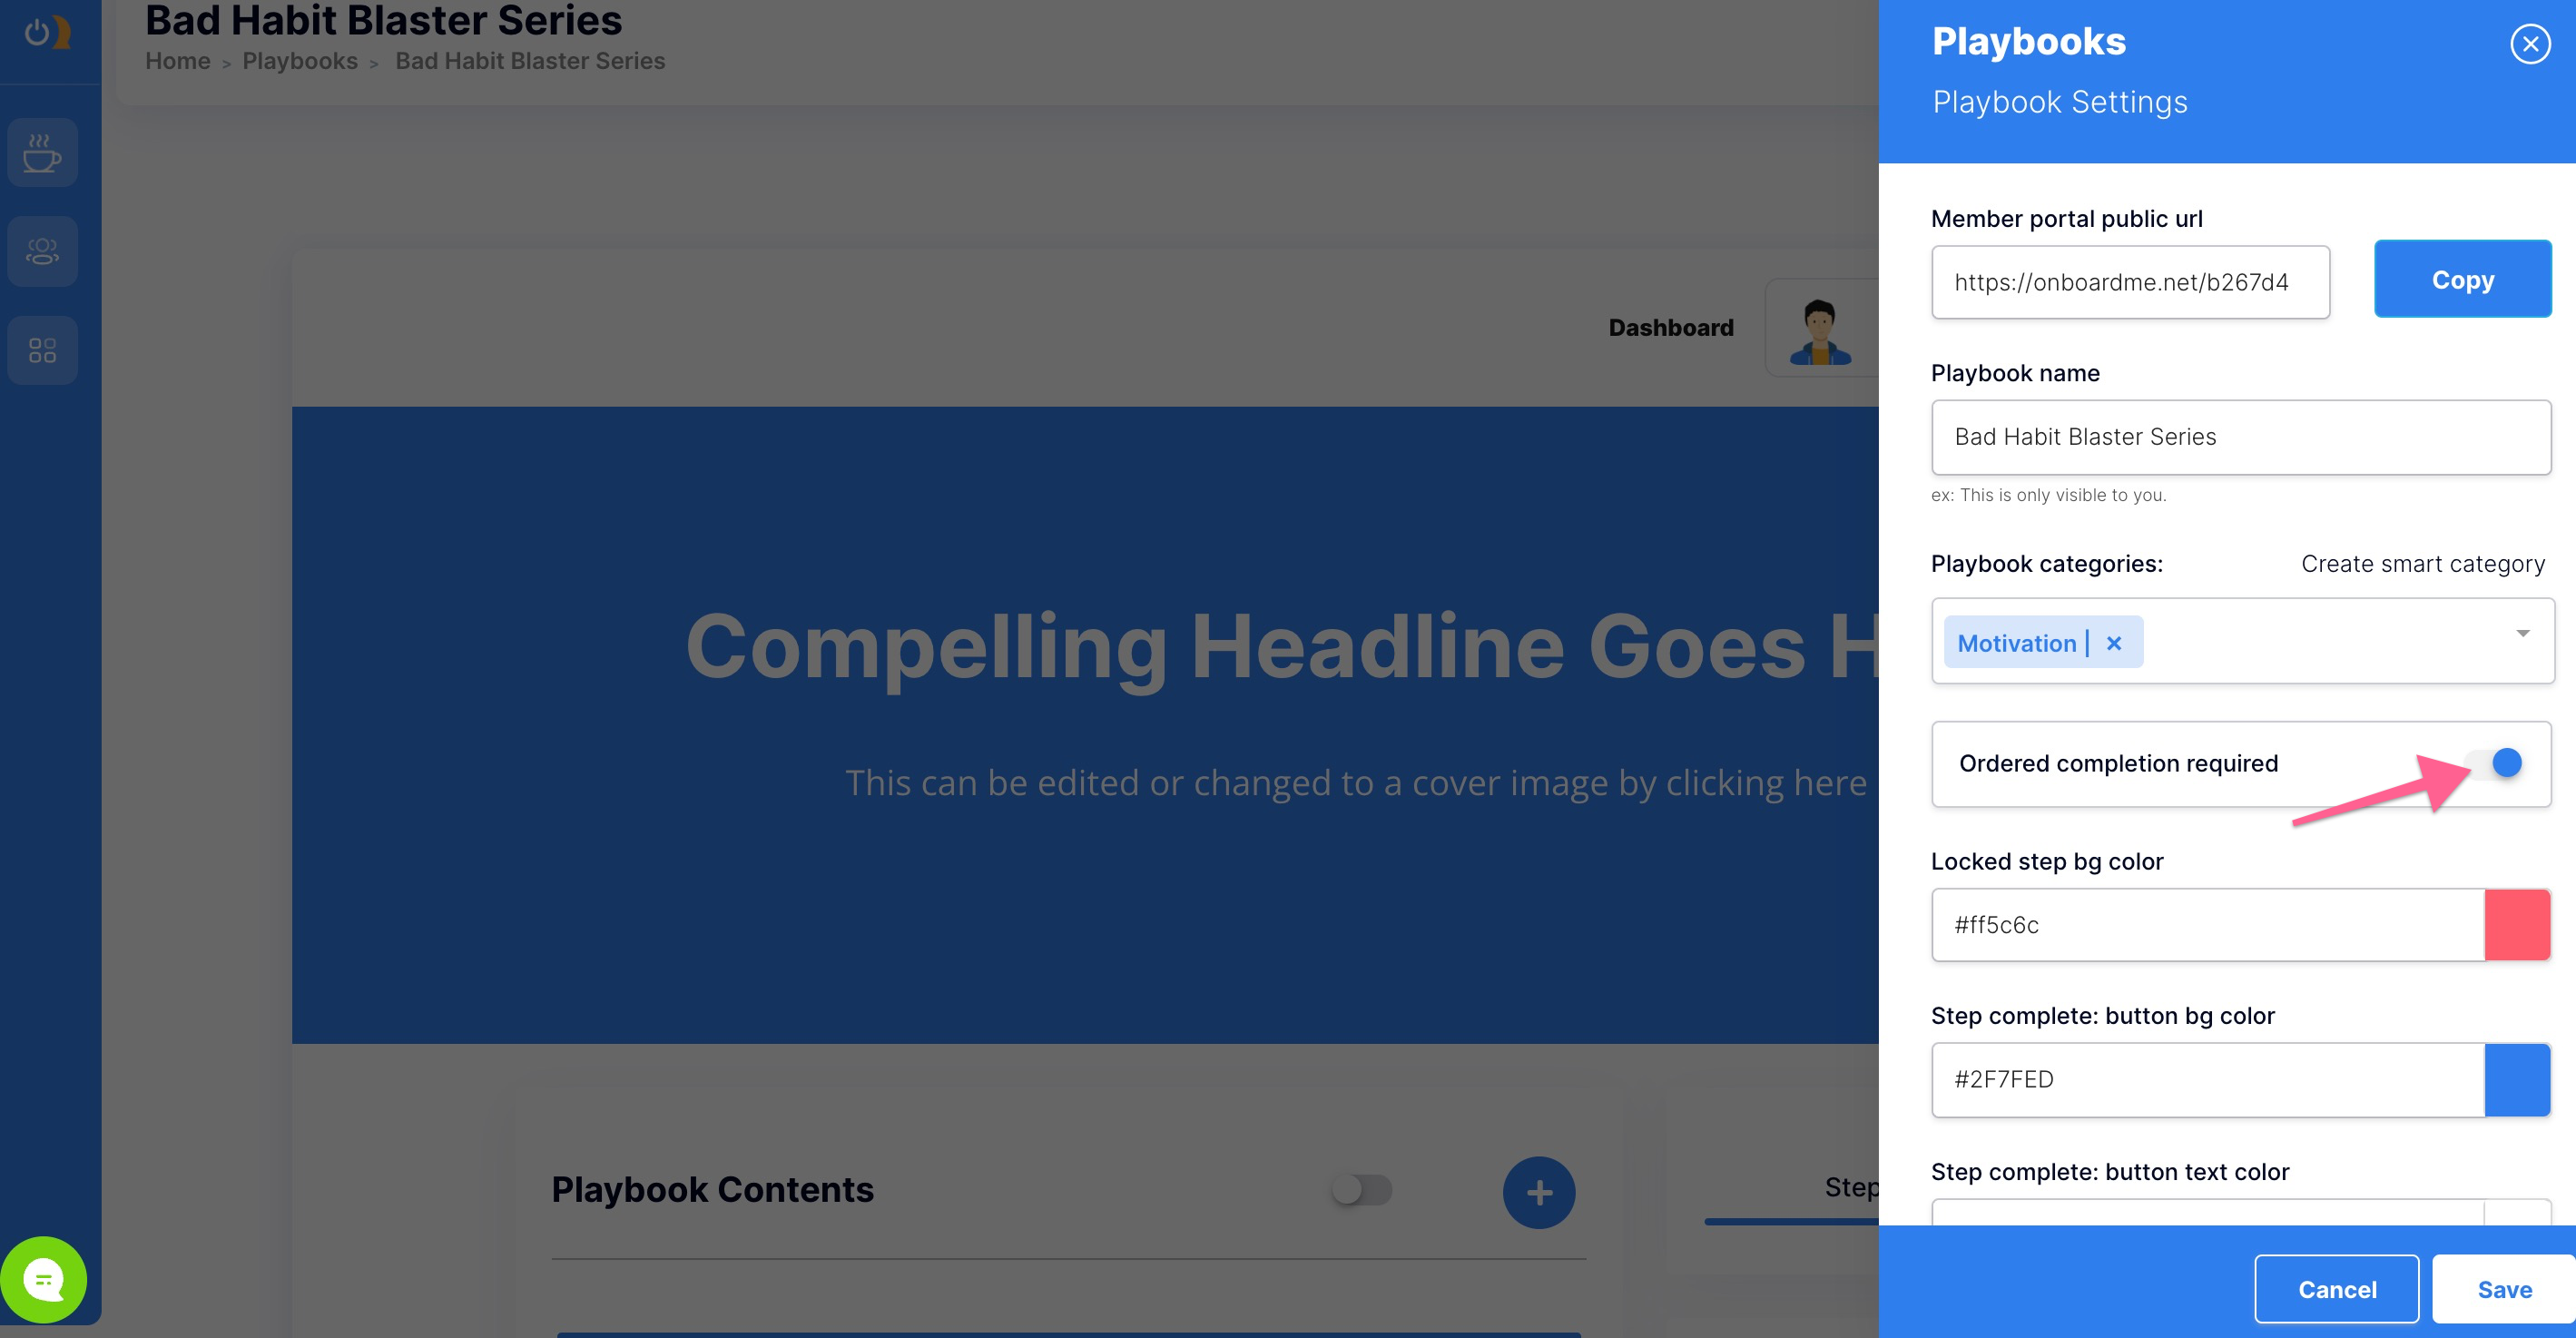
Set playbook smart categories
Here you can:
Create common categories that your paybooks cover. Let's say you offered 8 recipe playbooks for different body types and blood types. You could create a smart category called recipes. Now your clients can easily find playbooks from their dashboard that contain recipes.
Make clients complete the playbook in order
Here you can determine if you want to require your clients to complete a step before accessing the next step. This is great for onboarding or program-oriented playbooks. We would not recommend this for recipe manuals.
- Complete in forced order
- Complete at one's leisure
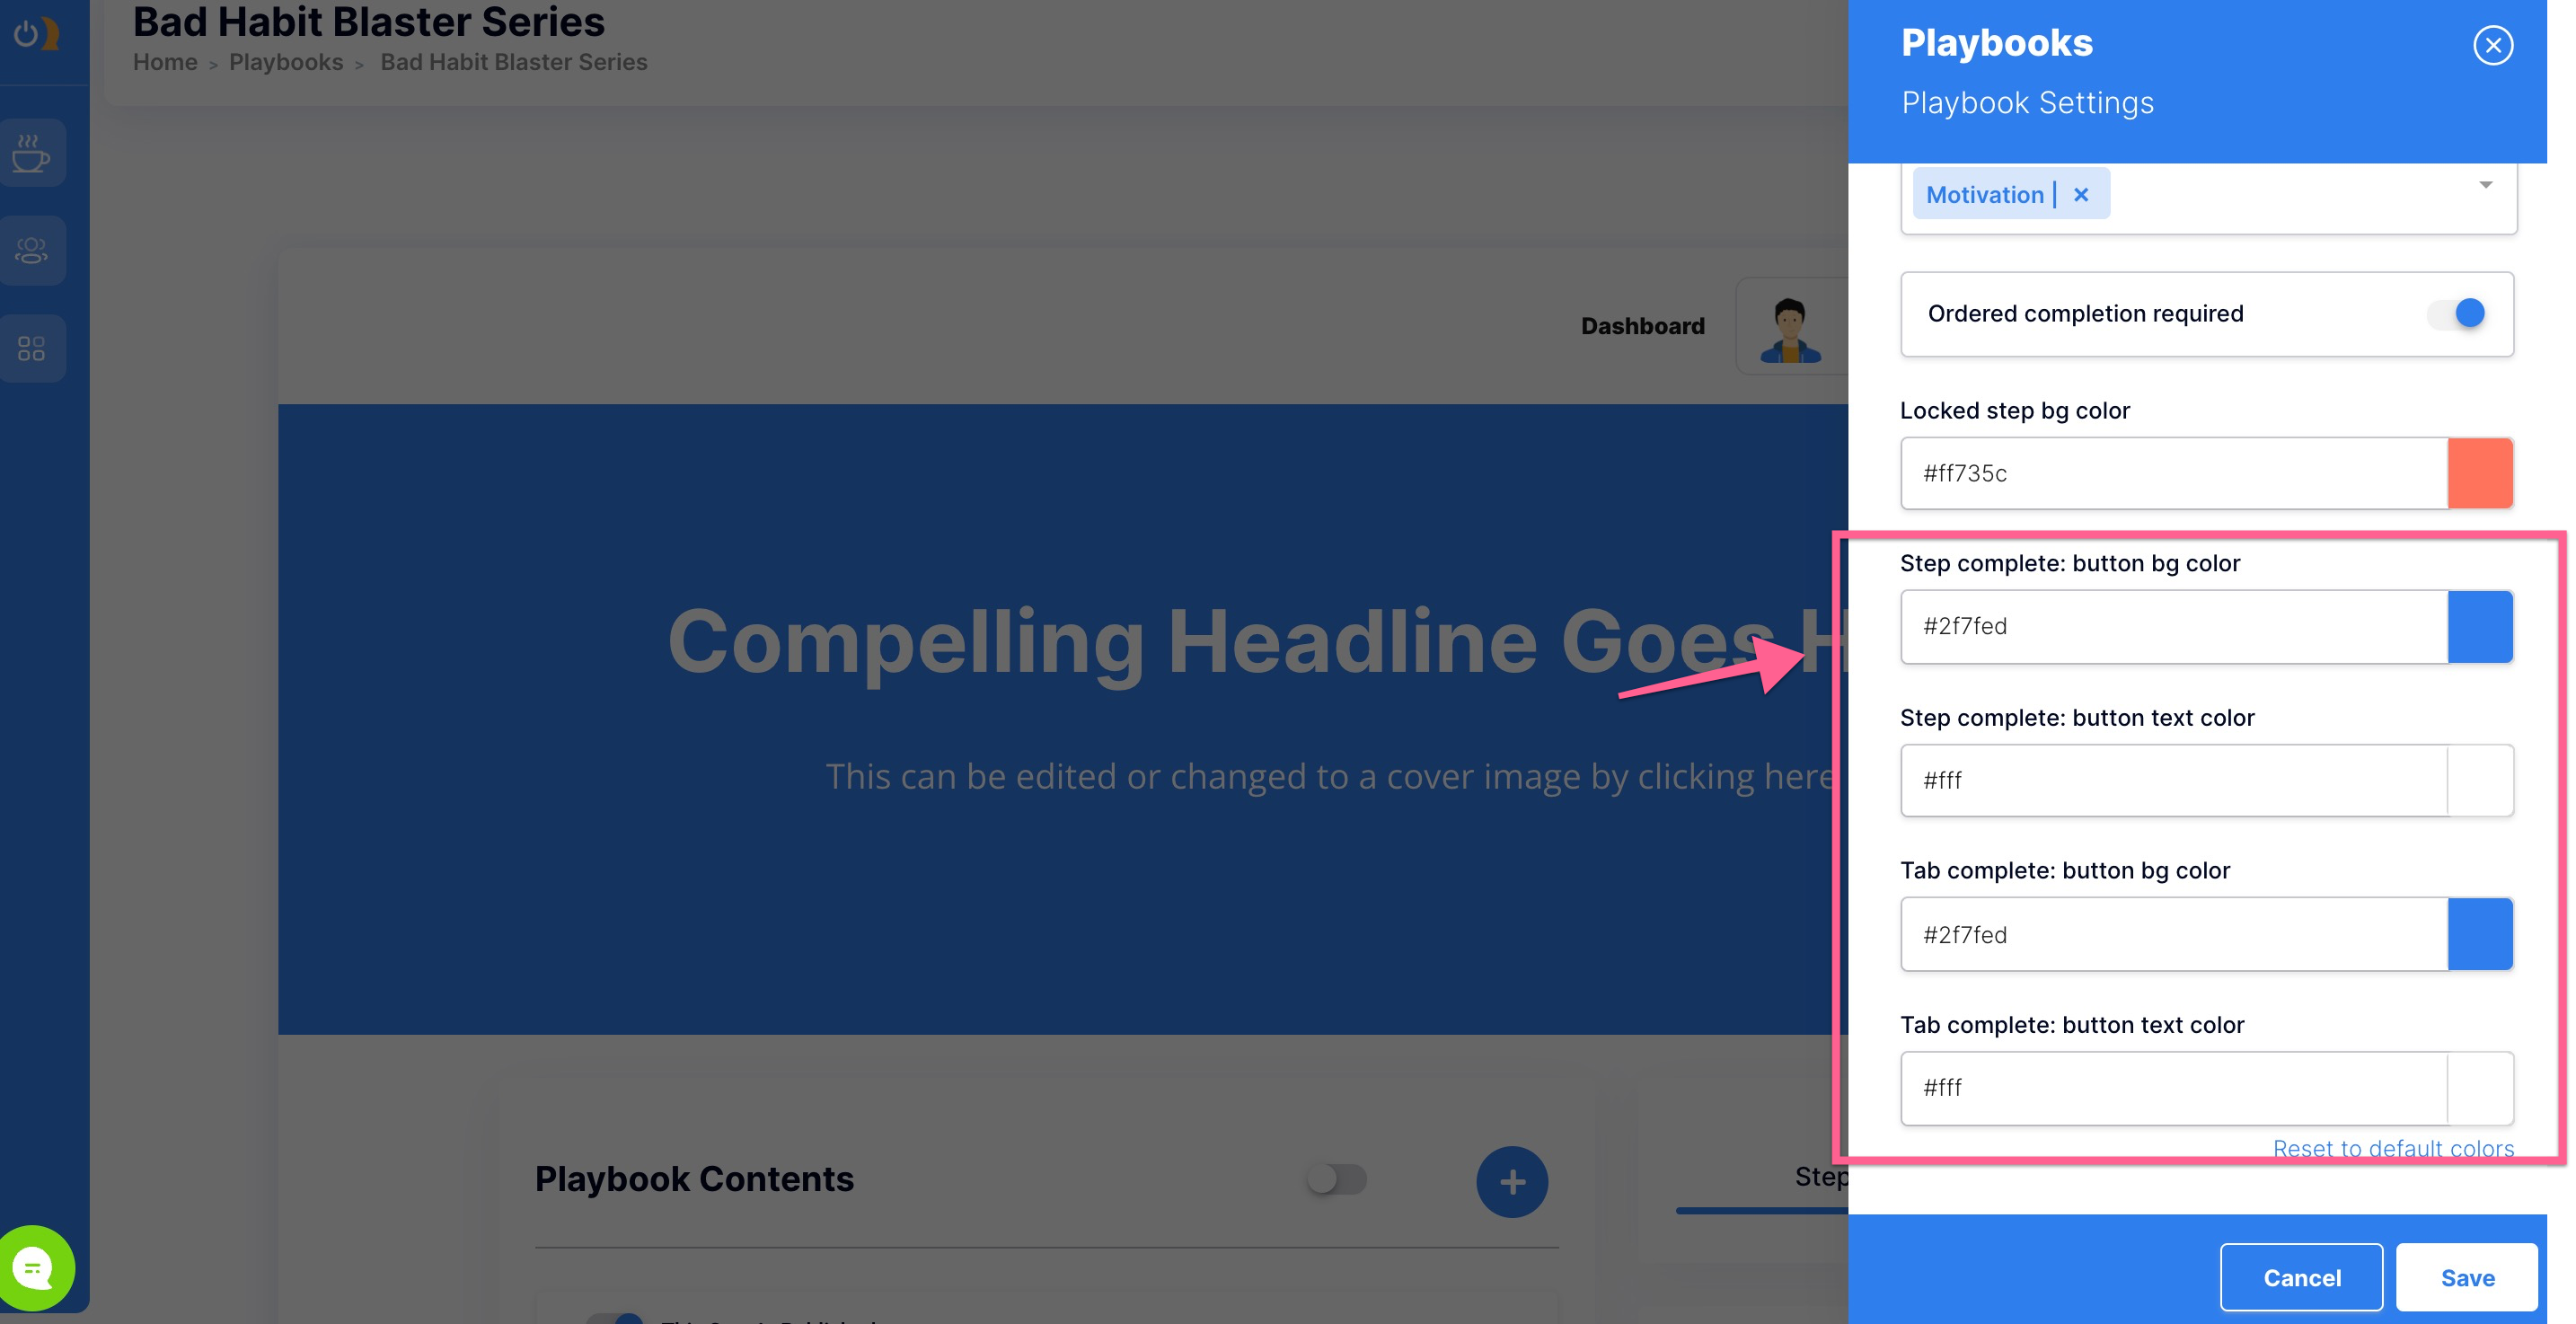
Playbook step-completion button styling
Here you will choose the way your Mark Complete buttons are displayed on playbook steps
- Mark step-complete styling
Playbook tab-completion button styling
Here you will choose the way your Mark Complete buttons are displayed on playbook tabs
- Mark tab-complete styling
Set Your Playbook Header
Your playbook header is an optional bar that contains your company name, author image, and your logo. You can toggle it on or off for visibility. Any changes made will update in real-time on the live form.
Header styling and images
Styling allows you to choose your bar color, company name, text color, logo, and author image. With an easy "click to edit" design adding and removing header imagery is also a breeze
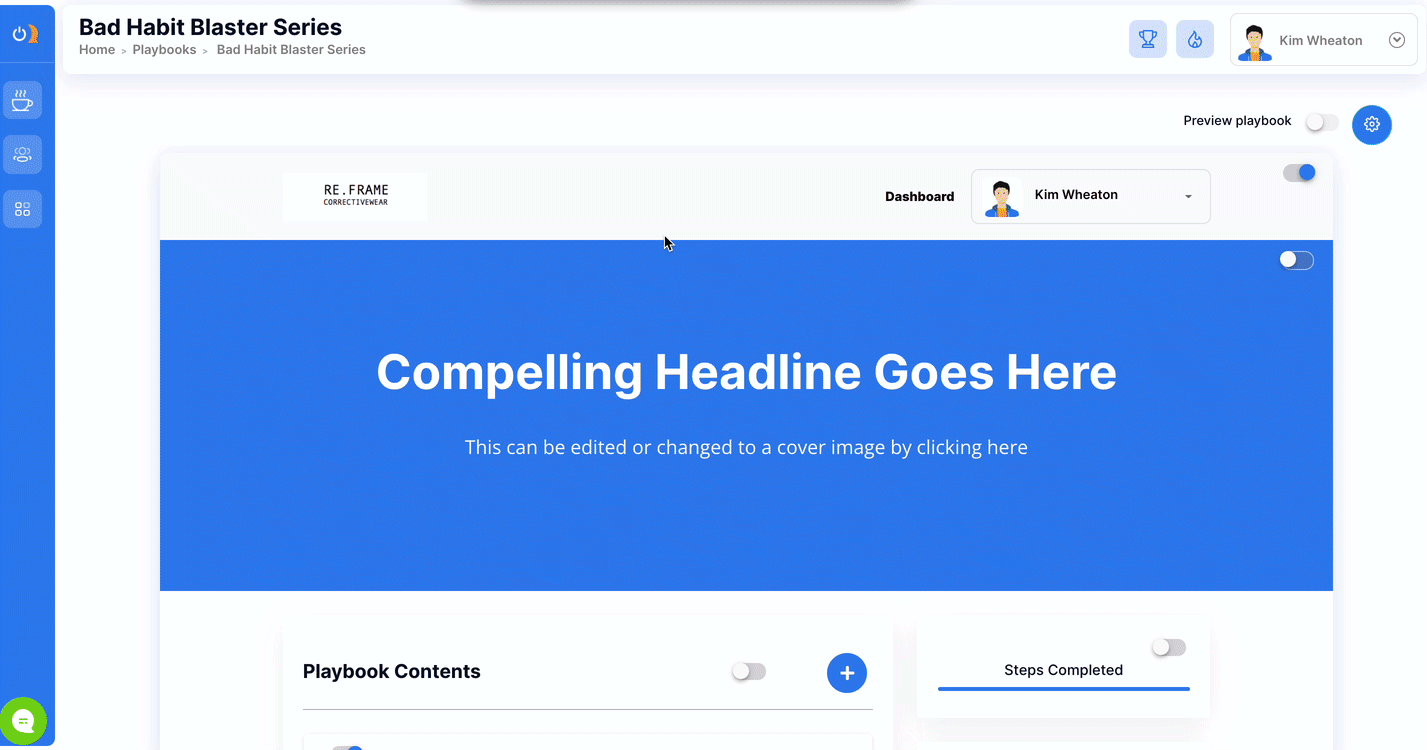
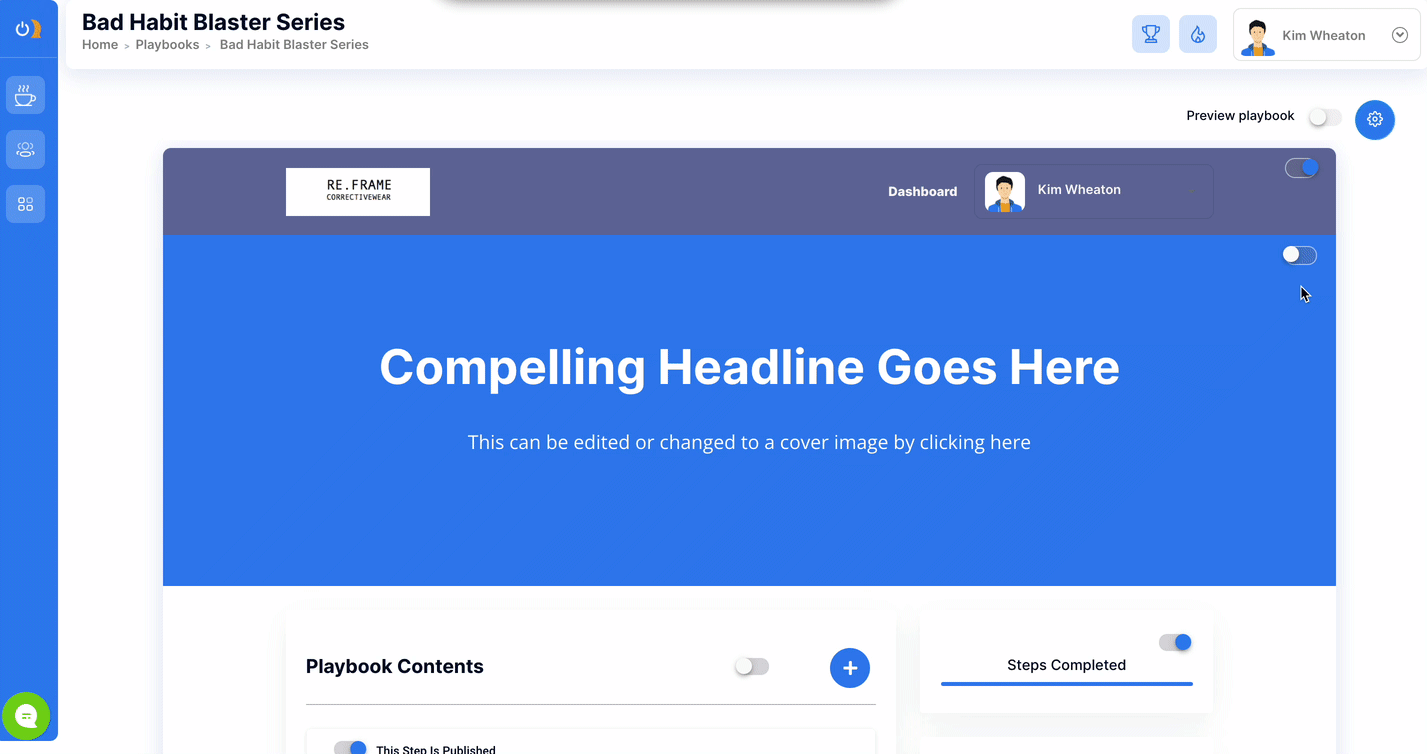
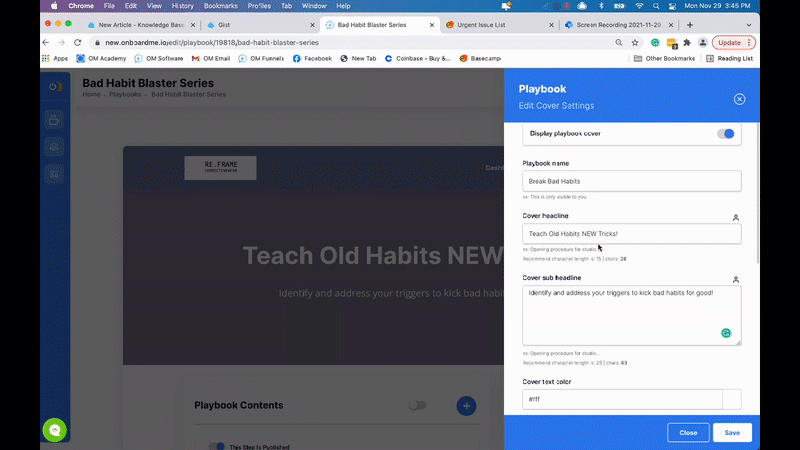
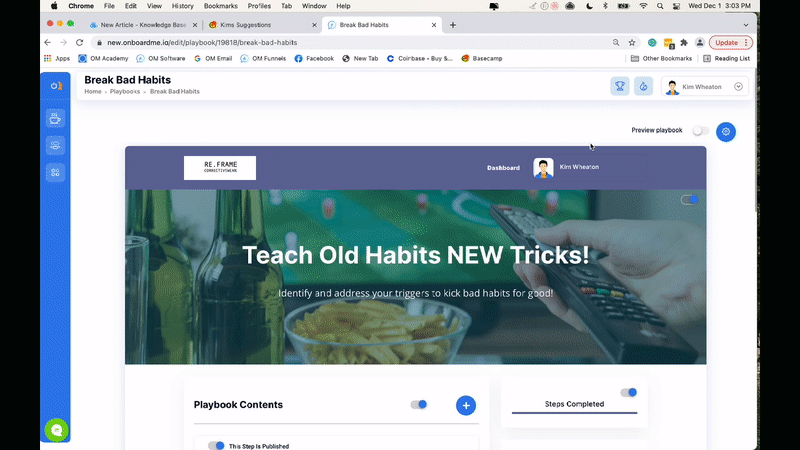
Set Your Playbook Cover Area
Your cover or "hero" area is where you can create a beautifully branded experience with a custom image and overlay or a custom background color and headline/sub-headline. This section sets the tone for what's ahead in your playbook.
Cover visibility
Using the toggle at the top right you can decide if you want visitors to see your cover, headline, and sub-headline, or custom cover image.
Cover styling and images
The cover styling allows you to choose your cover color, add a headline and sub-headline. Upload your own image, choose from your saved library, or just search for a free image using our library.
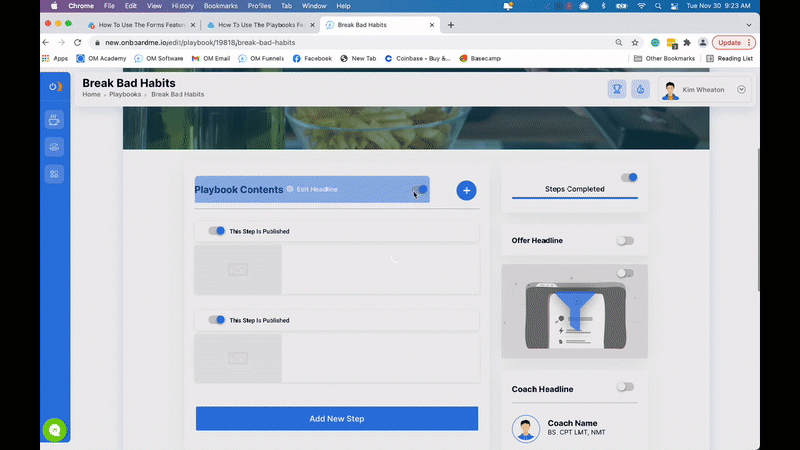
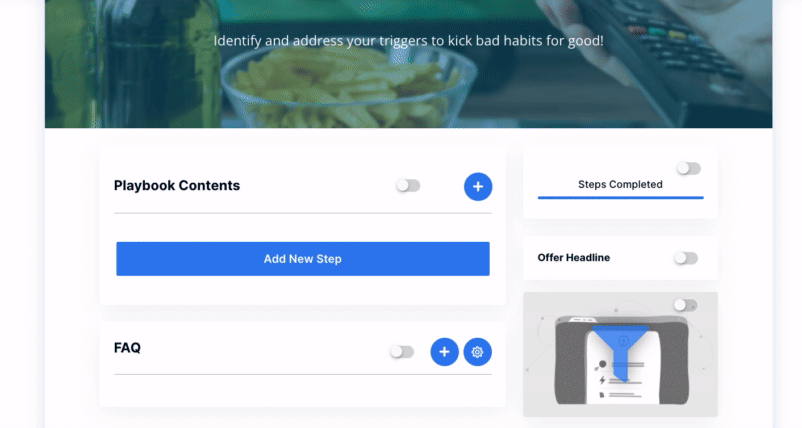
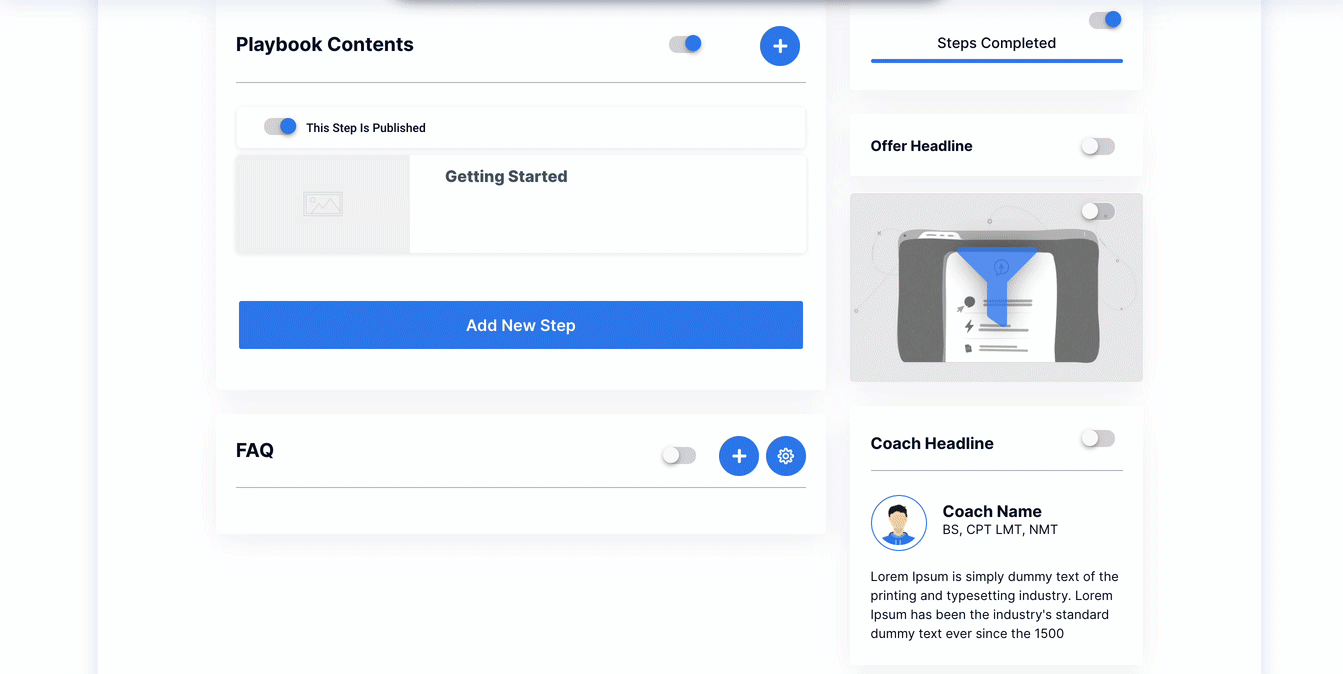
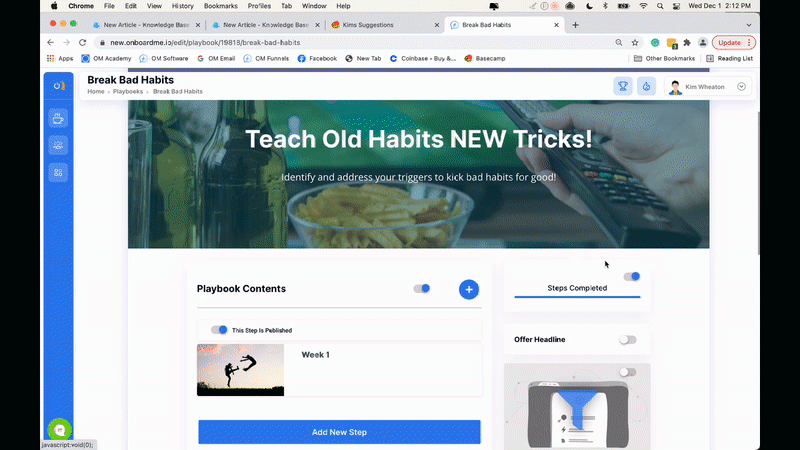
Add Your Main Playbook Content (Steps)
Using the toggle at the top right you can decide if you want visitors to see your playbook content headline. Click to edit.
What are playbook steps?
Playbook steps are like chapters in a book. Let's say we're running a 4-week keto challenge.
Your playbook steps could be:
- Getting started
- Week 1
- Week 2
- Week 3
- Week 4
- Graduation
- Next Steps
These would be the main sections of your challenge. Inside your steps could be the nitty-gritty details (using tabs, discussed in the next section). For now, let's go over your main playbook steps so you have no questions when it comes to using playbooks to revolutionalize the way you coach clients.
Creating your steps
Inside your playbooks editor click the + symbol and from the pop-up wizard decide if you would like to create a new step from scratch to use an existing start step.
Adding content to your steps
To add content to your step once your step has been created you can click the content area and the edit drawer will open. From there you can select the appropriate accordion and open, edit and save.
Settings: You can update the step title here
Images: Here you have 2 types of images your can update here.
- Playbooks step thumbnail
- Playbook step banner (this is seen inside the step once your member accesses the content)
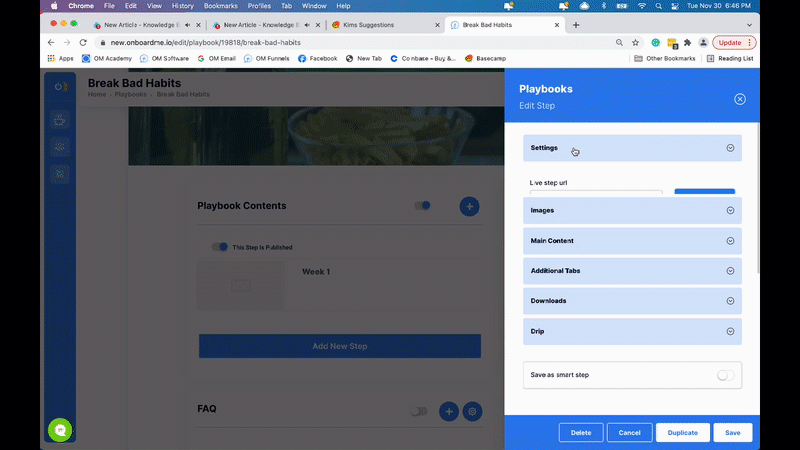
Main content: This is where you add your main teaching material.
- Determine if you are including a main video
- Add content directly or import from your content library

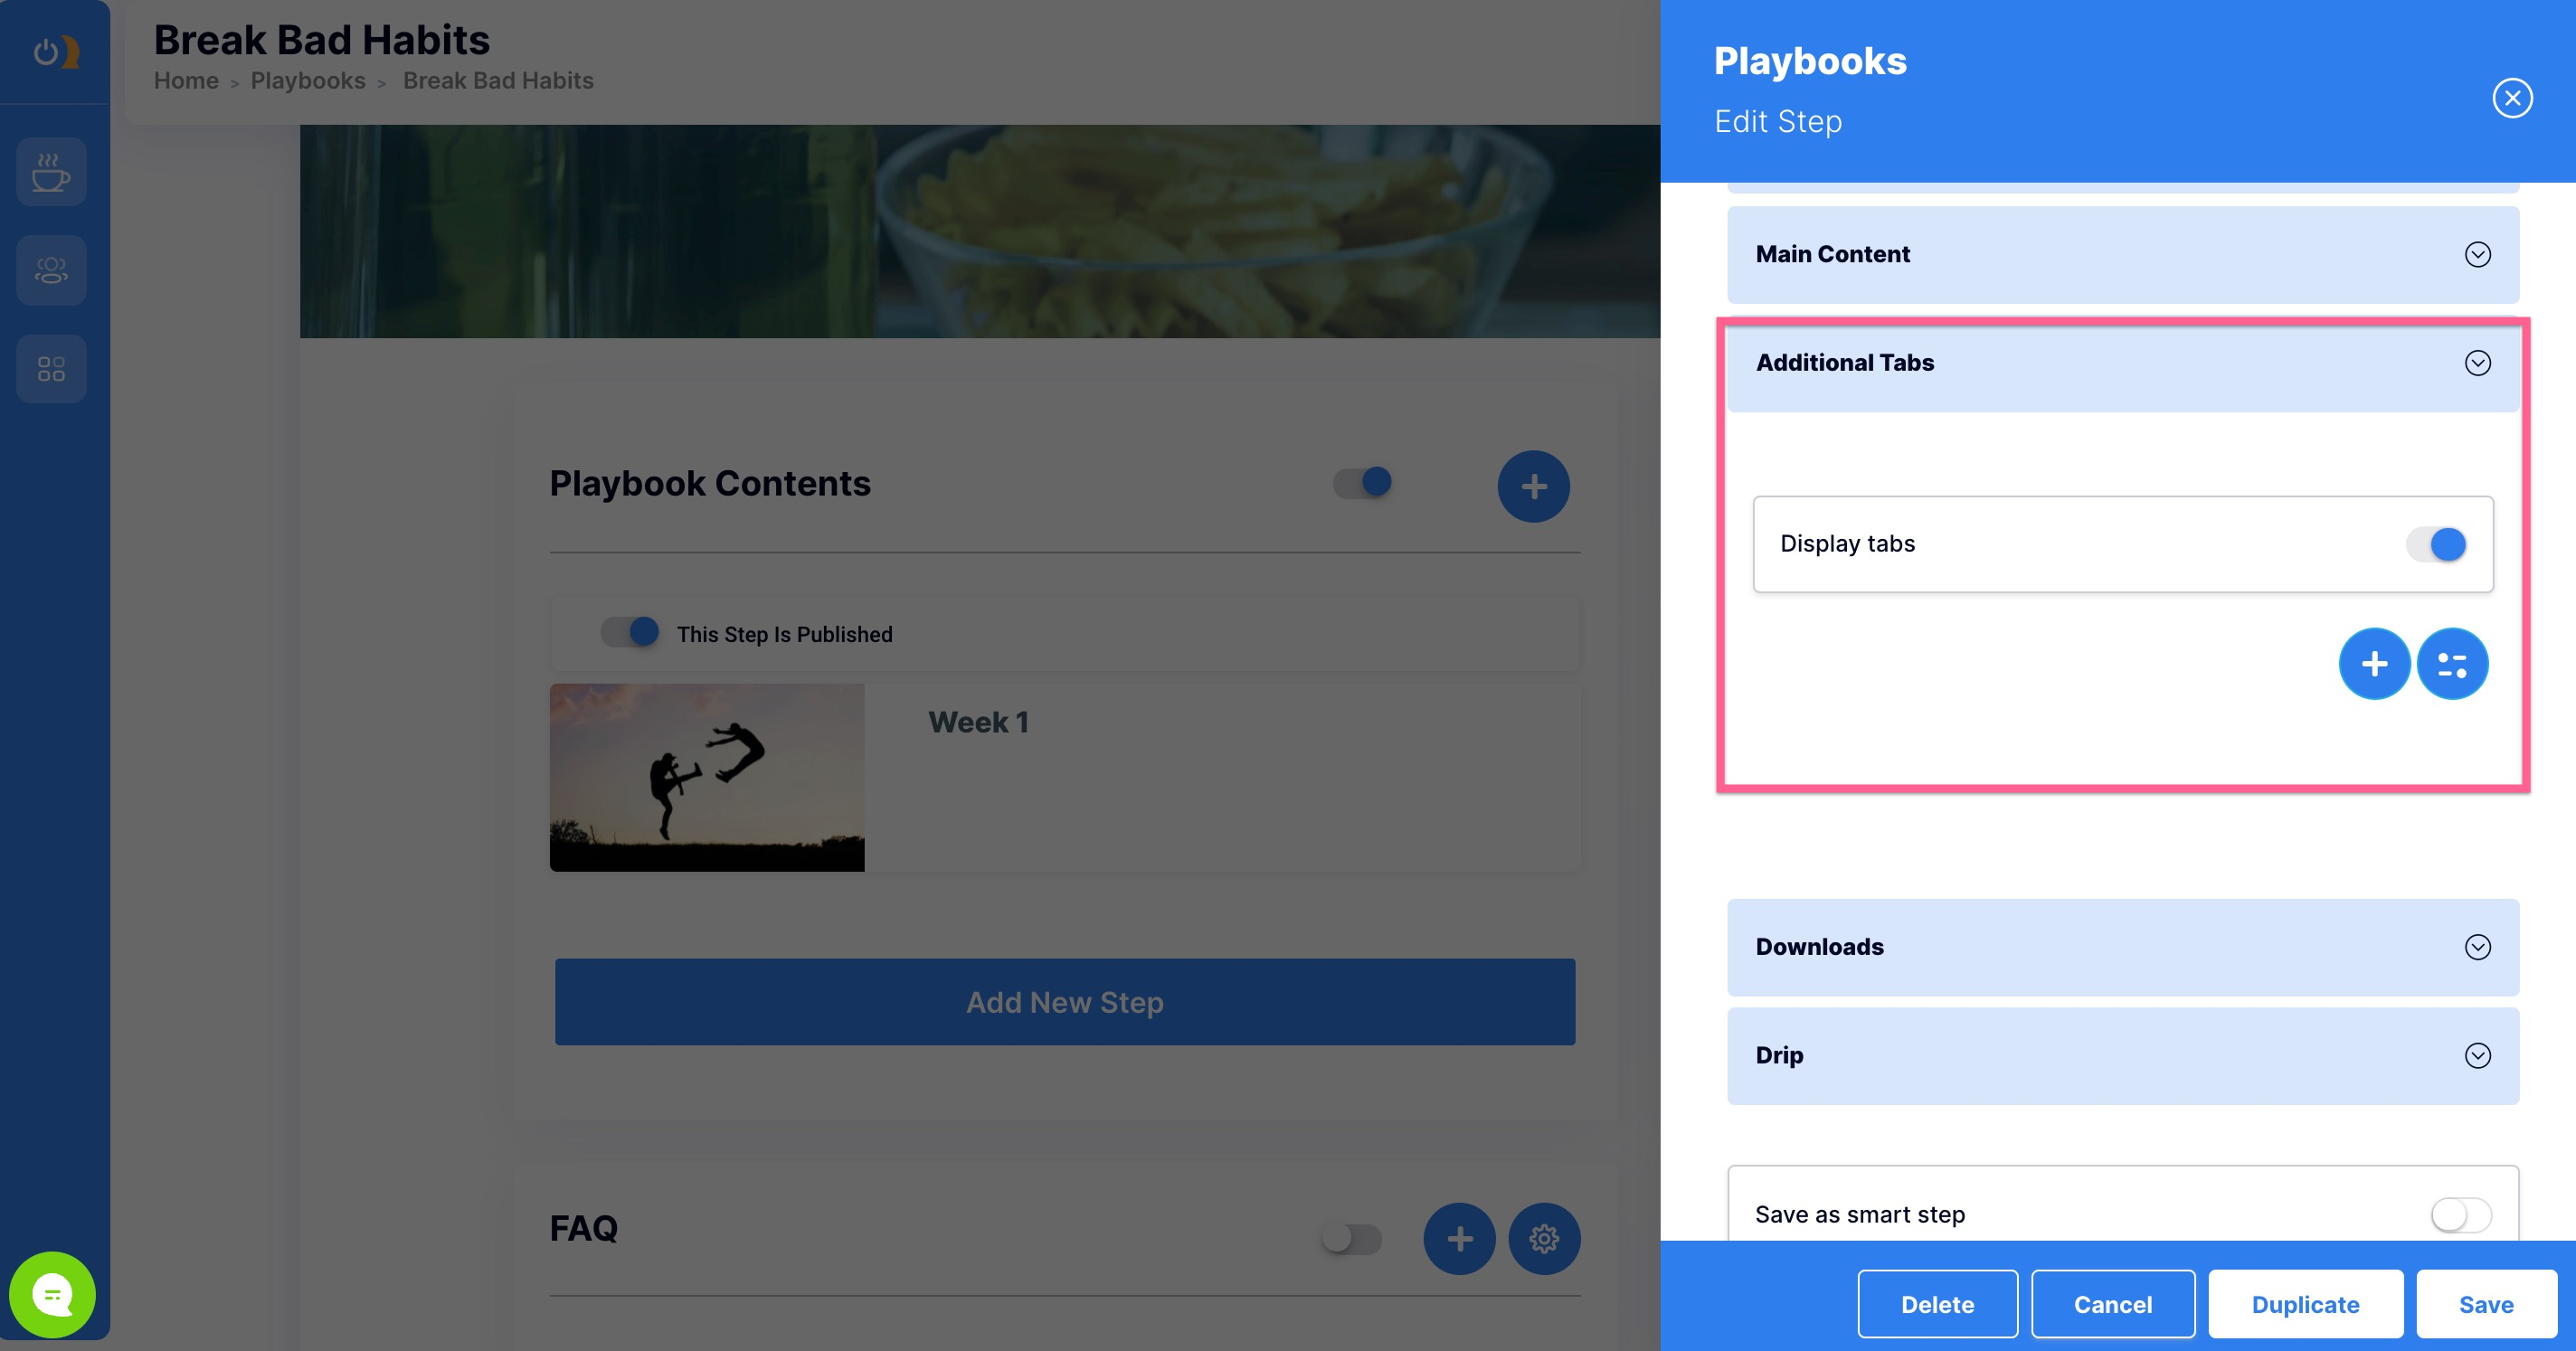
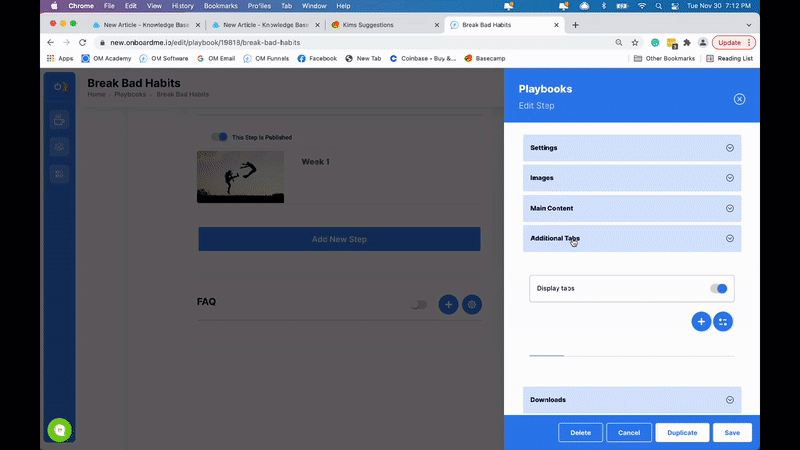
Additional Tabs: This is where you can add nested content to your main content.
- Add, edit, delete tabs
- Adjust tab styling and order
- Add tab content
(More detailed info on Tabs in the next section)
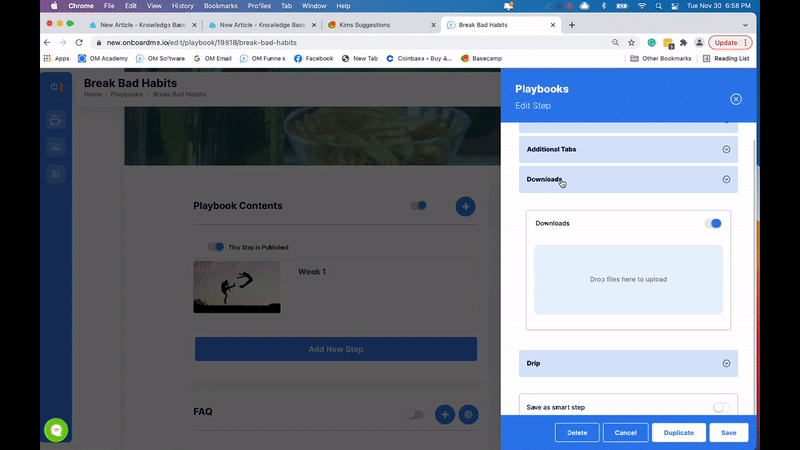
Downloads: This area allows you to add branded downloads to your playbook step in a special downloads area.
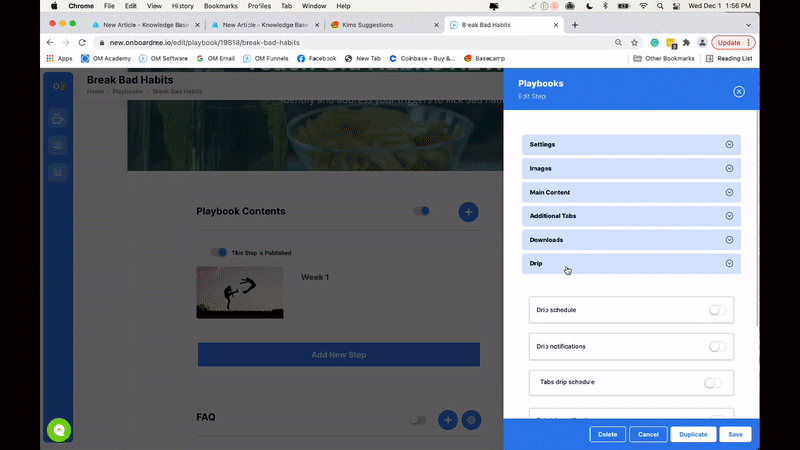
Drip: This allows you to drip out your main content and nested (tabs) content by time interval, or on specific dates.
Add Your Nested Playbook Content (Additional Tabs)
What are tabs?
Tabs are organized mini-lessons within a module or step.
Let's say your main step title was Keto Challenge Week 1 and it had a main video and outline covering the first week of the program
Your step tabs could be:
- Mindset
- Nutrition
- Workouts
- Recovery
- Tracking
These tabbed areas cover the more detail-oriented parts of the program
Tab creation and adding content to tabs
Creating tabs is simple. Just click Additional Tabs in your step editor, then use the plus sign to add your tab title (eg Mindset, etc.). Toggle the Display Tabs to the ON position in order to add content to your tab. You will find a message box within which you can type directly or pull saved content from your Library.
Adjusting tab styling to fit your brand
Customize tab bg color and text color above the message box and click "Apply to all tabs" if you would like all other tabs to automatically match these color choices. A congruent branding experience is vital for clients to easily navigate courses, communications, etc. but also subconsciously creates trust in your company.

Dripping your tabs
(still needs content)
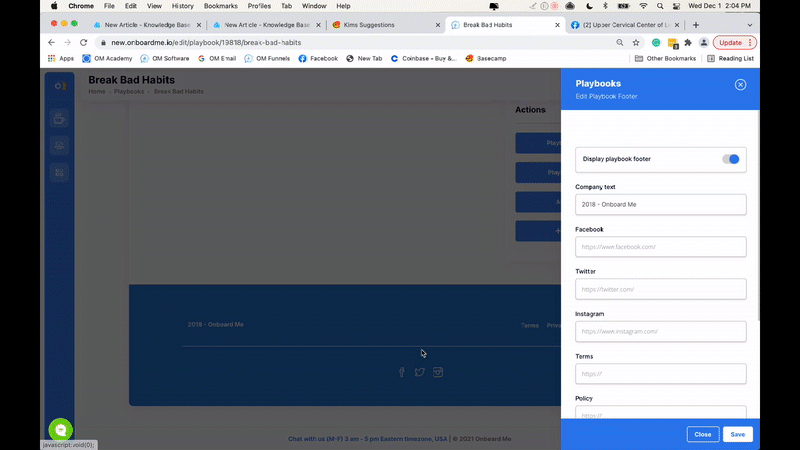
Set Your Playbook Footer
Your playbook footer is great for displaying your company name, copyright info, privacy policy, terms and conditions, and links to your various social media pages. You can also adjust the colors to match your branding. Most users set their footers in the saved styling area in admin settings so they can easily use the same footer colors/content for every playbook they create.
Footer visibility
Using the toggle on the top right of the footer you can easily update your footer's visibility to playbook visitors in real-time. This will reflect in real-time on your live published playbook.
Footer contents and styling
Your footer contains vital info about your company and can be used to build brand awareness and rank you higher in the search engines. Here is what you can display on your footer.
- Company name
- Facebook business page
- Instagram page
- Twitter page
- Privacy policy link
- Terms and conditions page link
You can also update your footer color and footer text color.
Making Quick Edits To Your Live Playbook
Easily edit your published live playbook by going to your dashboard and clicking the title of your playbook on the thumbnail. Once in the form editor just click the area of the playbook you wish to change, make desired changes in the service panel, and hit save.
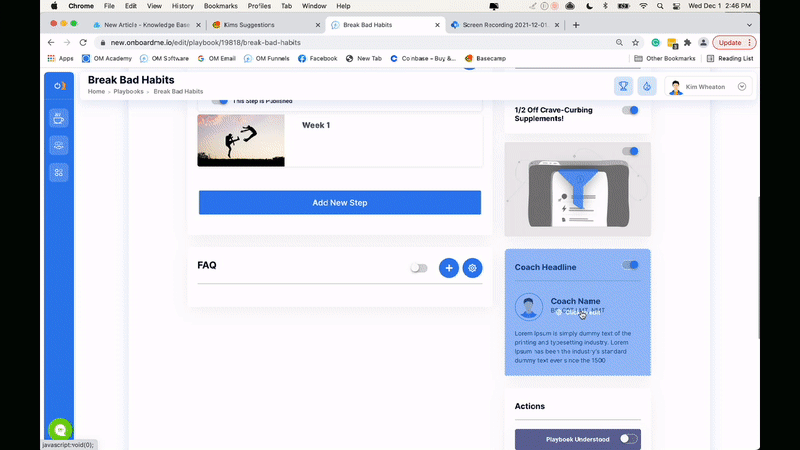
Set Your Playbook Sidebar Content
Step completed area
This will show the playbook subscribers which step they are on so they can gauge their progress at a glance
Example: Steps Completed 5/15
You can also update the color of the progress bar to match your company brand colors.
Playbook sidebar offer
This front-and-center area allows you to create a highly visible and attractive proposition related to your content. Example: If your playbook content gives away your famous keto recipes, your offer could be a 21-day keto challenge for $299 or an expanded keto recipe playbook you sell for $97.
Since your visitor is already consuming valuable content related to your products, they are much more likely to upgrade to your offer here, than if you emailed or pitched it directly.
For complete training on offers and free giveaway templates, click HERE
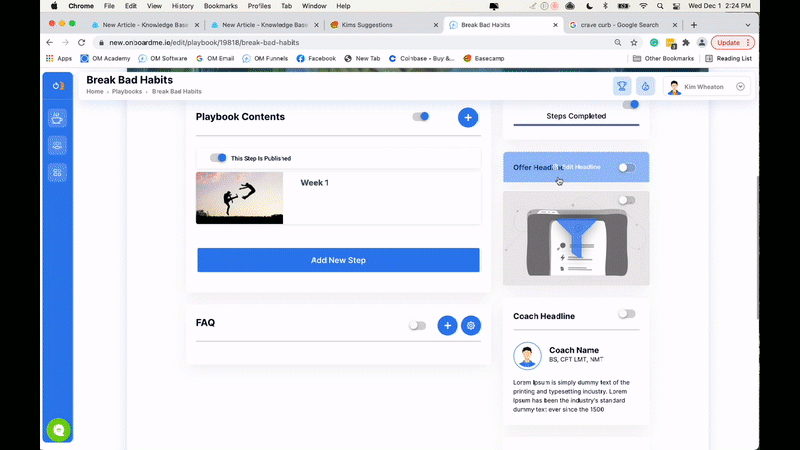
Playbook bio
In the book, Influence, by Robert Cialdini, he teaches about the triggers that cause people to act in predictable ways. One of these triggers is authority. He describes authority as "owning" space in your mind as being a credible expert. If your content is accompanied by your photo, testimonials about your keto-based coaching, and includes your credentials: MS, CPT, RD, and LMT, you will quickly garner trust and credibility in your prospect's mind.
Creating your bio is a breeze. It is also something that can be added to saved stying in your admin settings for biography consistency throughout all playbooks (admin settings > content settings > saved styling > playbooks > bio settings).
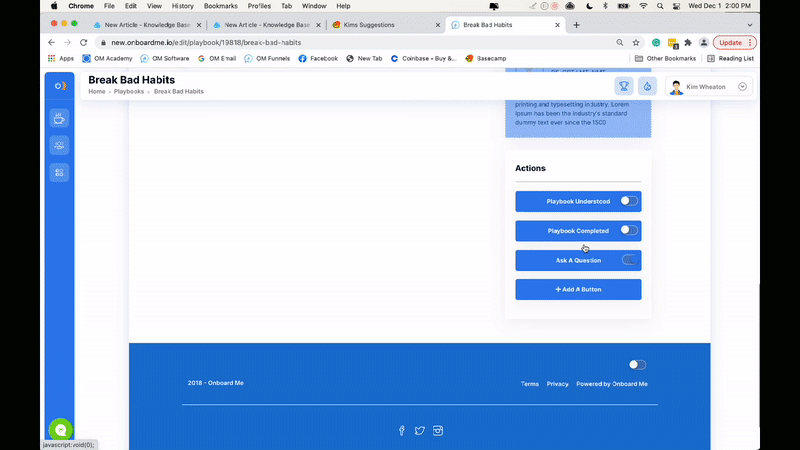
Action Buttons
Interested in adding more actions your clients can take as they work through your playbook? Now you can use our preselected action buttons. Add your own or edit ours to suit your needs.
Here is a short list of actions users often add:
- Join us live on Zoom - Just link to your Zoom join link
- Recipe guide - Link to your Recipes playbook
- Ask a question - Use our built-in ask-a-question feature
- Playbook understood - Use our built-in feature, notifying you that the client understands the course and has no more questions
- Playbook completed - Use our built-in feature, notifying you when clients complete their playbooks and that they are ready for the next step(s)
- Workout library - Link to your Workout Library playbook
- Book a call - Link to your call scheduler
- Get a pass - Link to your VIP Offer page
- Buy the upgrade - Link to an OM checkout page
- Schedule a class - Link to OM Scheduling booking page
- Book an appointment - Link to OM Scheduling booking page
How to edit your buttons
Step 1) Adjust visibility toggle
Step 2) Change button name and color to match your brand and goal
Step 3) Add your desired URL in the link area
Step 4) Save and preview

Preview Your Playbook
At any time during your editing process, you can preview your saved playbook by navigating to the top of your playbook editor and sliding the preview toggle to the right.
You can preview what your playbook will look like to visitors on:
- Desktop
- Tablet Portrait
- Tablet Landscape
- Phone portrait
- Phone landscape
To go back to edit mode and make a quick change just slide the toggle back to the left.
Give Contacts Access To Your Playbook Manually
There are 4 common ways to give contacts access to a playbook manually
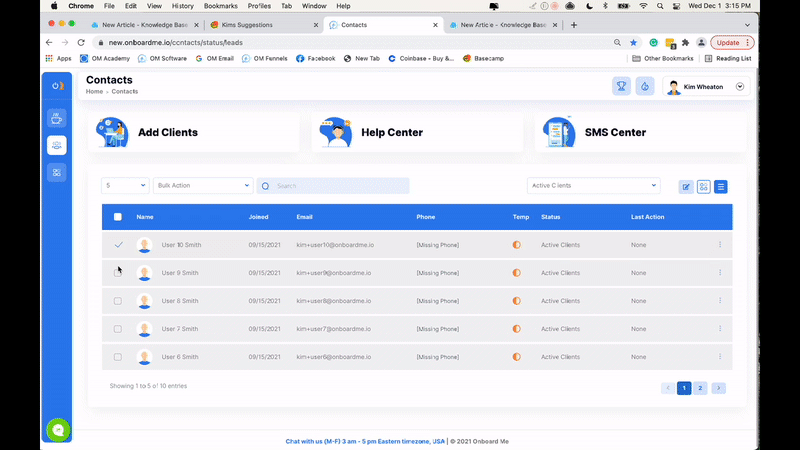
1) Use the launch pad in your contact center
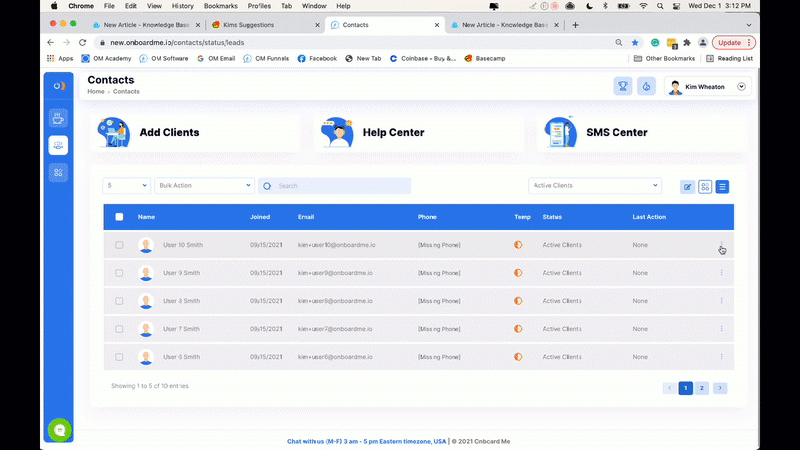
2) Use the bulk action menu in your contact center.
3) Use the add contacts feature on your playbook thumbnail.
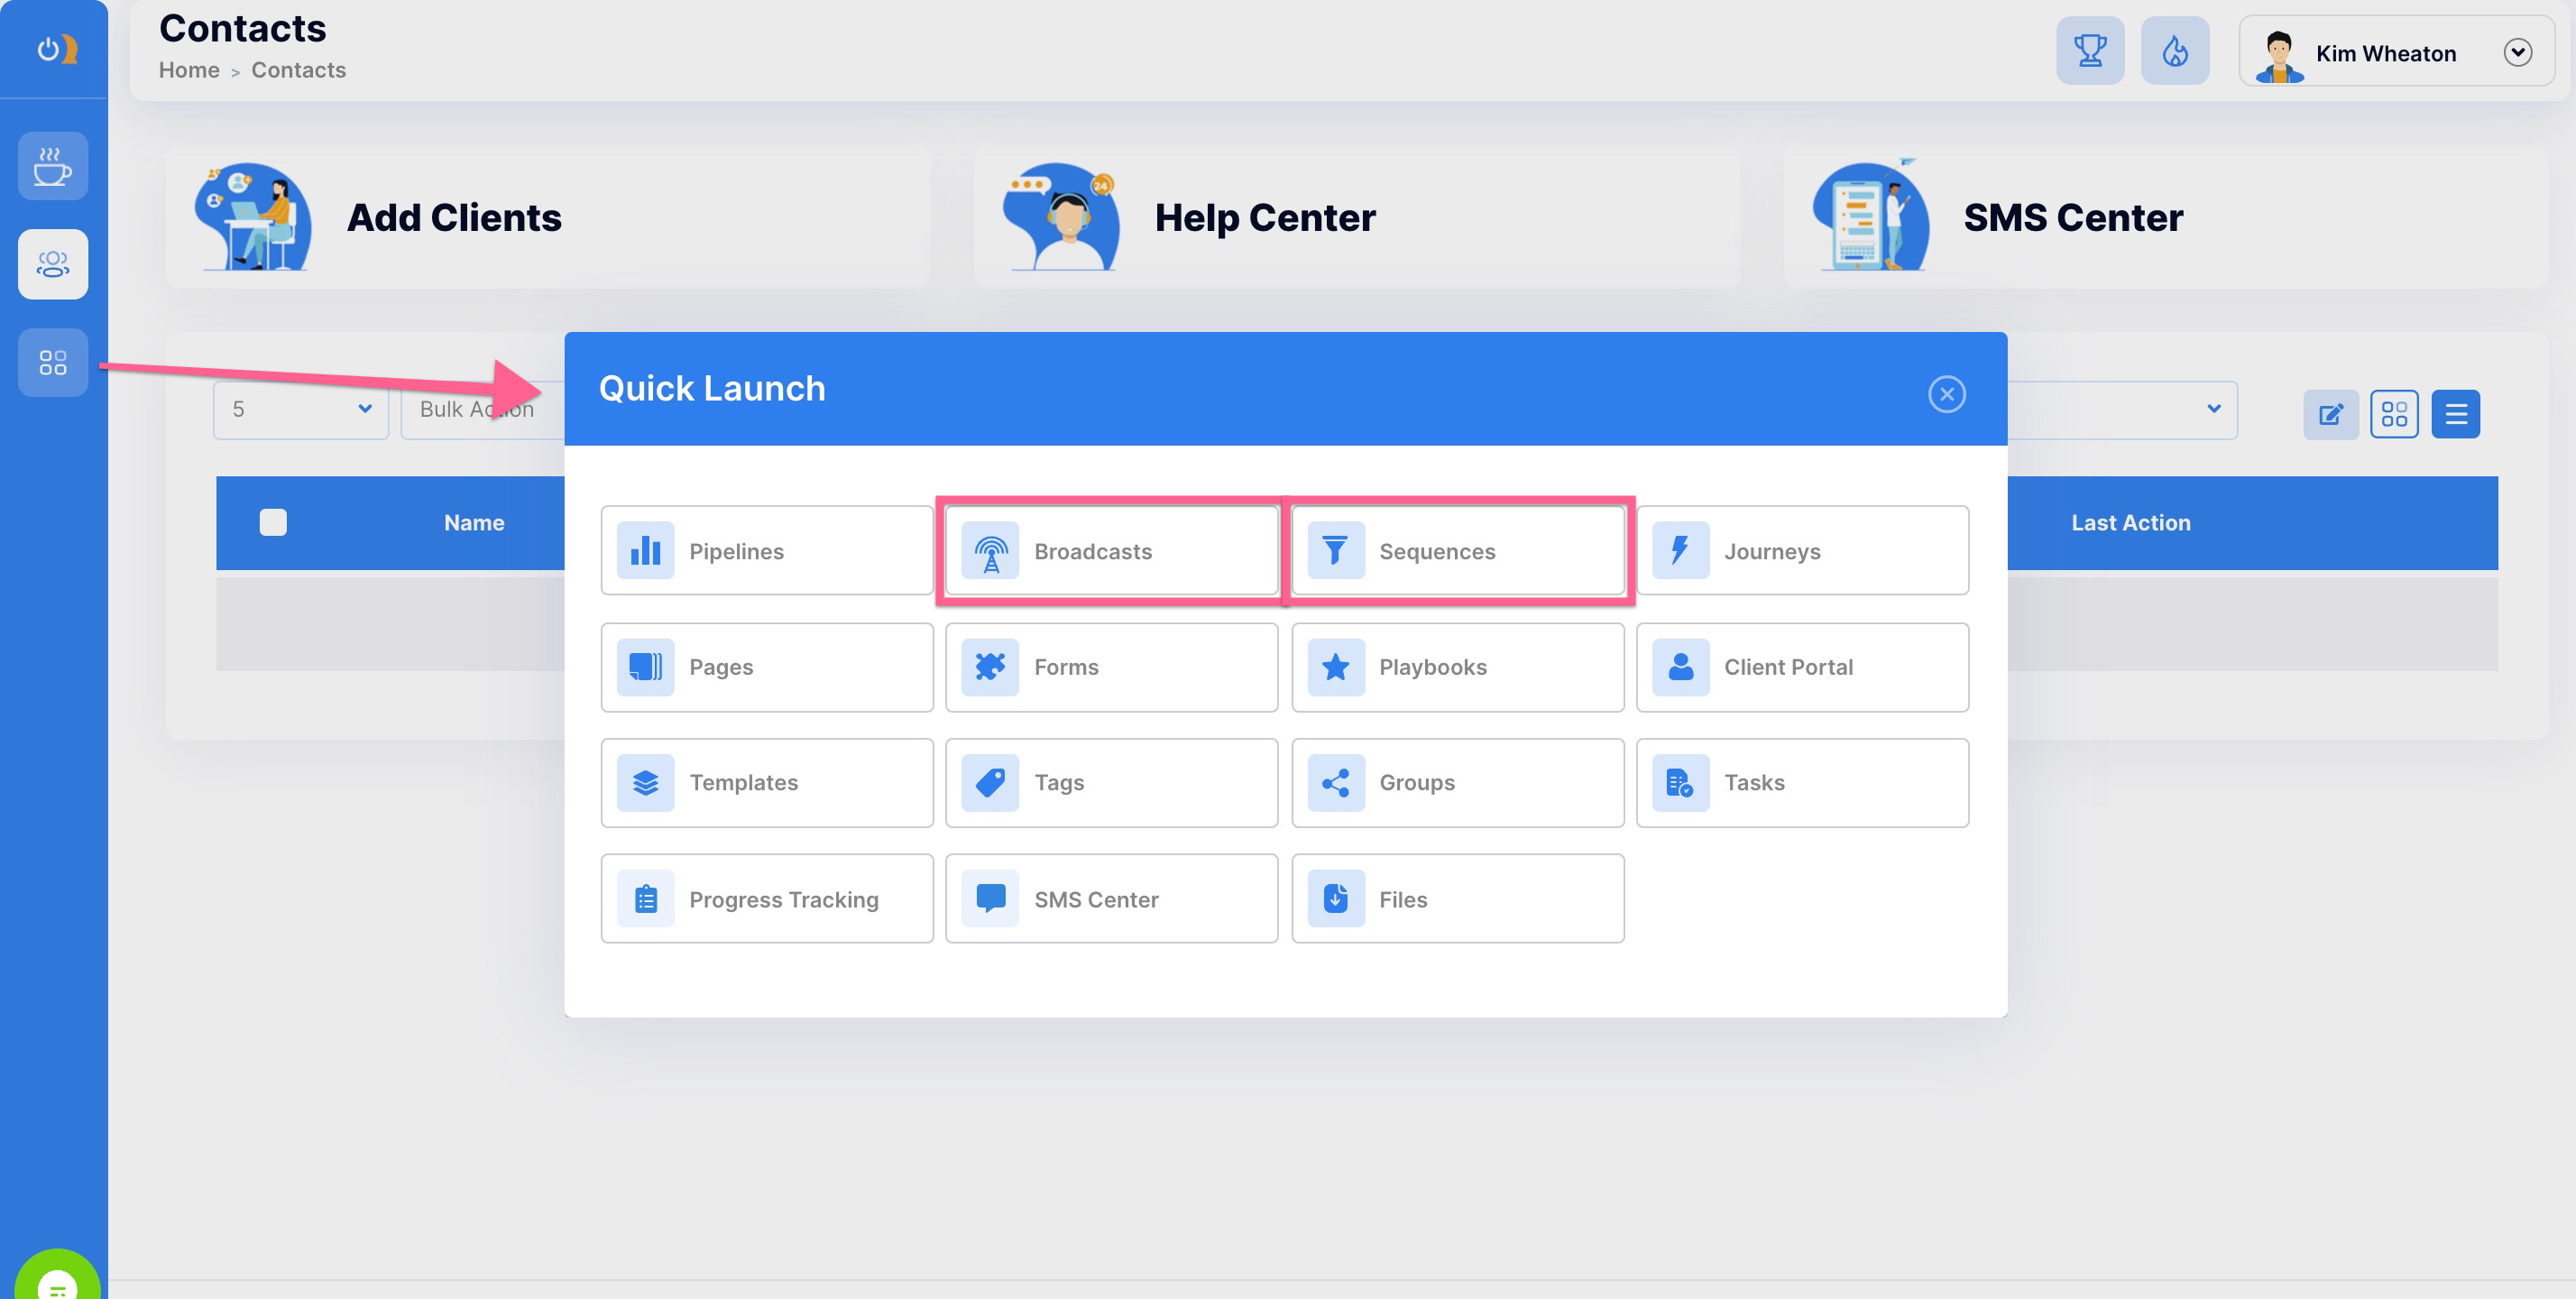
4) Email your playbook sign-up form link to your list using the broadcasts or sequences feature.
Give Contacts Access To Your Playbook Automatically
This can be done using the Journeys feature and in your journey by adding "Send a form" from the actions menu.
A complete journeys tutorial can be found HERE.
To assign a playbook automatically:
1) Add Assign a playbook as one of your journey actions steps
2) Adjust your delays so the playbook is assigned at the desired time interval or date
3) Adjust your conditions if you desire to add if/then logic to your rule.
4) Save or update your journey
Troubleshooting Playbook Issues
To be added as needed.