Everything You Need To Know About Admin Settings
Welcome to Admin Settings!

Learn about the customizations, standard settings, and advanced settings.

Common Use Cases For Admin Settings?
Here are some common use cases for admin settings:
- Account Details
- Member ID's
- Reports & Schedules
- Integrations
- Rewards
- Birthdays
- Contacts
- Swipe File Import
- Content Settings
- Email Settings
- Kill Switch
Account Details
How to update your organization details
1.Go and navigate to your Admin Settings.
2. On the Account details section, click Primary Location.
The new Organization Settings Drawer will then pop up.
3. On the Details Tab, you can add, remove or change the following:
- Organization Logo
- Organization Name
- Owner First and Last name
- Address
- Mobile Number
- Business Phone number
- Website
4. On the Settings Tab you can do the following:
- Turn the toggle that lets your Users see all contacts on/off
- Allow/restrict organization access to your users.
- Set the recipient number for organization notifications
- Set timezone of your organization
- Set the FROM email address for outgoing emails
- REPLY to email address
- Organization Currency
5.On the Advanced Tab, you can:
- Access the API Key
- Turn the Mail Subscription toggle on/off

Navigating through the new Location UI
The new Locations Settings allows easier access to your location details, settings, and API integrations.
1.Go and navigate to your Admin Settings.
2. On the Account details section, click Locations
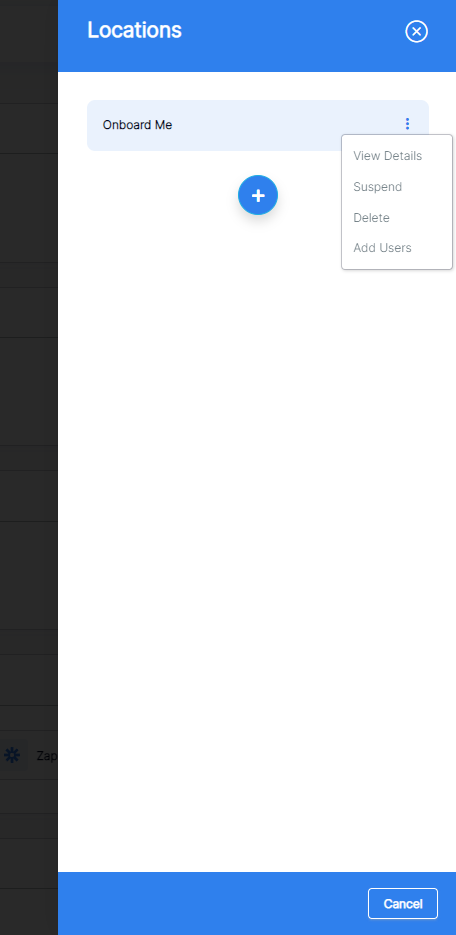
The new Locations Drawer will then pop up.
4. Right off bat you can either:
- Create a new location by clicking the blue ADD button below.
- Access the settings menu of an existing location
- Suspend an existing location
- Delete an existing location
- Add users to an existing location
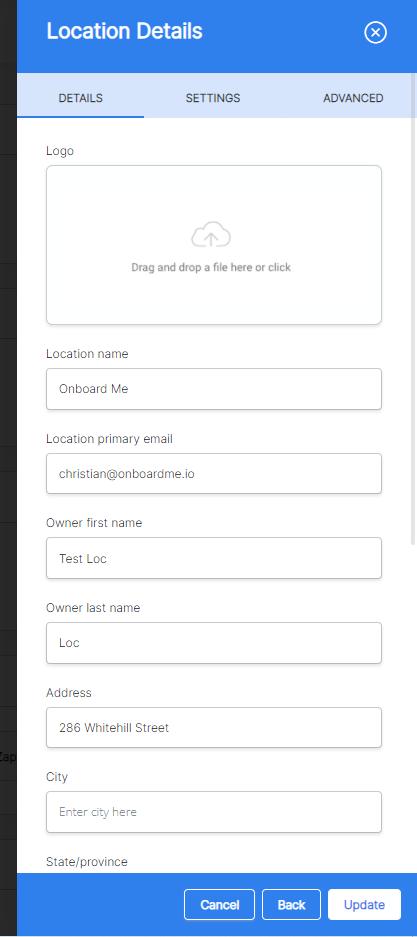
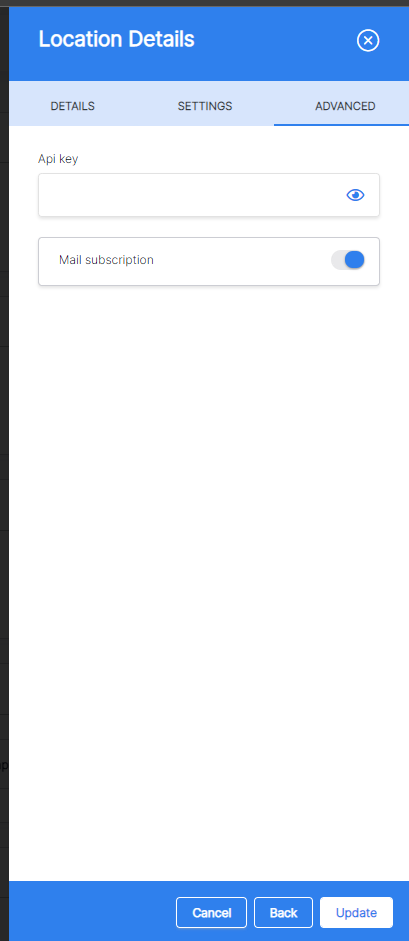
The Location Details drawer is divided into three tabs: Details, Settings, Advanced.
5. On the Details Tab, you can add, remove or change the following:
- Location Logo
- Location Name
- Location Primary email
- Location Owner First and Last name
- Location Address
- Location Mobile Number
- Location Business Phone number
- Location website
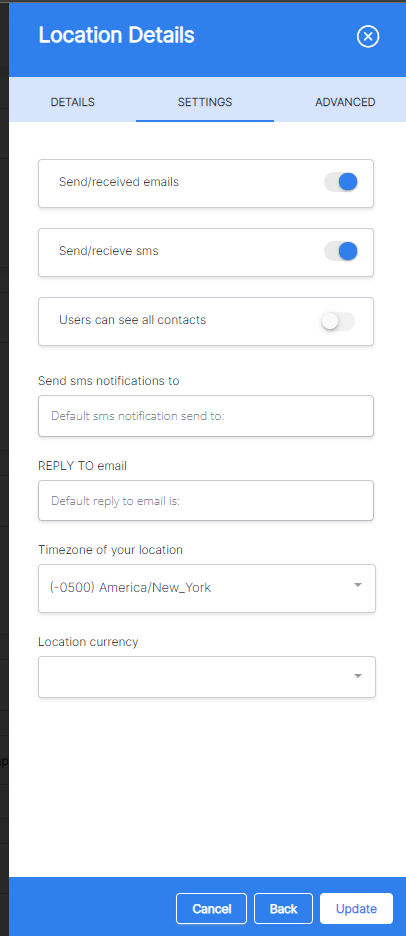
6. On the Settings Tab, you can do the following:
- Turn the Send/Receive toggles on/off for Emails and SMS
- Allow users access to see all the contacts by turning the toggle on/off
- Set the recipient number for organization notifications
- Set the timezone of your location
- Set the REPLY to email address
- Set the Location Currency
7. On the Advanced Tab, you can:
- Access the API Key
- Turn the Mail Subscription toggle on/off
How to add a new location
Go to account details click the Additional Locations button.
Update your Locations Details, Settings, and Advance options.
Location Details:
- Update business logo
- Enter a location name and location primary email address
- Enter the owner name and location complete address
- Enter the location phone number and website URL
Location Settings:
- Enable/disable email and sms notifications
- Update the location timezone, currency
Location Advance Settings:
- View your API Key and Mail subscription Notification

How to suspend location
Under the locations section, select the name of the location and click the three dots and click suspend.
How to delete location
Under the locations section, select the name of the location and click the three dots and click delete.

How to assign contact to your location
Under the locations section, select the name of the location and click the three dots and click add users.
Lastly, select the name of the user and click save.
How to add a new user
Under account details, click users.
- Click add new user icon
- Select user type and search the name of the contact
- Lastly, configure the user feature access permission and click create.
How to enable white label
Under account details, click white label.
- Enable/disable white label option
- Enter your business name
- Enter website url (optional)
- Click save

How to enable custom domain
Under account details, click white label.
- Enable custom domain
- Click the plus icon and enter domain name. (ex. mycompany.com without http or https)
- Select client portal and save
- Please add the CNAME record: member-host.onboardme.io to your DNS record through your domain provider then click Verify Domain button.

Member ID's
How to configure your ID Dashboard

How to access your ID List

Reports & Schedule
How to access your Email Reports
Accessing your email logs is really simple.
How to access your Schedule Email and SMS

Integrations
How to integrate with Twilio
In your admin settings, go to integration section and click twilio. Lastly, enter the following details:
- Twilio Account SID
- Twilio AUTH Token
- Twilio Number
Make sure you enable the connection.
How to configure your Twilio Notifications
You can turn on and off your twilio notification. Watch the guide below.
How to integrate with Unbounce
In your admin settings, go to integration and click unbounce.
- Create a new tag or select an existing tag.
- Click the generate button to get your webhook.
- Grab the webhook and paste it to your unbounce account.

How to integrate with Fit Funnels
In your admin settings, go to integration and click fit funnel.
- Enter a webhook name
- Create a new tag or select an existing tag.
- Click the generate button to get your webhook.
- Grab your webhook and paste it to your fit funnel forms
How to integrate with Mindbody
In your admin settings, go to integration and click mindbody.
- Enter your mindbody studio id
- Click connect button

How to integrate with Zen Planner
In your admin settings, go to integration and click zen planner.
- Log in to your Zen Planner account In the menu toolbar (on the left side), click Setup.
- Go to the External services section and click on "Web Hooks".
- Enter https://new.onboardme.io/zen/planner in the "Web Service Url" field in "People" row.
- Enter the generated code in the "Account Id" field.

How to integrate with Zapier
In your admin settings, go to integration and click zapier.
Note: If it is your first time to connect to zapier copy and paste the invitation url in to a new tab: https://zapier.com/developer/public-invite/69414/0acdd28f6d18ed7d48ea69765a411e9a/
- Create or select existing tag
- Click generate button
- Copy the generated token and paste to your zapier webhook section

Rewards
How to configure your Rewards Points Name
In your admin settings, go to rewards and click points name.
- Enter your rewards points name
- Click save

How to configure your Rewards Currency
In your admin settings, go to rewards and click rewards currency.
- Enter your currency points
- Click save

How to configure your Rewards Notifications
In your admin settings, go to rewards and click notifications.
- Enable/disable awarded notification
- Enable/disable redeem notification
Birthdays
How to configure your Birthday Settings
In your admin settings, go to birthdays and click birthday settings.
- Enable/disable birthday settings
- Update your email notification
- Update timezone
- Click save
How to view your contacts Upcoming Birthday List
In your admin settings, go to birthdays and click birthday list.

Contacts
How to add contacts in your admin settings.
In your admin settings, go to contacts and click add contacts.
Learn more about uploading contacts here:
https://help.onboardme.io/article/313-step-2-add-your-contacts-to-onboard-me

How to configure tabs in your admin settings.
In your admin settings, go to contacts and click tabs.
Learn more about setting up your tabs here:
https://help.onboardme.io/article/323-step-2-create-your-contact-tabs

How to move contacts.
In your admin settings, go to contacts and click move contacts.
How to view your duplicate contacts.
In your admin settings, go to contacts and click duplicate contacts.
How to merge your duplicate contacts.
In your admin settings, go to contacts and click duplicate contacts.
- Select the contact name
- Click merge
How to export your contacts.
In your admin settings, go to contacts and click export.
- Select tabs, groups, or tags
- Click export

Swipe File Import
How to import your csv.
In your admin settings, go to swipe file import and click csv.
- Select the csv file
- Click import

Content Settings
How to create a button.
In your admin settings, go to content settings and click buttons.
- Enter a button name
- Enter a button text
- Select button action (internal link, download file, or external url)
- Configure button color, background, width, position, style, size, paddings
- Click save to complete
How to configure default asset styling.
In your admin settings, go to content settings and click saved styling.
- Select the assets that you want to style (Playbook, Pages, Forms)
- Configure your header settings
- Configure your cover settings
- Configure your bio settings
- Configure your action buttons
- Configure your progress settings
- Configure your footer settings
Email Settings
How to configure confirmed opt-in.
In your admin settings, go to email settings and click confirmed opt-in.
- Enable/disable your confirmed opt-in option
- Enter your mobile number and request access key
- Enter the access key that is sent to your email.
- Click save
How to create your email signatures.
In your admin settings, go to email settings and click signature.
- Enter your signature name
- Configure your brand bar settings
- Configure your bio settings
- Configure your social media settings
- Click save
How to configure your recovery page.
In your admin settings, go to email settings and click recovery page.
- Update your page headline and sub headline
- Update your button text and color
- Enable/disable security link image
- Click save
How to view your suppression list.
In your admin settings, go to email settings and click suppression list.
- Click Bounces, Complaints, or Unsubscribes Tabs
- Click the name of the contacts and send sms
How to configure your custom email domain.
In your admin settings, go to email settings and click domains.
- Add domain (ex. theonboardme.io )
- Add email address (ex. admin@theonboardme.io, support@theonboardme.io)
- Verify Domain by updating your DNS Settings (TXT records, MX records, CNAME record)
- Activate Your domain
Kill Switch
How to disable email sending.
In your admin settings, go to kill switch and click email status.
- Enable/disable Email Sending
How to disable sms sending.
In your admin settings, go to kill switch and click sms status.
- Enable/disable SMS Sending