


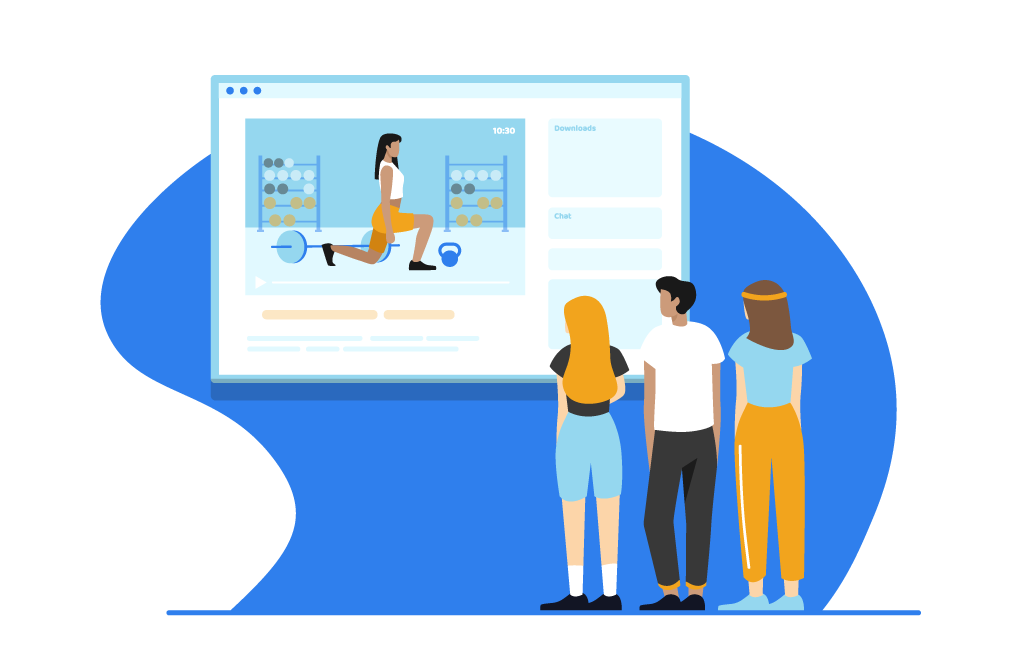
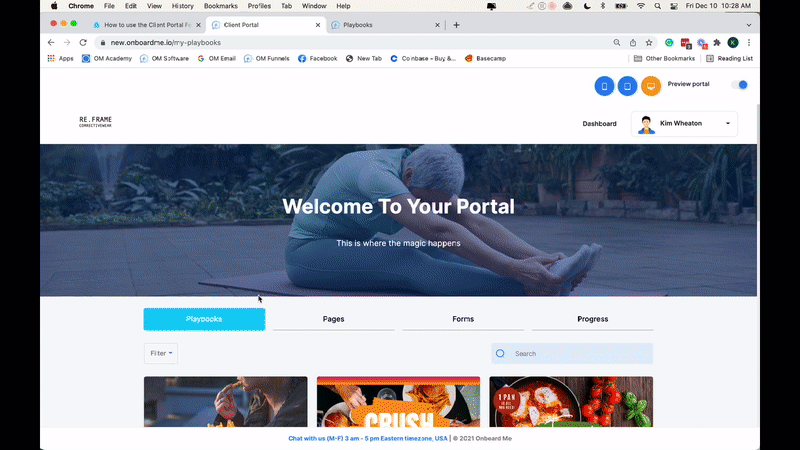
What Is A Client Portal?
Welcome to the client portal! This is a designated login site or "home base" for each client within your business. Use this area as a dropbox where you can collect progress statistics or intake forms/waivers. Provide additional value by sharing workouts, challenges, recipes, and more. Completely customizable, this platform will create a deeper level of trust and commitment from your clients, who will grow to depend on its supply of resources and directives.
Quick Training Links
- Common Use Cases For Client Portal
- Creating Your Client Portal
- Adjust Portal Settings
- Preview your Client Portal
- Client Experience
- Commonly Asked Questions
Common Use Cases For Client Portal
- Playbooks/tutorials
- Educational content
- Opt-in pages
- Newsletters
- Shared files
- Challenge tracking
- And so much more!
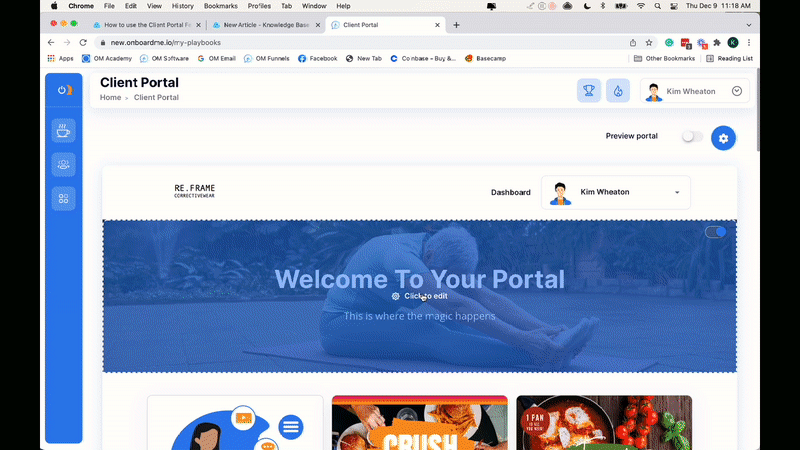
Creating Your Client Portal
Setting up the portal is fun! Simply click Client Portal in your Quick Launch options. Then, click on each section of the editor to customize content and styling. The toggle feature is available as you hover over the cover and footer section; click these ON or OFF, depending on whether you would like these sections to be visible to clients.
Set up your header:
Click within the header section to access the service panel, where you can update: company name, title, background/text color, logo image, and author information. The color and text styling can be entered manually or pulled from your saved settings (admin settings > content settings > saved styling).
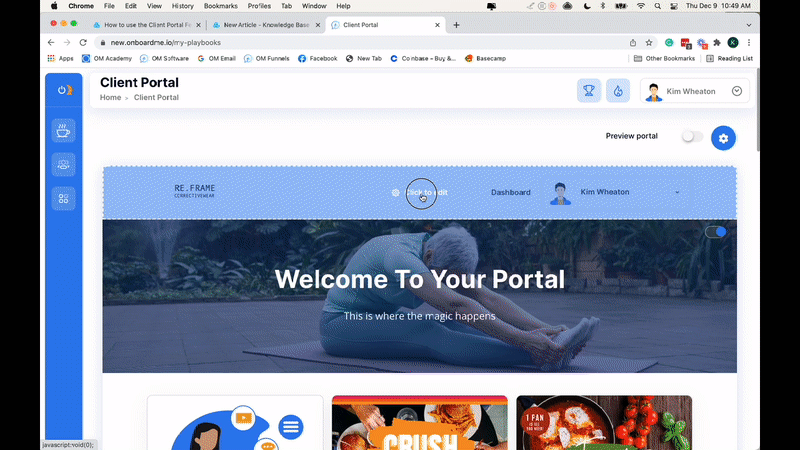
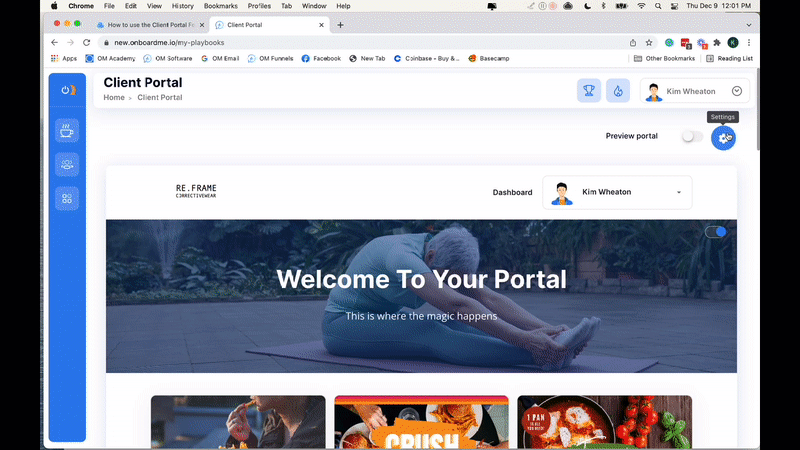
Set up your cover:
Design the main area of your client portal here. Choose whether or not you would like an image, text, or both, your headline/sub-headline, the size, and overlay color/opacity for a portal that is unique to your brand.
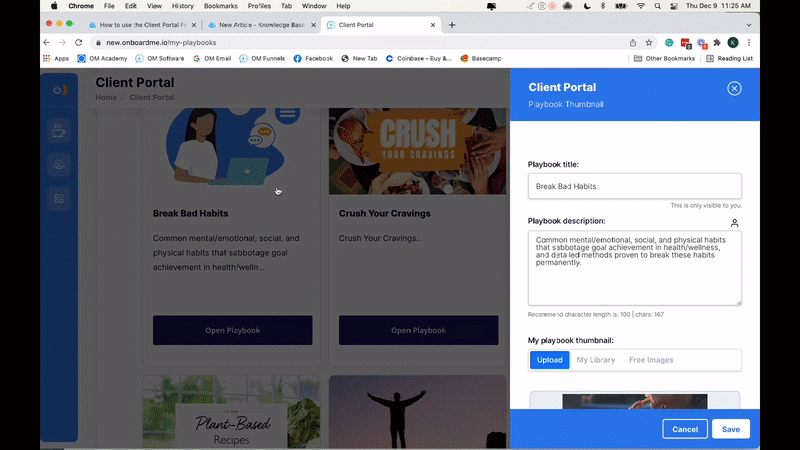
Update playbooks styling:
Once your playbooks have been uploaded, you may have to update their details and colors. To do this, simply click on each thumbnail and make updates within the service panel.
Set up your footer:
Click within the footer to customize this section. Update company text and add social media URLs for clients to directly access from their portals. You can also use the footer to add links to your company terms and conditions or policies. As with the header, your styling can either be inputted manually or pulled from your saved settings (admin settings > content settings > saved styling).

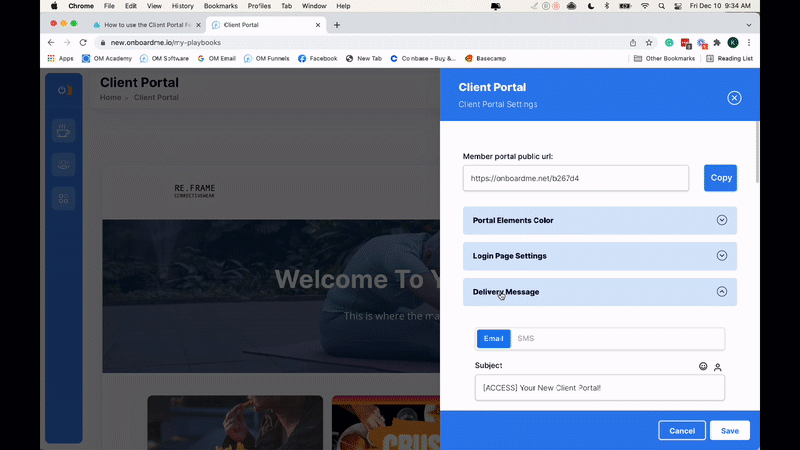
Adjust Portal Settings
To adjust the deeper settings of your client portal, go to the gear icon in the top right corner of your screen. You will immediately see the member portal public URL. Use this as you see fit.
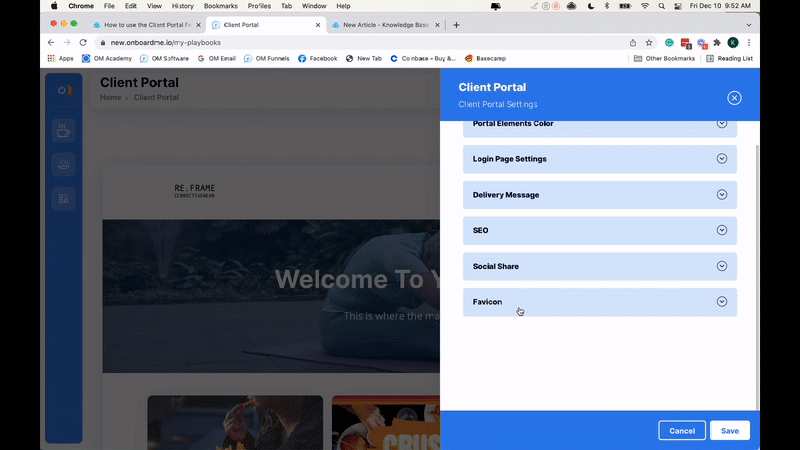
Portal elements styling:
Within your client portal preview mode, you will see your "elements" styling in the Playbooks, Pages, Forms, and Progress (tracking) tabs. Clicking on each tab will highlight that tab in the color you've chosen for your elements. Eements within each tabbed section will also be styled with this color.
Login page settings:
Click the Login Page Settings to customize this page. Here, you can choose a login image and select the text, text color, and background color of your message and button.
To add a personal video to your client portal login screen, click the thumbnail toggle to the ON position and embed or add a video link.
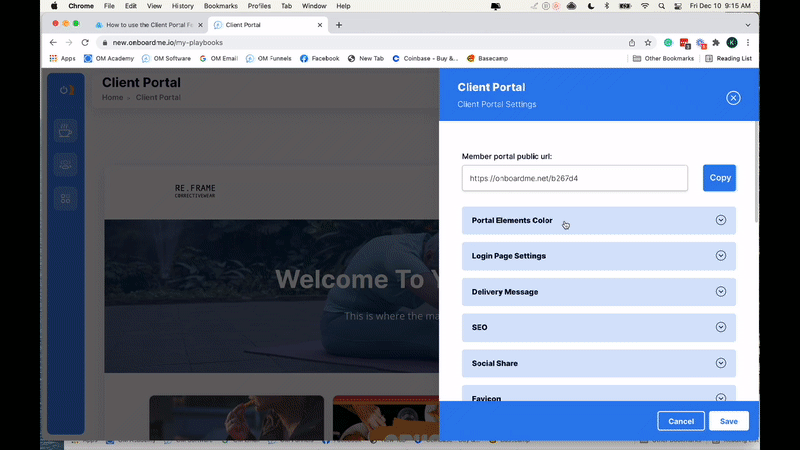
Delivery message:
Your delivery message introduces clients to their portals, supplies a username and password, and includes a brief agreement at the bottom. Feel free to add content to this message, but we suggest keeping the main elements in place as they are formatted for deliverability and provide basic user information. Your branding and company signature will help clients recognize this message and read it thoroughly.
Side note: If clients lose their passwords or wish to change them at any time, there is a "forgot password" link on the client portal login page. Following directions here will allow them to create a personalized password.
SEO:
In the SEO area, you can update your portal title tags, add keywords, and meta descriptions that search engines, like Google or Bing, can use to index your pages for better rank on inbound searches. Conversely, you can also turn off your search engine visibility if you don't want your page to be found by searches.
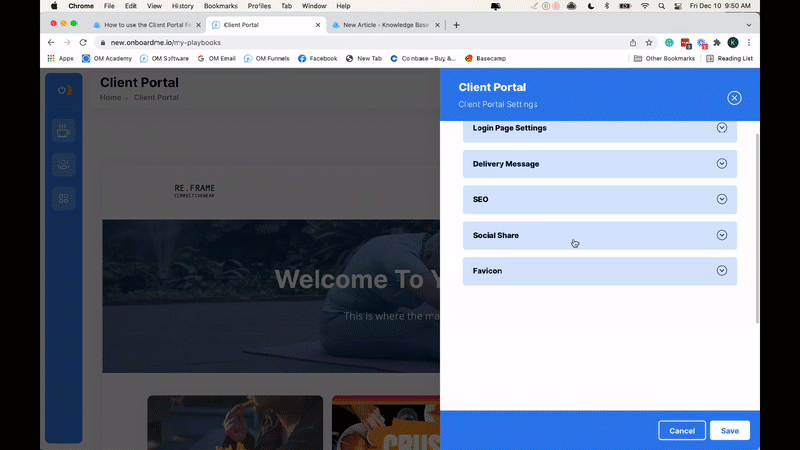
Social share:
Sharing a link to your portal page on social media is a fantastic way to get exposure to your business or brand. In these settings, you can upload a custom image and headline that will show up if you post a link to your page on a social media platform like Facebook, Instagram, or Twitter.
The recommended size for a social share image is 1200 x 630 and sites like Canva have many pre-made templates you can use to easily design a shareable image.

Favicon:
A favicon is a tiny image, present on the browser tab of any open web page. It helps visitors see which tab they are in by the image or logo associated with your business. Favicons can be updated here. The recommended image size for the favicon is 64 x 64 pixels.
Preview your Client Portal
Toggle the preview feature ON to view your login page and client portal from the client's perspective. Desktop, tablet, and mobile views are available, and orientation can be adjusted to ensure your portal pages are aesthetically pleasing on all devices.
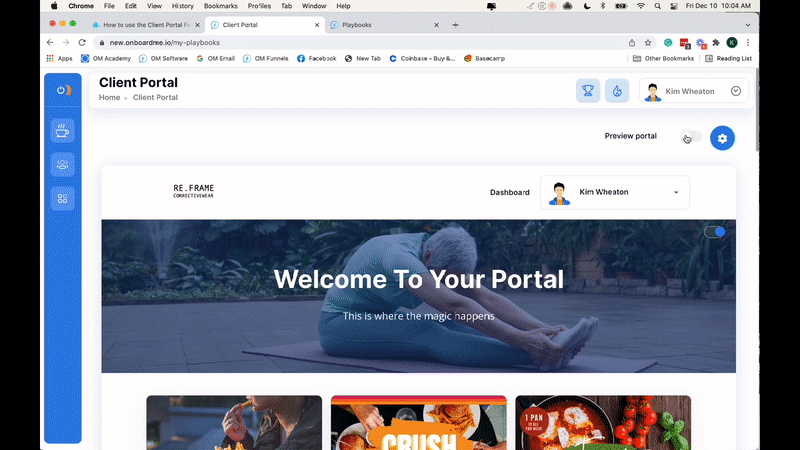
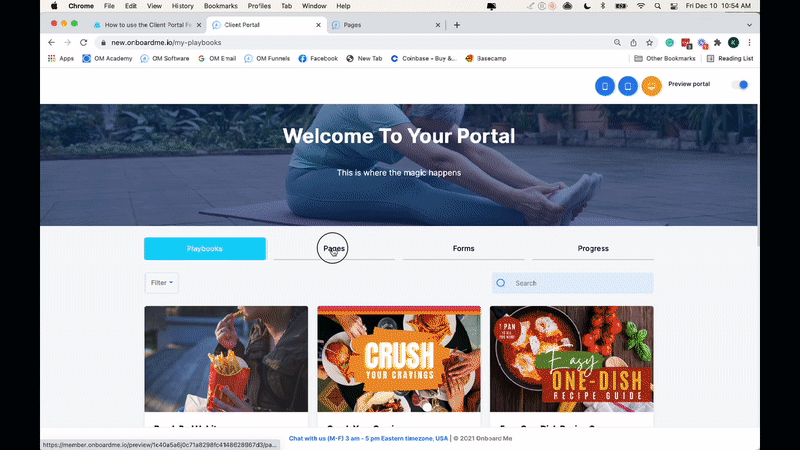
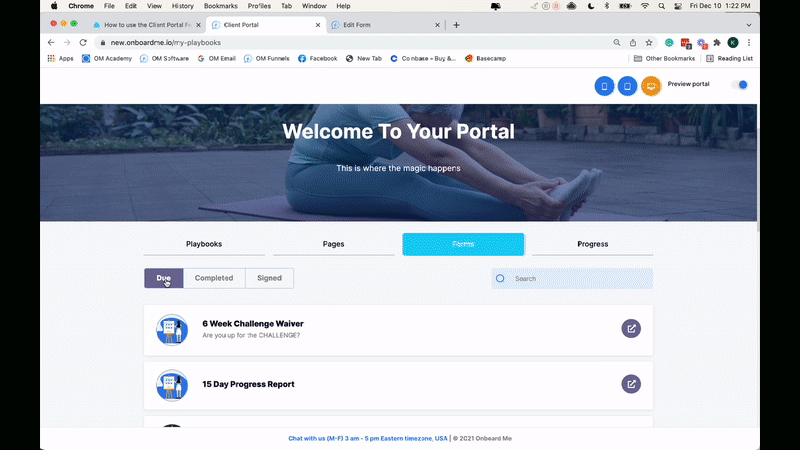
Client Experience
Within the portal, your clients will see your branded portal page with 4 main tabs: Playbooks, Pages, Forms, and Progress.
Playbooks Tab:
To sort through assigned playbooks, clients will use the drop-down "filter" menu and select a smart category. Smart Categories are created by you, the owner, within the Playbooks feature.
For a playbook to be accessible to a client in the portal, the playbook would have to have been assigned to a smart category (playbook editor > advanced settings > playbook categories) AND assigned to that client (playbook thumbnail MORE options > assign contacts).
Pages Tab:
Under the pages tab, clients will be able to click either Private (to access pages only available within their portal) or Public (to access pages available on the internet but also here for their convenience). The public and private settings are set within page editors (page settings > make private toggle ON or OFF > save).
Forms Tab:
The forms tab organizes client forms into those due, completed, and signed. You can set your form requirements within the form's editor. The "Questions Completed" sidebar toggle should be turned ON to require completion of forms before they can be submitted. The Settings tool can be used to set signature preferences (settings > optin settings > signature required ON).
Progress Tab:
The progress tab is another interactive area, where clients can upload progress pictures, add progress details, and more. Before they begin, they will be required to set their goals. Your progress scenario will take it from there!
![]()
Commonly Asked Questions
1. How do I send clients their Client Portal login details?
Just assign any playbook, form, progress tracker or page to your clients. An email will automatically be sent to your clients containing their login details.
2. How can I resend my clients' password?
Go to a playbook your client is assigned to, then click the number of members assigned below the playbook title. Look for the client's name, then click on the envelope icon that says Resend login details.
3.Can a client see everything on their client portal?
Clients will only see the assets that you assign to them.
4. How can I check what a client sees on their client portal?
You can check the client portal from your client's perspective by clicking on their name on your contacts dashboard, then go to the Emails Sent tab. Look for the delivery message for their Client Portal login, and then click the automatic login link.