What Are Tasks?
Welcome to Tasks! As you may have guessed, tasks are a compilation of work to be done. These can be assigned to whomever you wish, and stored within the Tasks dashboard for easy access.
Quick Training Links
- Common Use Cases For Tasks
- Your Tasks Dashboard
- Tasks Dashboard Functions
- Create A Task
- Give Contacts Access To Your Tasks Manually
- Give Contacts Access To Your Tasks Automatically
Common Use Cases For Tasks
- Employee checklists
- Specific contractor or staff projects
- Personal tasks you wish you keep track of
- Keeping coaching clients accountable
- Creating success maps for clients
Your Tasks Dashboard
Navigating your tasks dashboard is easy.
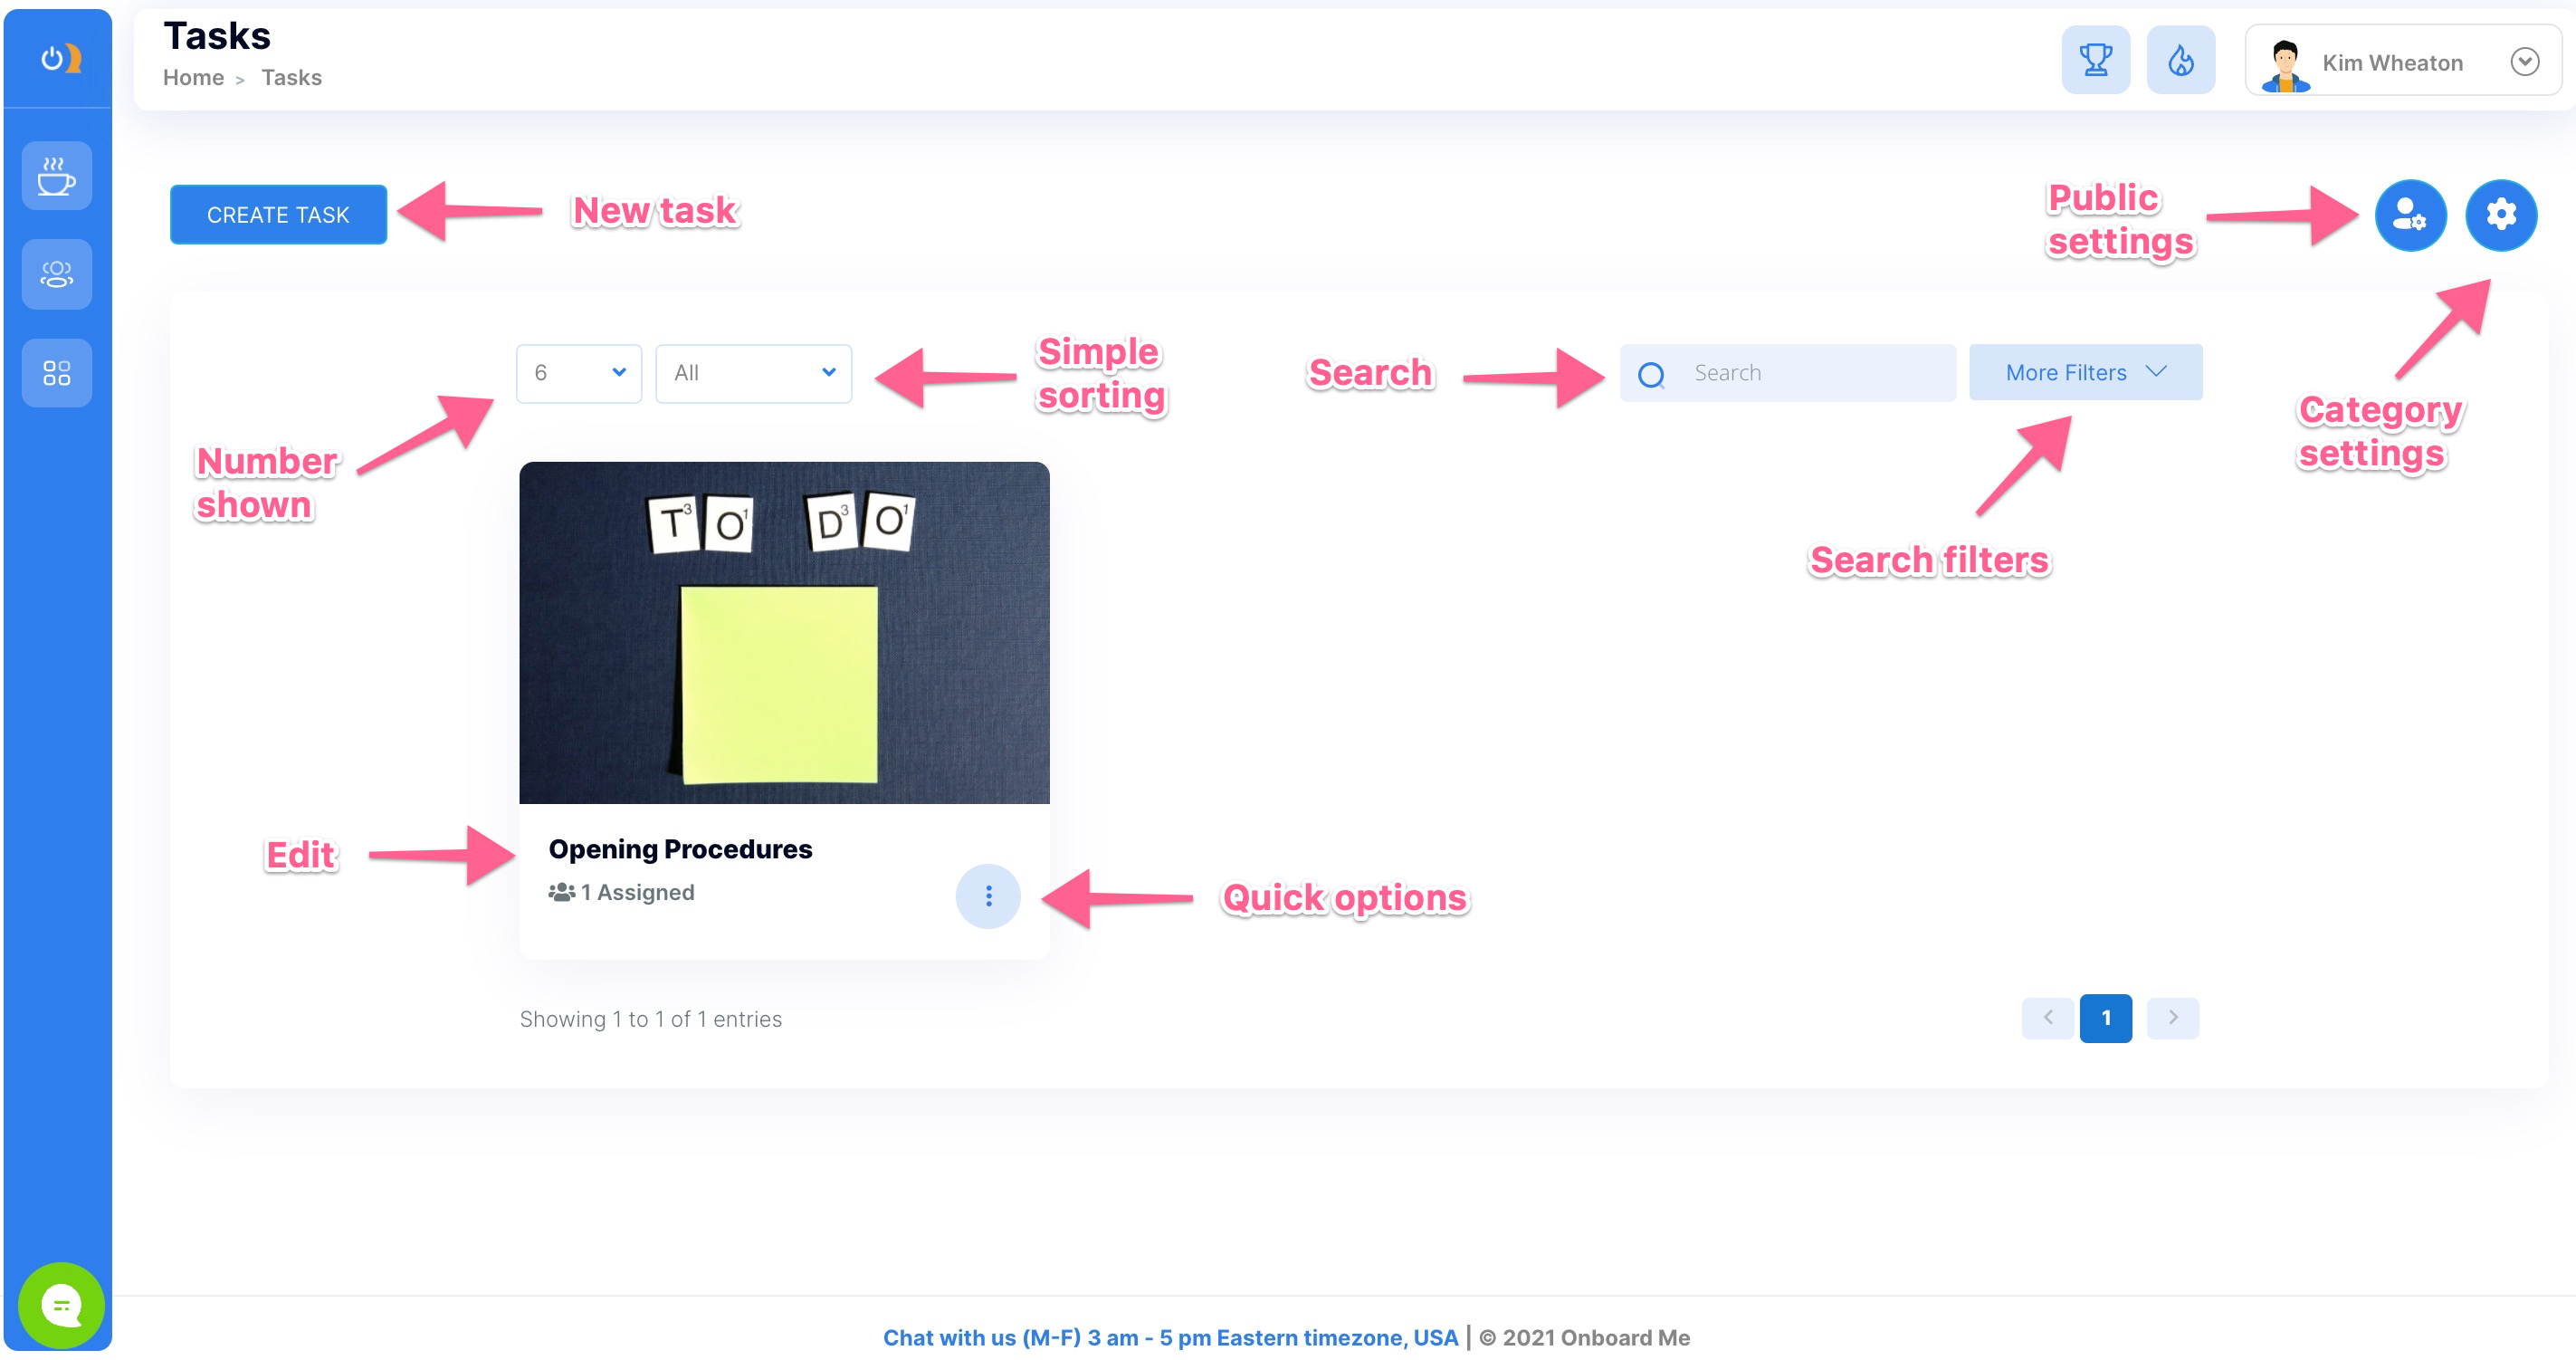
Tasks Dashboard Functions
Searching and Sorting:
Finding specific tasks once you've accumulated many can be done a few different ways. Pull up tasks based on who they are assigned to (contact or user) using the drop-down on the top left side of your dashboard. You can also type any title into the search bar or use more advanced filters to pull up specific tasks. These filters include:
- Date: ID, date created, date started, date due
- Location (select)
- Task Type: One time or recurring
- Assigned to User (select)
- Assigned to Contact (select)
- Task Status: Ongoing or completed
Public Settings:
Set your public settings on the top right side of your dashboard. Style the header and login details accordingly to maintain consistency in your brand across all online platforms.
Category Settings:
Using the gear icon, you can change your category settings. The plus button will allow you to create a new category, while the MORE dots to the right of any listed category will allow you to edit or delete that category. To delete multiple categories at one time, simply check those titles and use the bulk action feature > delete.
Quick task options:
To take action on a task without entering the editor, select the MORE menu by clicking the three dots located on your task thumbnail.
Here are the actions you can take with the quick task option:
- Edit your task
- Rename your task
- Manage your task
- Chat with task assignee(s)
- Preview your task
- Mark the task as complete
- Mark the task as incomplete
- Delete the task
Create A Task
Details:
To create a task, simply click the Create Task button and complete the steps in the service panel. Under the Details tab, give your task a name, description, and choose an existing category to put your task in (or make a new one). Assign the user or contact who will be completing the task, the start date/time, and the due date/time. Reminders are available at predetermined times, recurrences, etc., to ensure tasks will not be overlooked or forgotten. Feel free to add a formal, itemized checklist before saving.

Notes, Files, and Notifications:
Under the remaining tabs, you can add notes, attach files, or add notifications to your task. Notifications can be customized by type (MSM, email, both), content, and styling. Each notification populates with the details of the previous section (user/contact, timing, and task specifications). Select which sort of notifications you would like to enable (task assigned, task completed, task due), and change as you see fit. Hit the update button to save your work, and to preview any notification before setting it into action, click the eye icon under the main content box.
Give Contacts Access To Your Tasks Manually
There are 2 common ways to give contacts access to a task manually:
1. Use the launch pad in your contact center.
***BUG***
2. Use the bulk action feature in your contact center.
Give Contacts Access To Your Tasks Automatically
This can be done using the Journeys feature. In your journey, add an action > select action > assign task to user (or contact). A complete journeys tutorial can be found HERE.