


1. Funnel Overview
Today we are going to build your email Newsletter sign-up system. This will allow you to post a link on your website, after your live casts, or in your social media posts so that prospects can opt-in to your Newsletter list.
Quick Training Links
2. Setup Steps
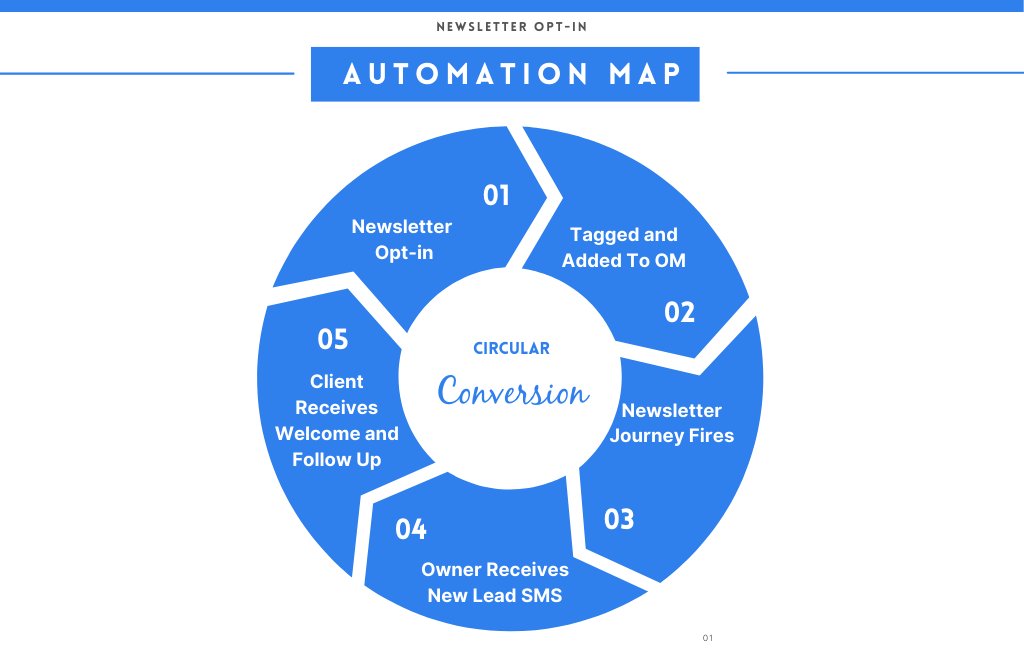
This is how the process works:
1. A prospect will answer a few segmenting questions on your form
2. The will submit the form
3. The customer journey will be triggered
4. You will receive a new lead text
5. The prospect will receive your welcome letter letting them know whet to expect as a subscriber
6. The prospect will receive a personal follow up in 14 days asking if they have any specific questions or need help
Ok Lets get this funnel set up. Here are the broad steps
Step 1: Import all the done-for you templates by downloading the CSV file and importing them through your content club importer.
Step 2: Edit the emails, landing page, and journey to your branding and voice
Step 3: Connect the funnel and turn the Journey on
Step 4: Test your new system
Step 5: Deploy
3. Setup Details
Let's take a closer look at Step 1: Import the done-for-you templates by downloading the CSV file and importing them through your content club and FitFunnels Importer. While logged in, you can also click on the individual links to get the Onboardme Assets one by one. Navigate to your Apps and launch FitFunnels. Create a landing page using the landing page file.
Newsletter-Fitfunnels CSV: https://d.pr/f/Ffw4pL
Newsletter Journey: https://new.onboardme.io/asset/share/5947/9939/SI7erupOZeXEFUmI
Newsletter Welcome Email: https://new.onboardme.io/asset/share/3325/85148/EyonOyaJA9u6ALaQ
Newsletter Followup: https://new.onboardme.io/asset/share/3325/85149/xOpufozIXOgaXO3u
Newsletter landing page: https://d.pr/f/Kz6cBa
Let's take a closer look at Step 2: Edit the emails, journey and landing page to your branding and voice.
The Welcome and Follow-up emails are on your Templates Dashboard. Navigate to your Templates dashboard and click on the Template title to edit the welcome and follow-up emails. Edit them to your branding.
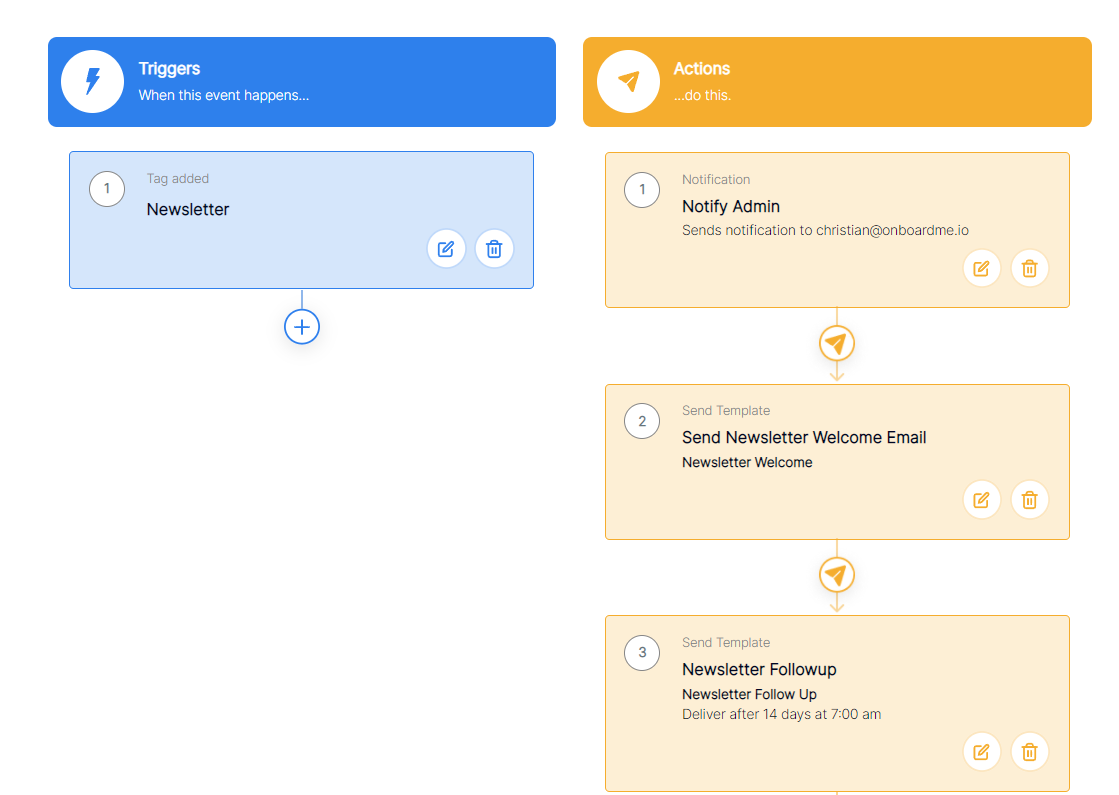
Next, navigate to your Journeys Dashboard and find the Newsletter Journey. Edit the journey. You can add additional actions like Assign a Playbook. The trigger should be Tag Added with the Newsletter tag connected.
Lastly, navigate to your Apps and launch Fitfunnels. Look for the Newsletter landing page and click edit. Edit the landing page to your branding and voice.
Click on the form in the landing page and click settings. Make sure that the Form Fields have the correct Name Attributes. Below are the correct name attributes for each field.
First name: first_name
Last name: last_name
Full name: full_name
Email: email
Phone: mobile_phone
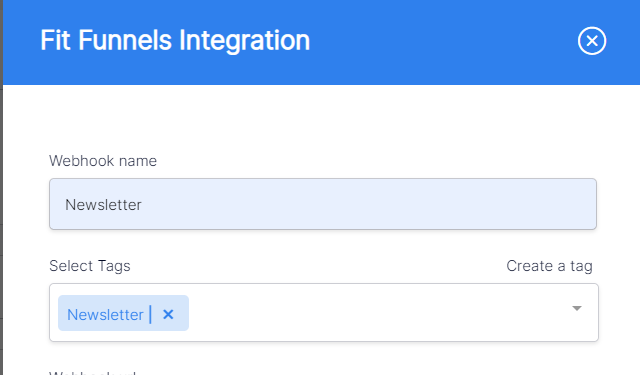
Let's take a closer look at Step 3: Connect the funnel and turn the Journey on. Go to your Admin Settings > Integrations > FitFunnels. Choose a webhook name, and connect the Tag used in the Newsletter Journey. Generate and copy the generated webhook. Don't forget to click save.
Navigate back to your FitFunnels and edit the Newsletter Landing Page. Find the form in the landing page, then click on settings. On the integrations tab, make sure that the sending method is "Send The Form to URL as Post" Paste the copied webhook in the URL Address field. Hit Save and close.
Now go to your Journeys dashboard and make sure that the Newslettter Journey is turned on.
Let's take a closer look at Step 4: Test your new system. Navigate to your FitFunnels and click on the live link of the Newsletter landing page. Sign up on your live Newsletter landing page using your test email. Your test email should be added in your Onboardme contact list, tagged with the trigger tag. This should trigger the journey, sending you the welcome email almost immediately.
Let's take a closer look at Step 5: Deploy. Congratulations! You can now copy the live landing page link and post it to your website, after meetings, or social media posts.
4. Troubleshoot
1. Make sure you attach the correct tag in your Newsletter webhook and in your Newsletter Journey
2. Make sure that the Newsletter journey is turned on.
3. Make sure to copy the exact webhook. Remove any unnecessary characters like #.
4. Make sure to save before you publish your Newsletter funnel.
5. Commonly Asked Questions
1. I have made changes in my Journey. How will that affect my contacts?
The changes will reflect to future clients who will be added to the Journey, but won't affect the existing ones. You can restart the journey for your existing clients so they'd get the changes.
First, terminate the journey by going to your contacts dashboard, mark the checkbox of your selected contact, Bulk Action>Journeys>Terminate Journey.
Then reapply the trigger. Sign up on the Form using the same email address.
2. Can I see who's in my Journey?
Yes! Go to the journey you want to check, then click on the History Log at the bottom part.