There are 3 ways to get clients into your Onboard Me account:
1) Manually enter each contact.
2) Sync with one of our certified integrations
3) Import a CSV file. See below for IMPORTANT precautions:
BEFORE YOU IMPORT A CSV!
Make sure that your contact lists are not dirty prior to uploading, meaning your lists aren't riddled with duplicate emails, test emails, unsubscribes, etc.
If you are absolutely CERTAIN your list is clean, MAKE SURE you TURN OFF the Confirmed Opt-in setting BEFORE uploading your CSV file.
How to disable confirmation emails Onboard Me sends to uploaded contacts asking permission to email them in the future
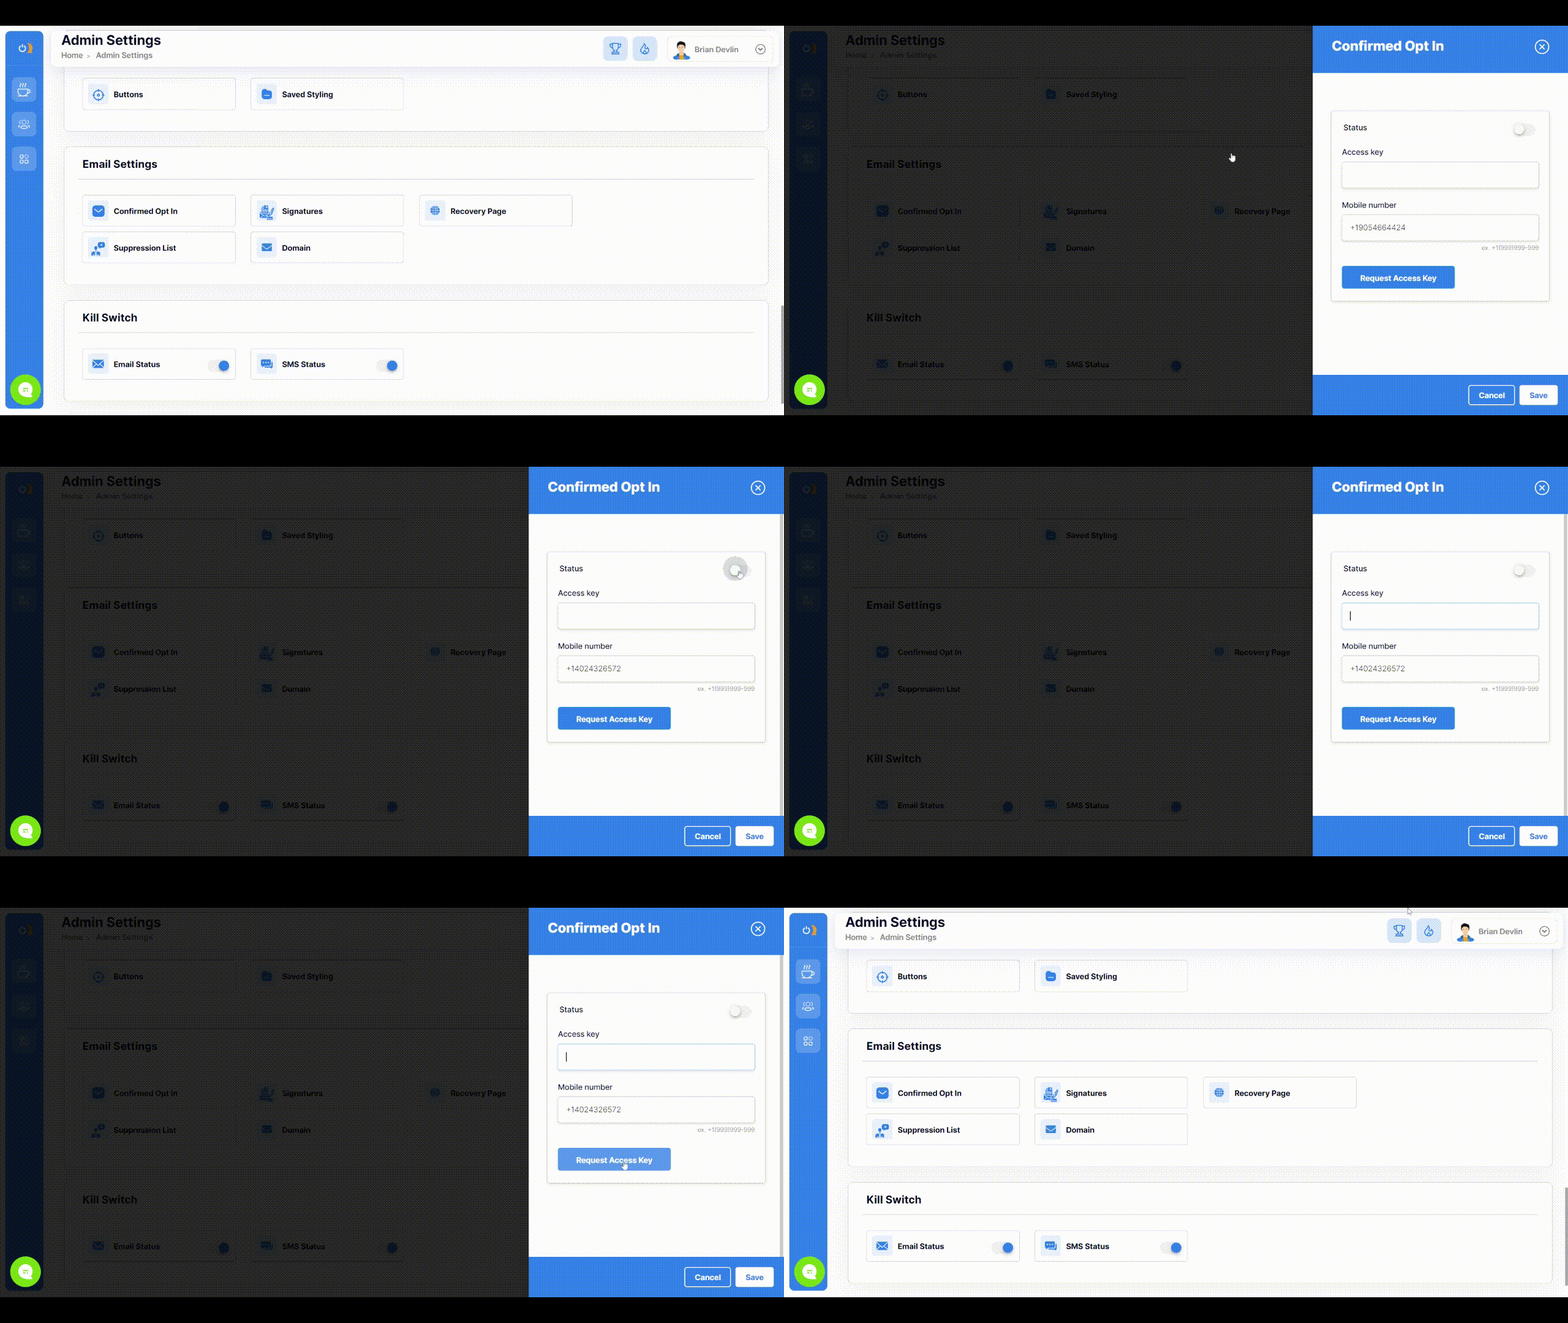
In your admin settings, go to email settings and click confirmed opt-in.
- Disable your confirmed opt-in option
- Enter your mobile number and request an access key
- Enter the access key that is sent to your email.
- Click save
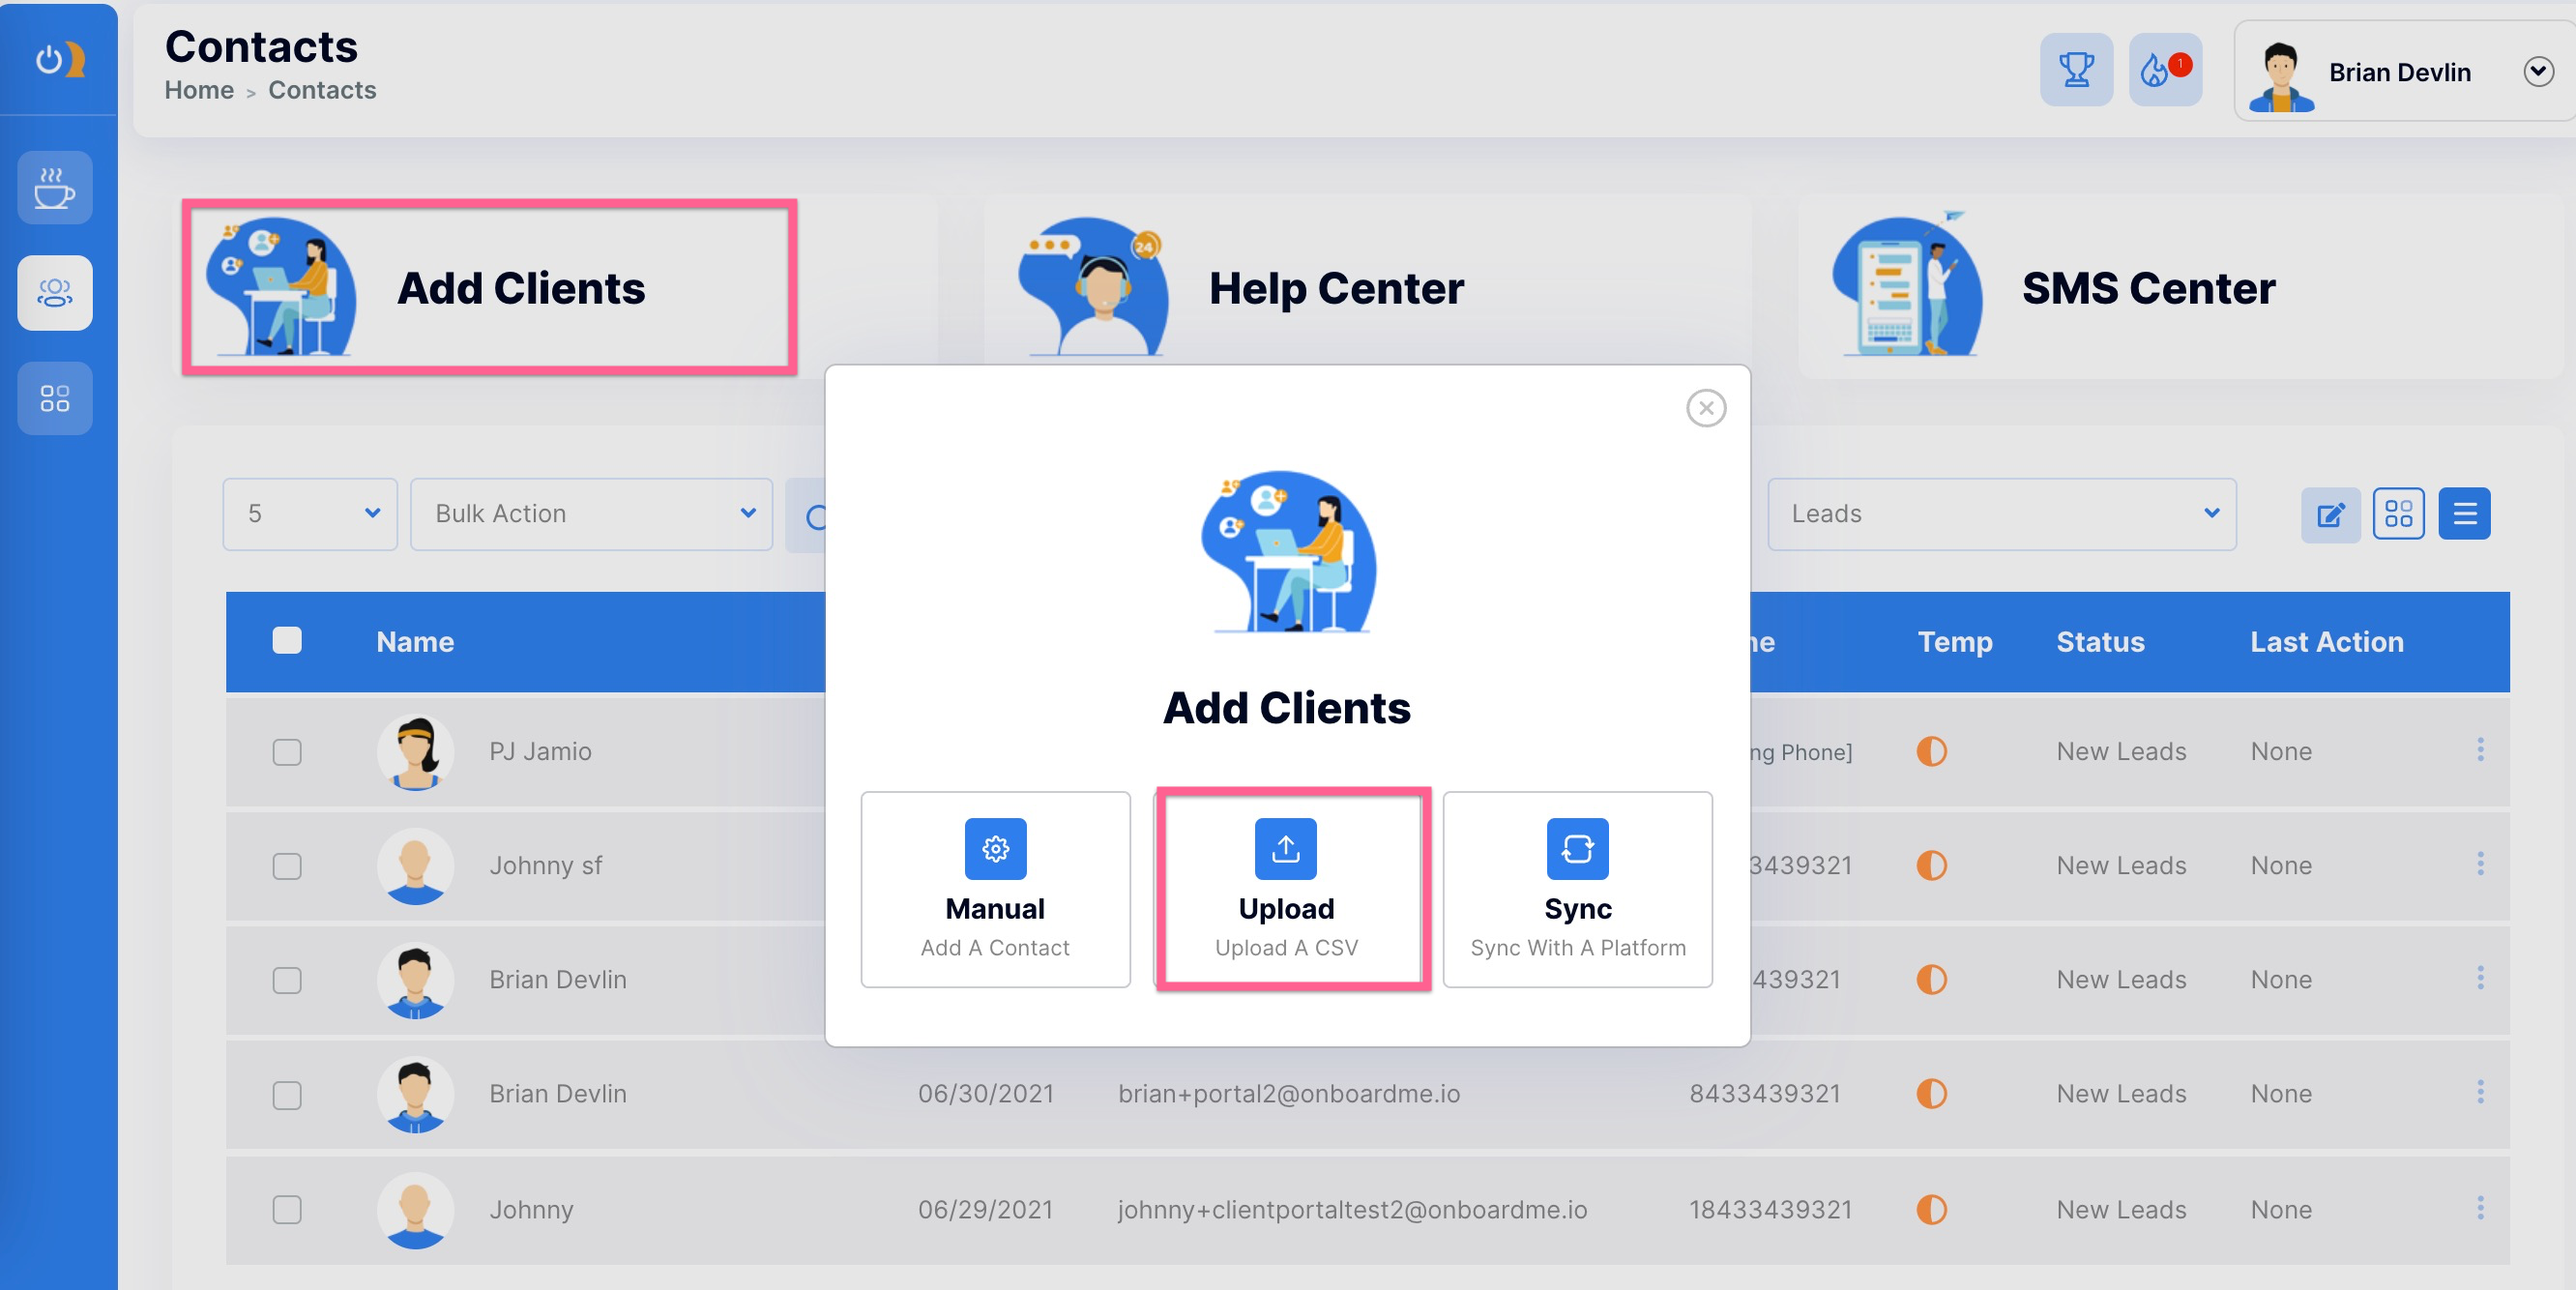
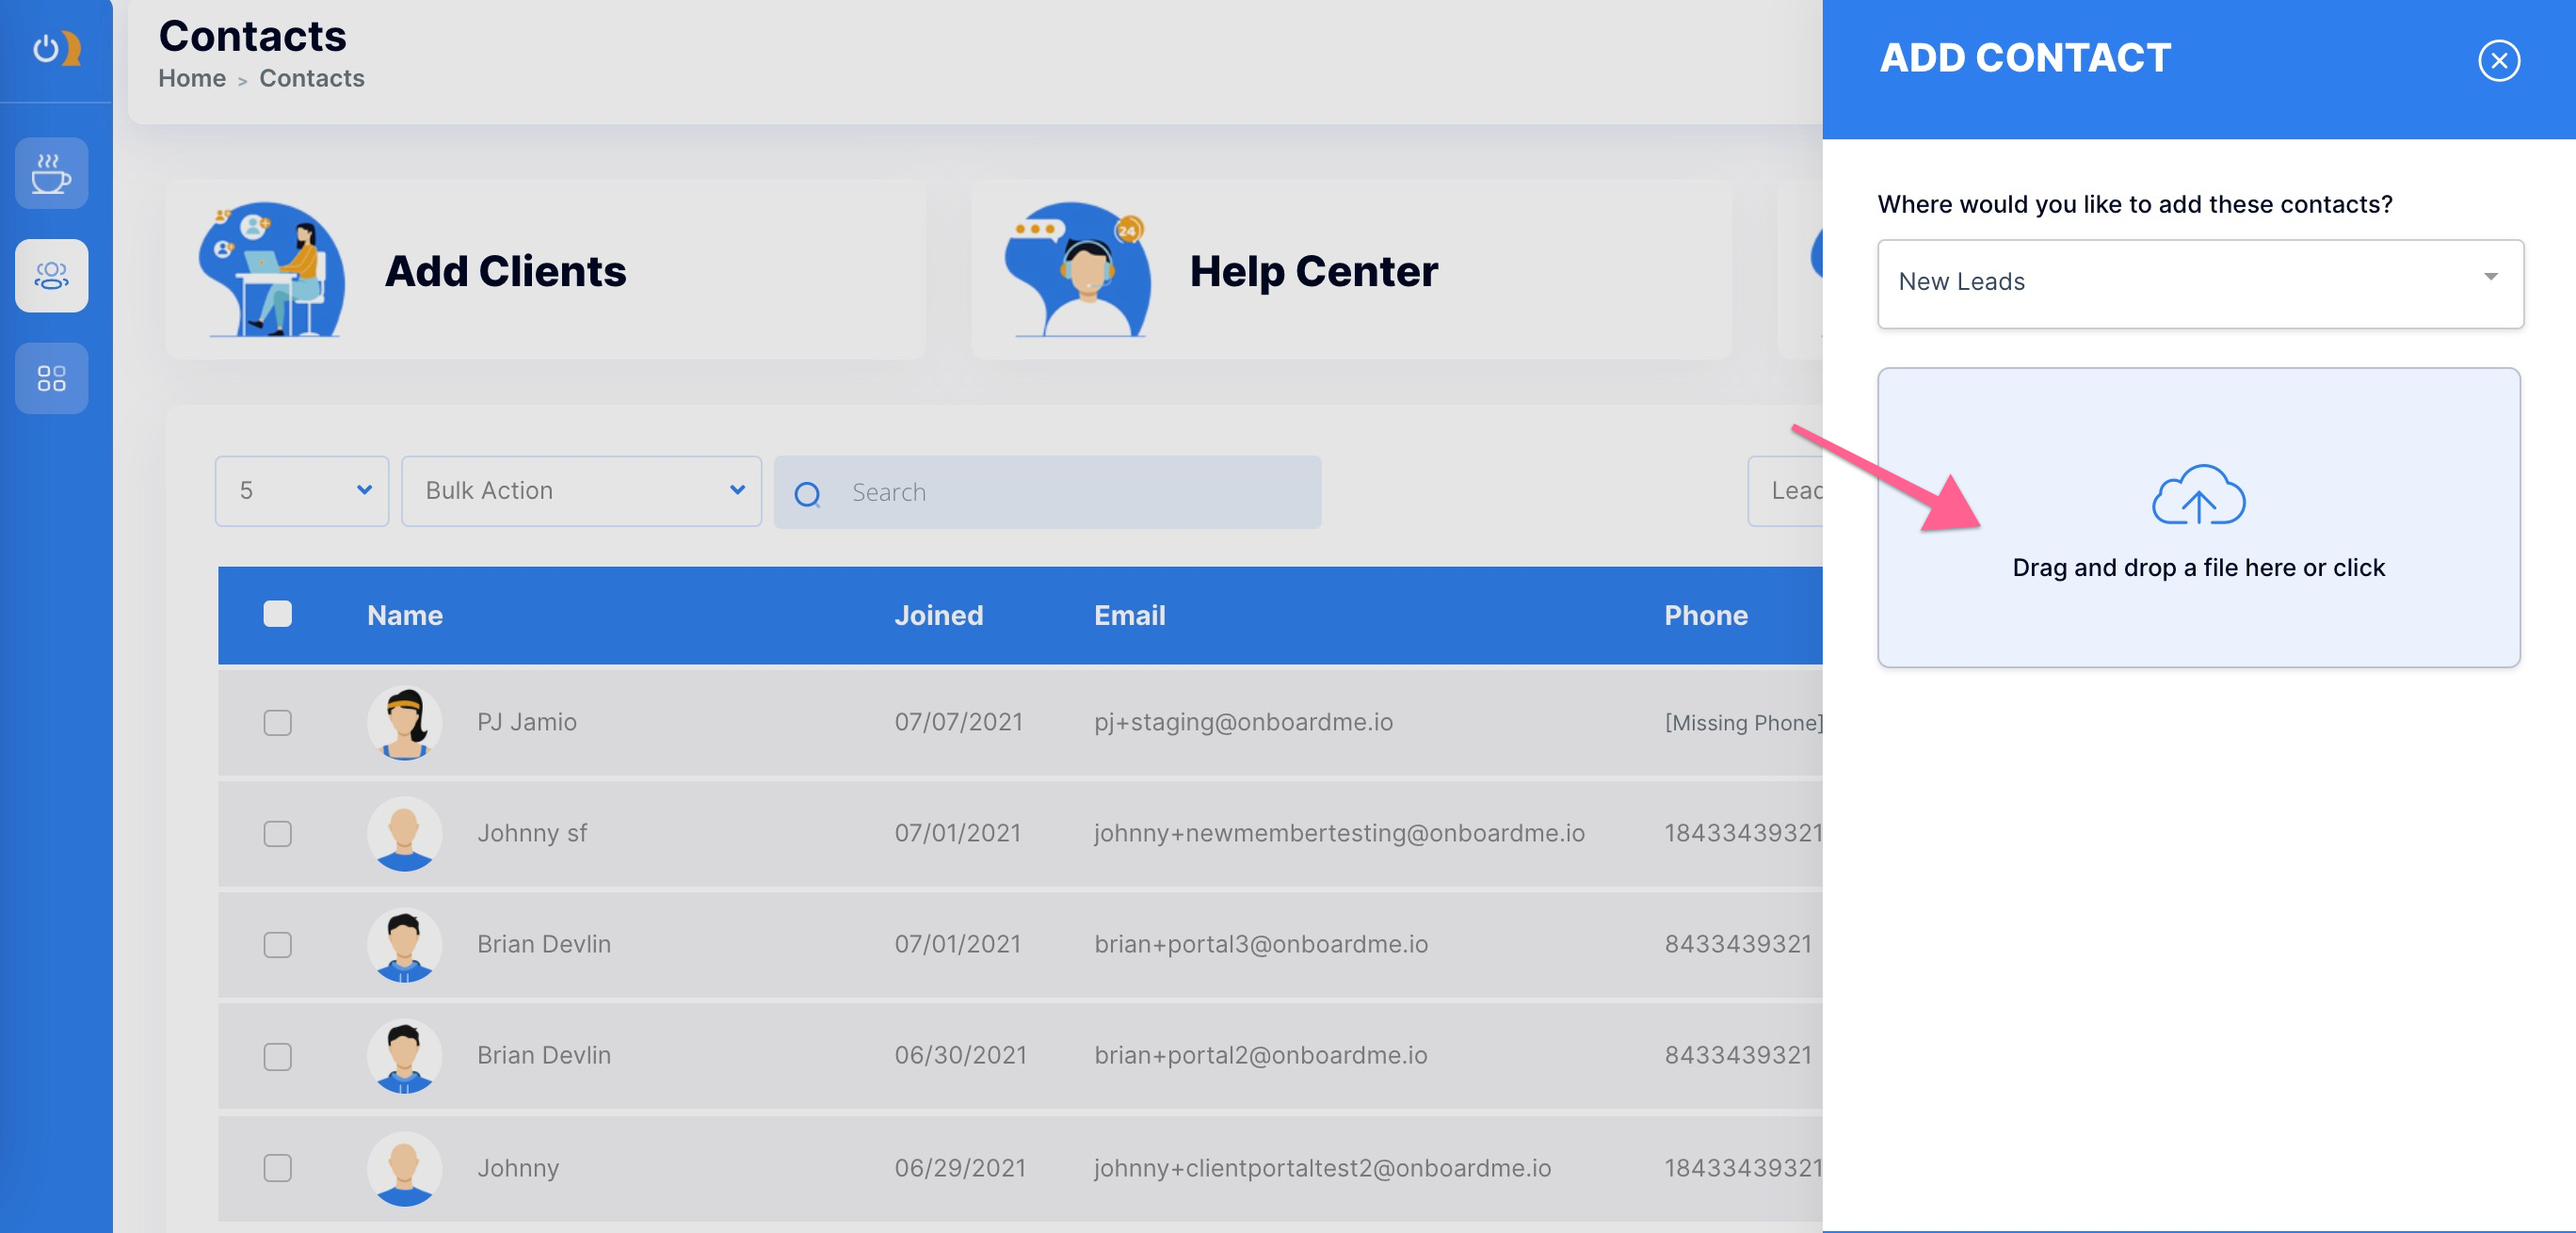
1. From the Contacts dashboard click Add Clients, then click Upload (a CSV).
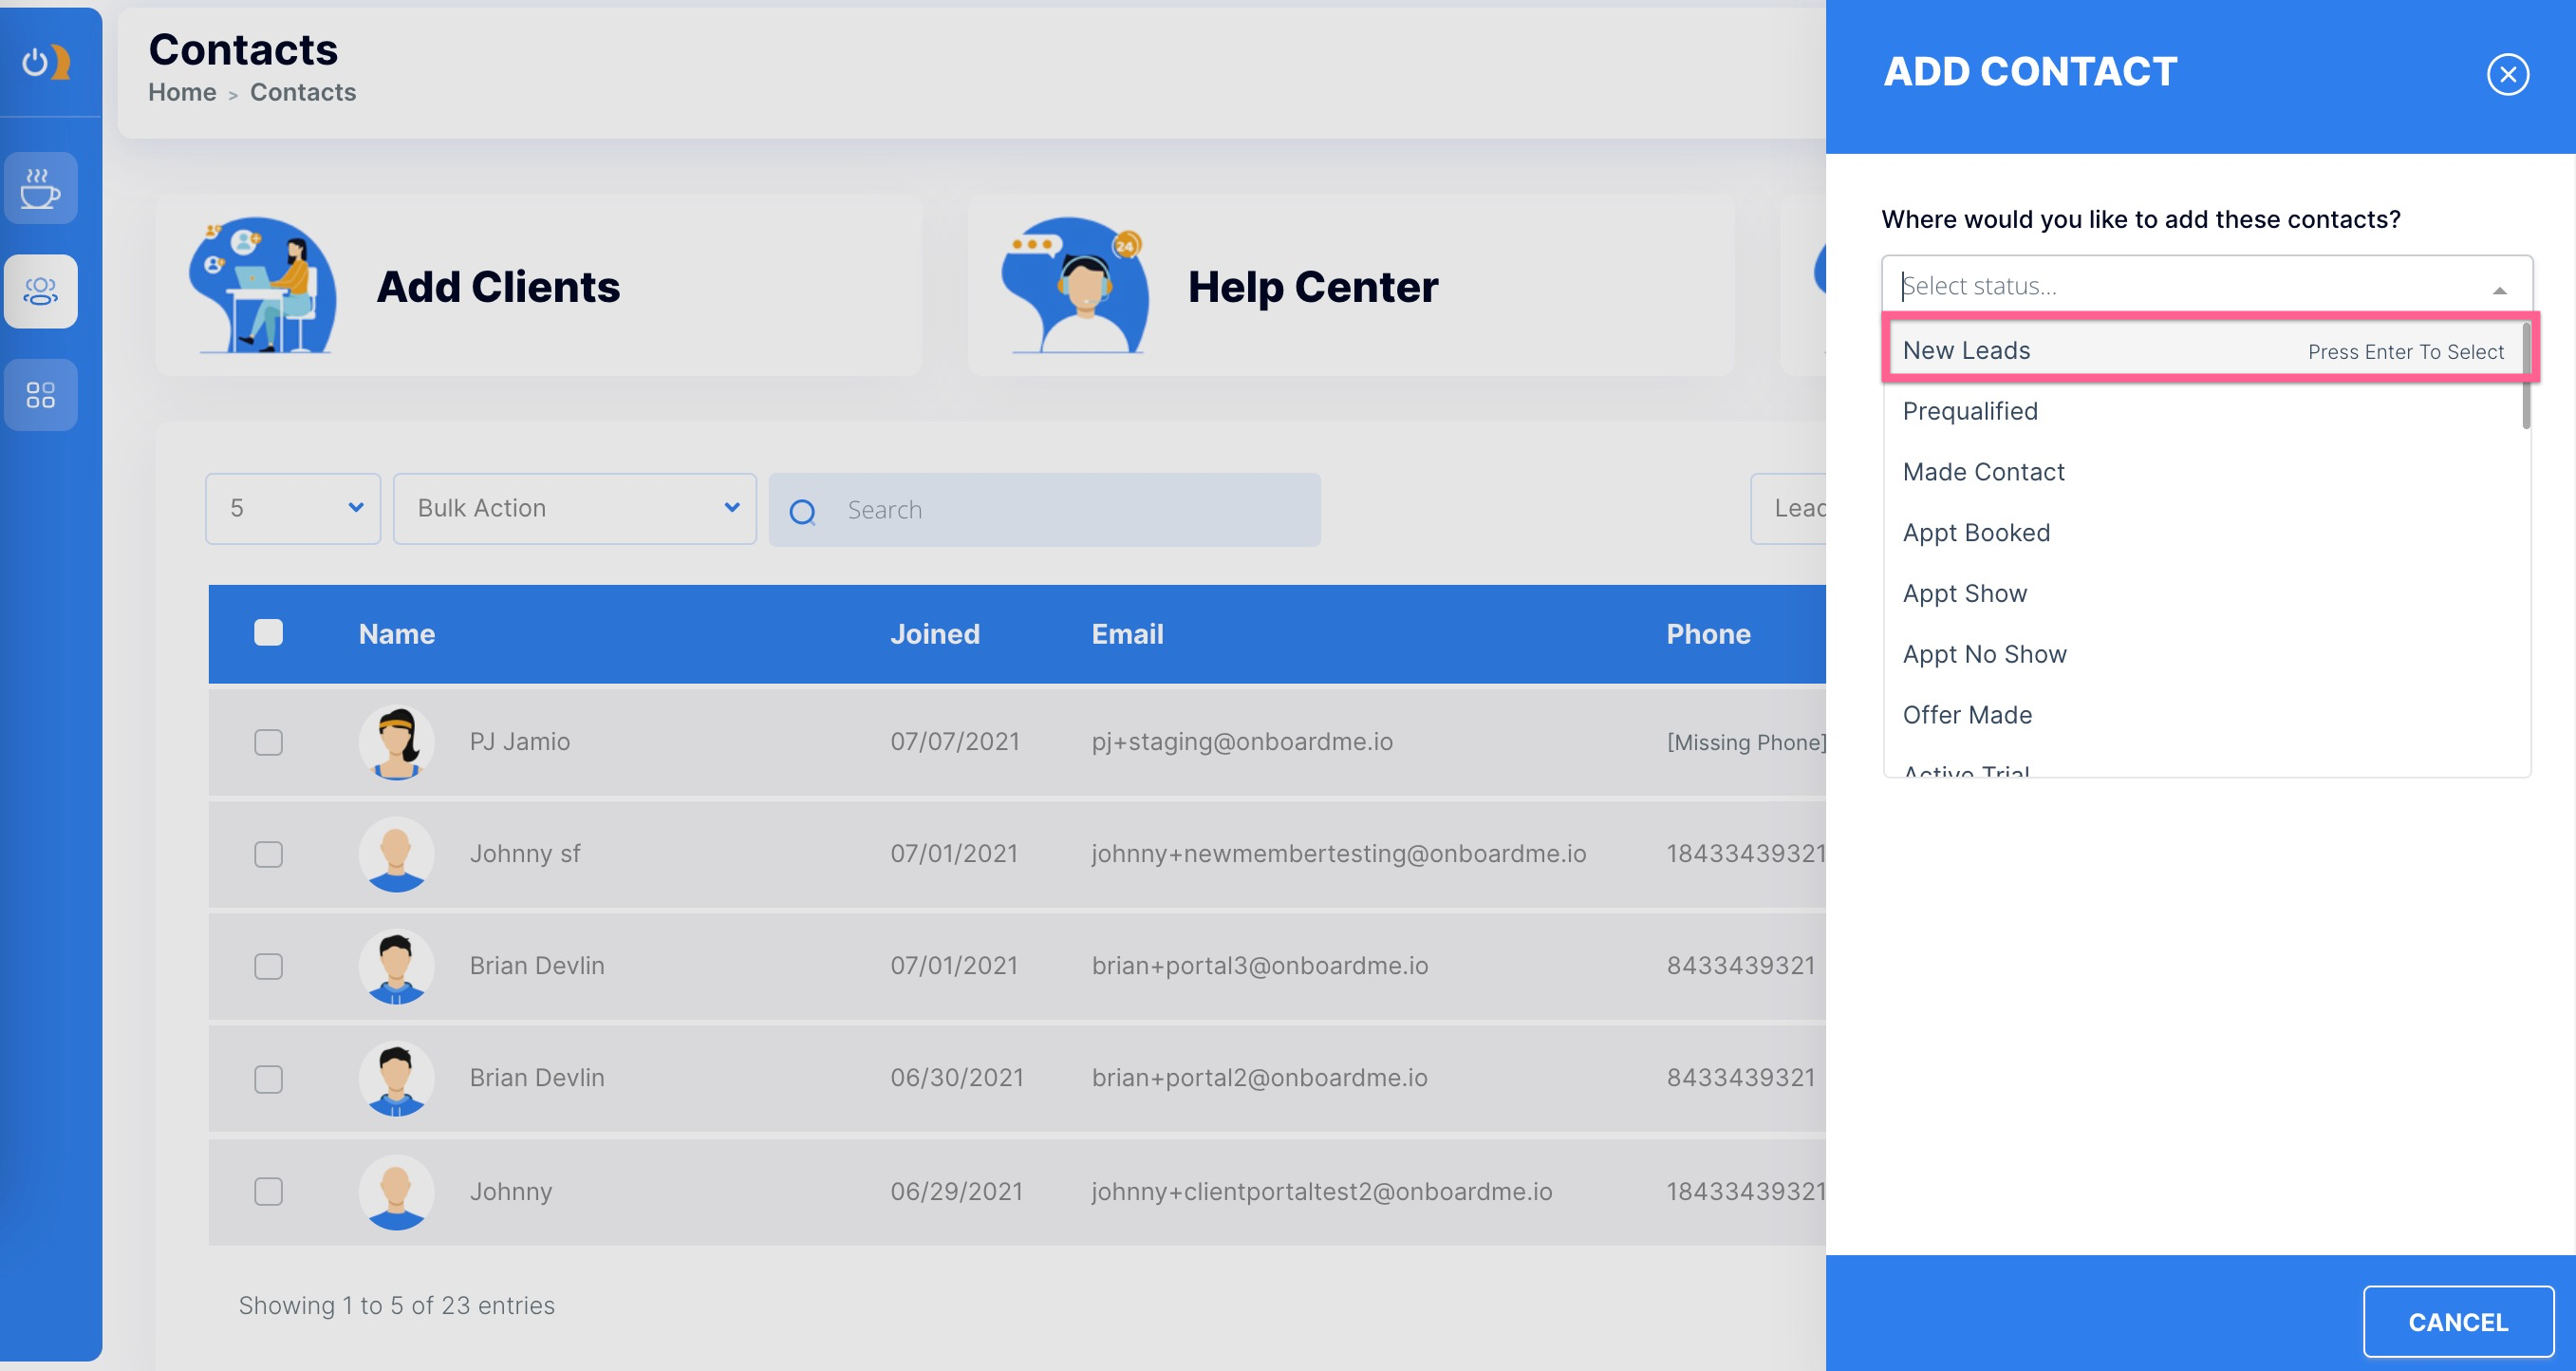
2. Assuming your current contact list isn't already segmented into specific categories, select New Leads in the drop-down menu.
3. Drag and drop CSV file.
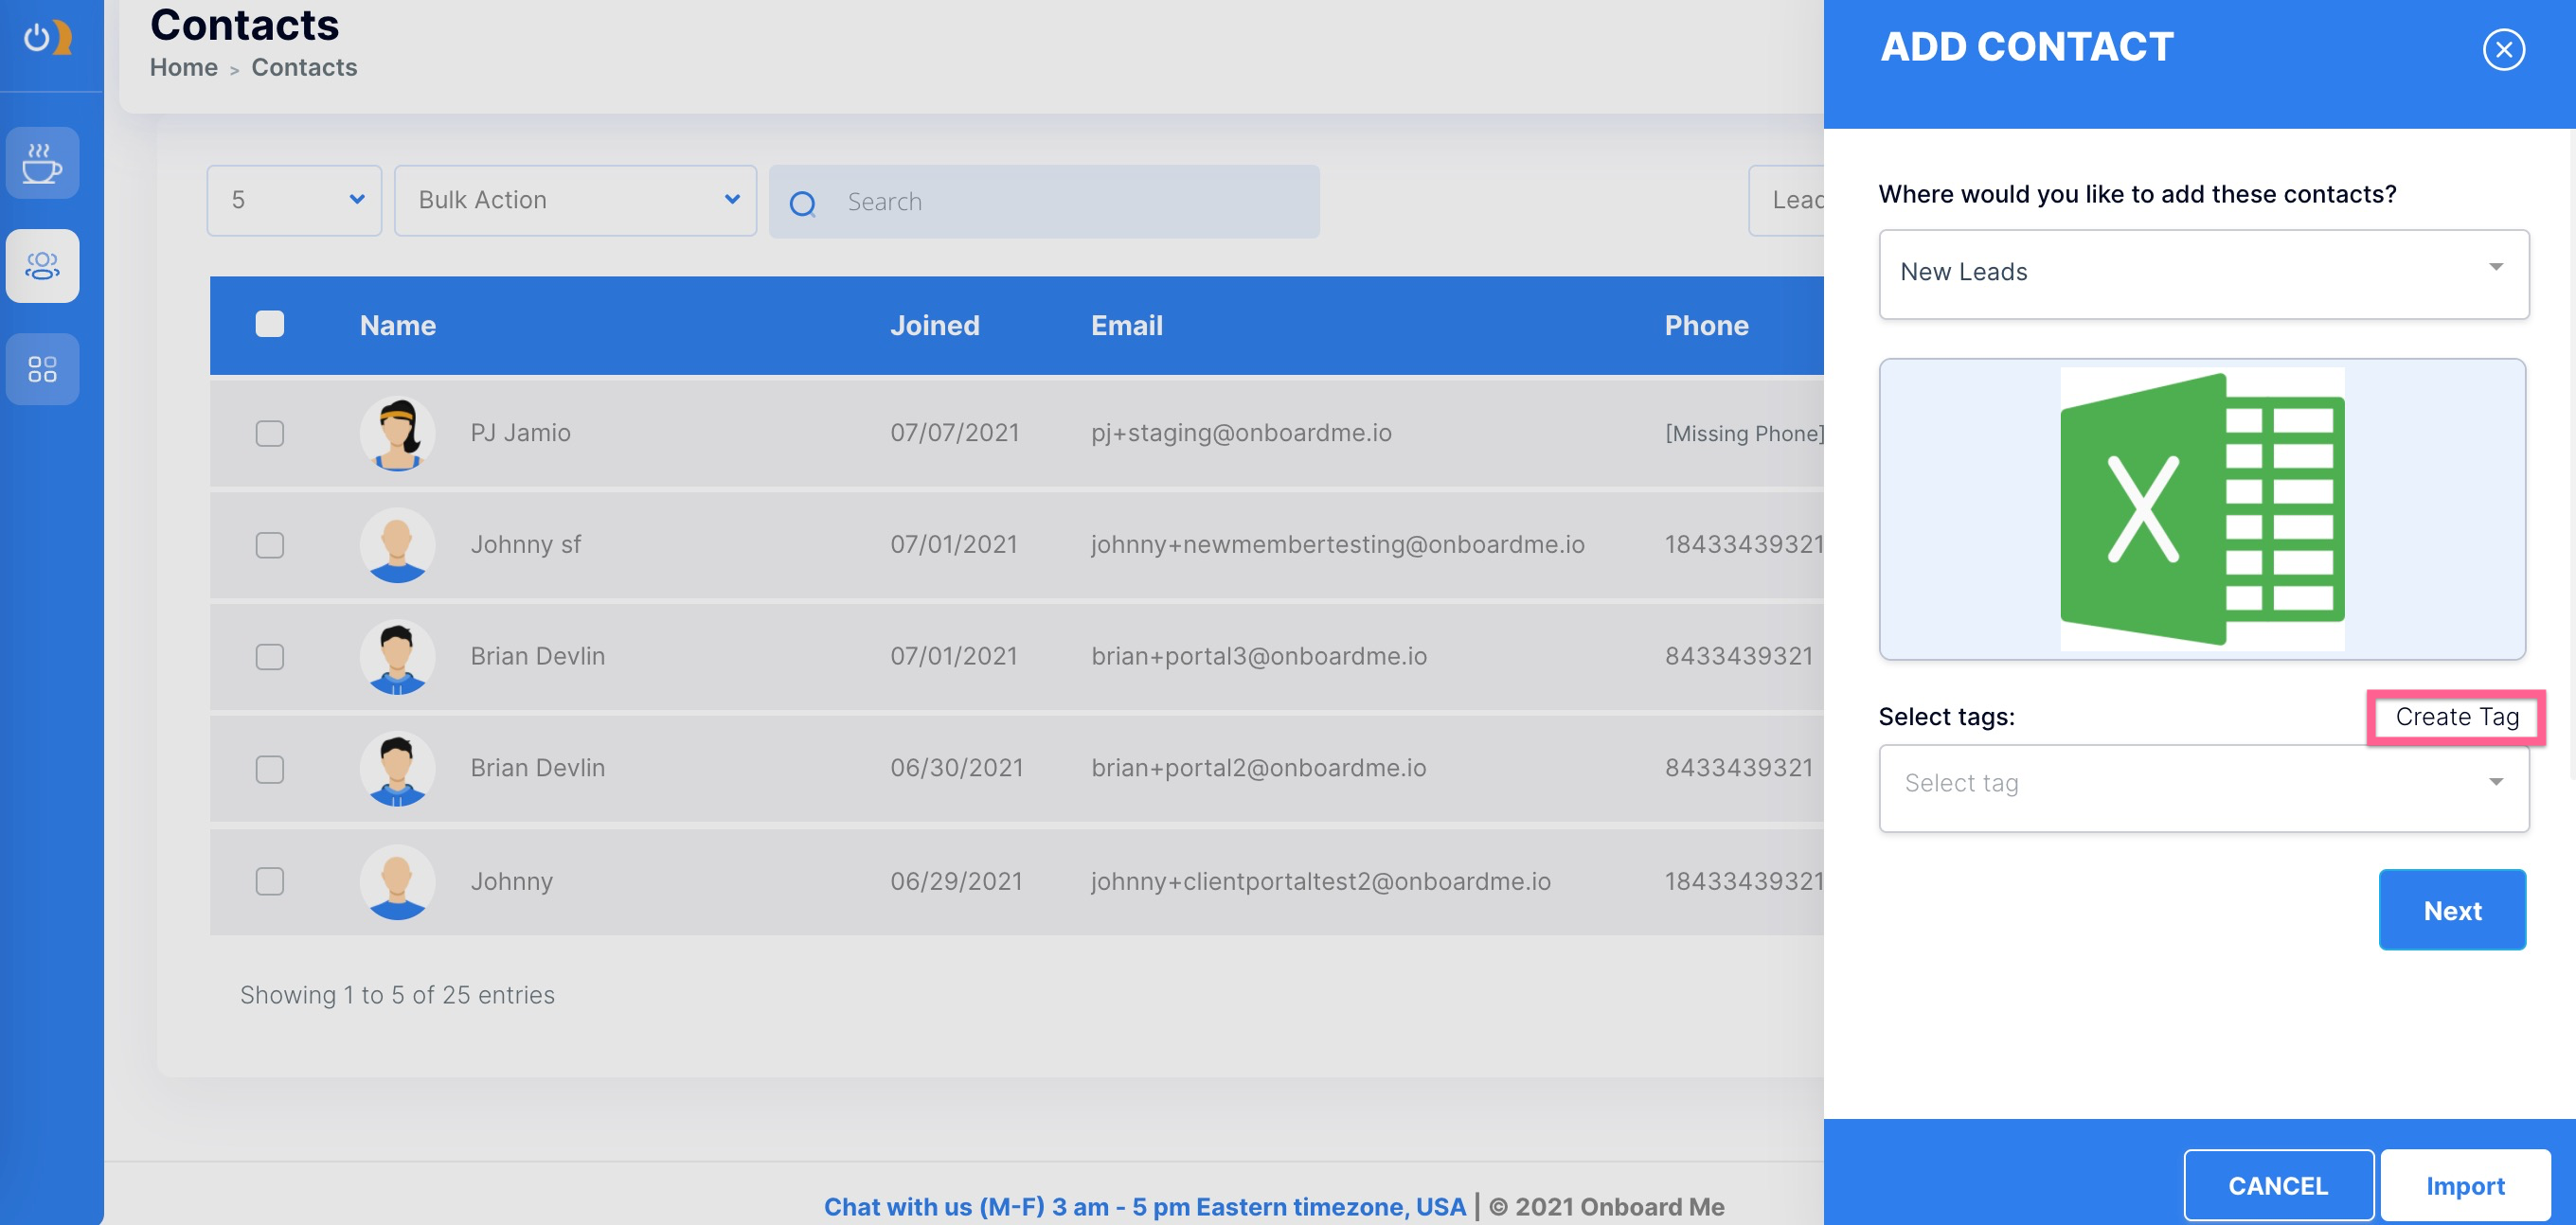
4. Select a tag or create a new tag. To create a tag simply click Create Tag.
Never select a green tag when uploading a CSV file of contacts unless you wish to immediately trigger the specific automation associated with that green (trigger) tag.
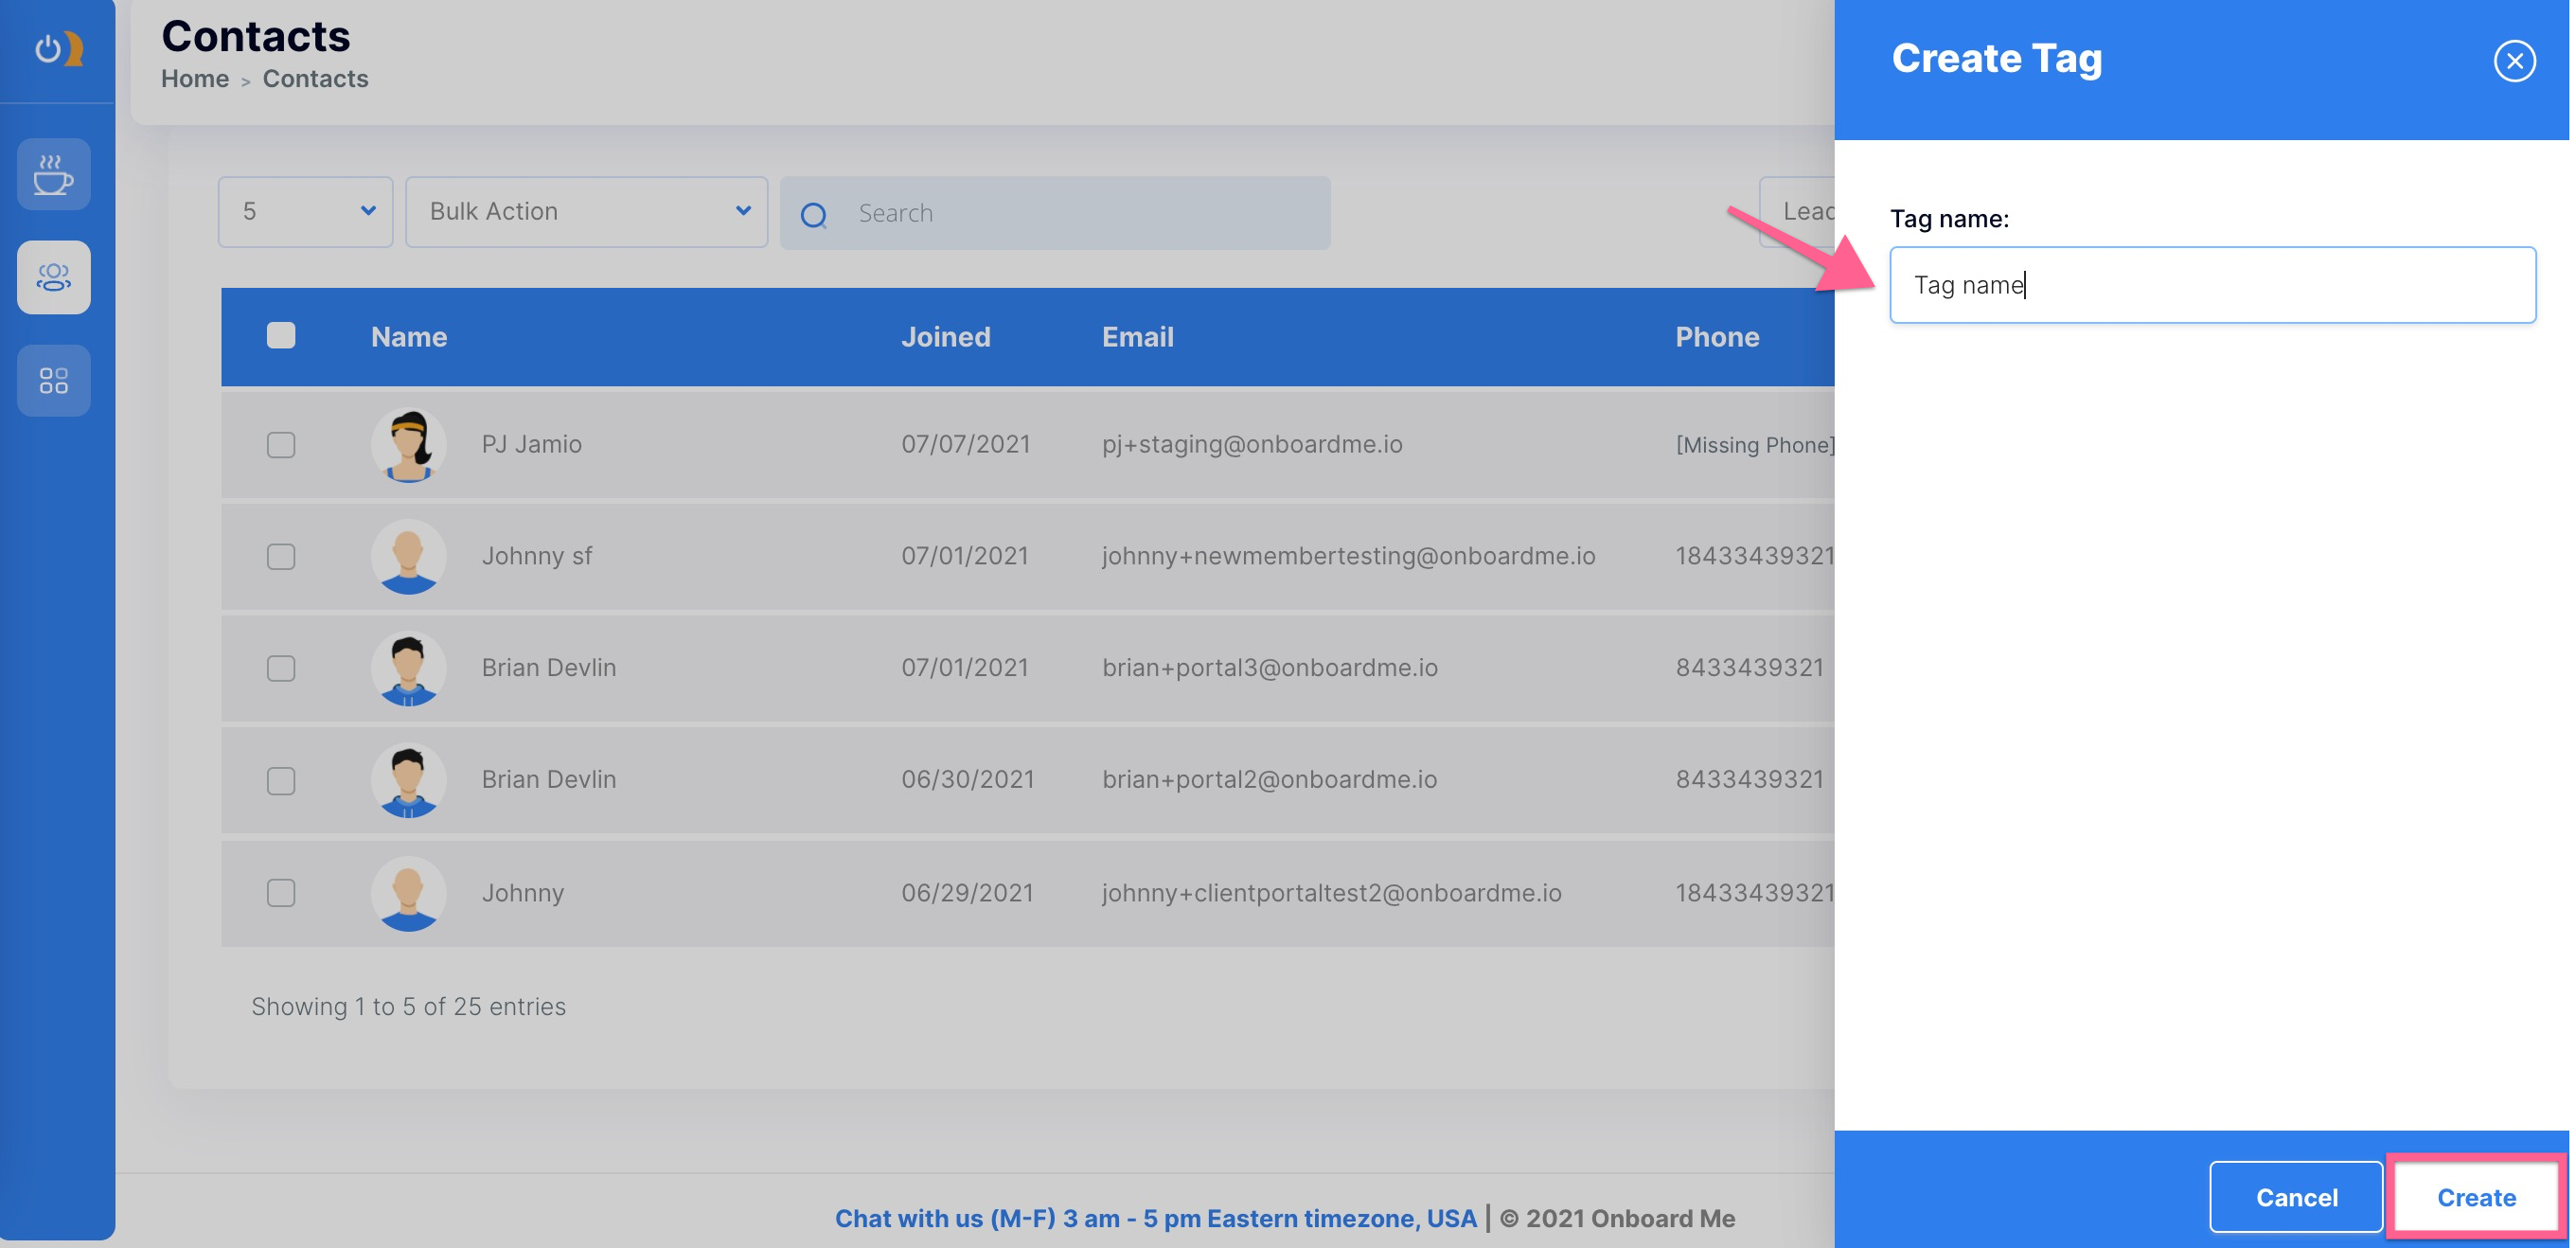
5. Enter your tag name in the text field and click Create. Now you can access it from the tag menu.
6. Click Next to map data fields between Onboard Me and the tables in your CSV file.
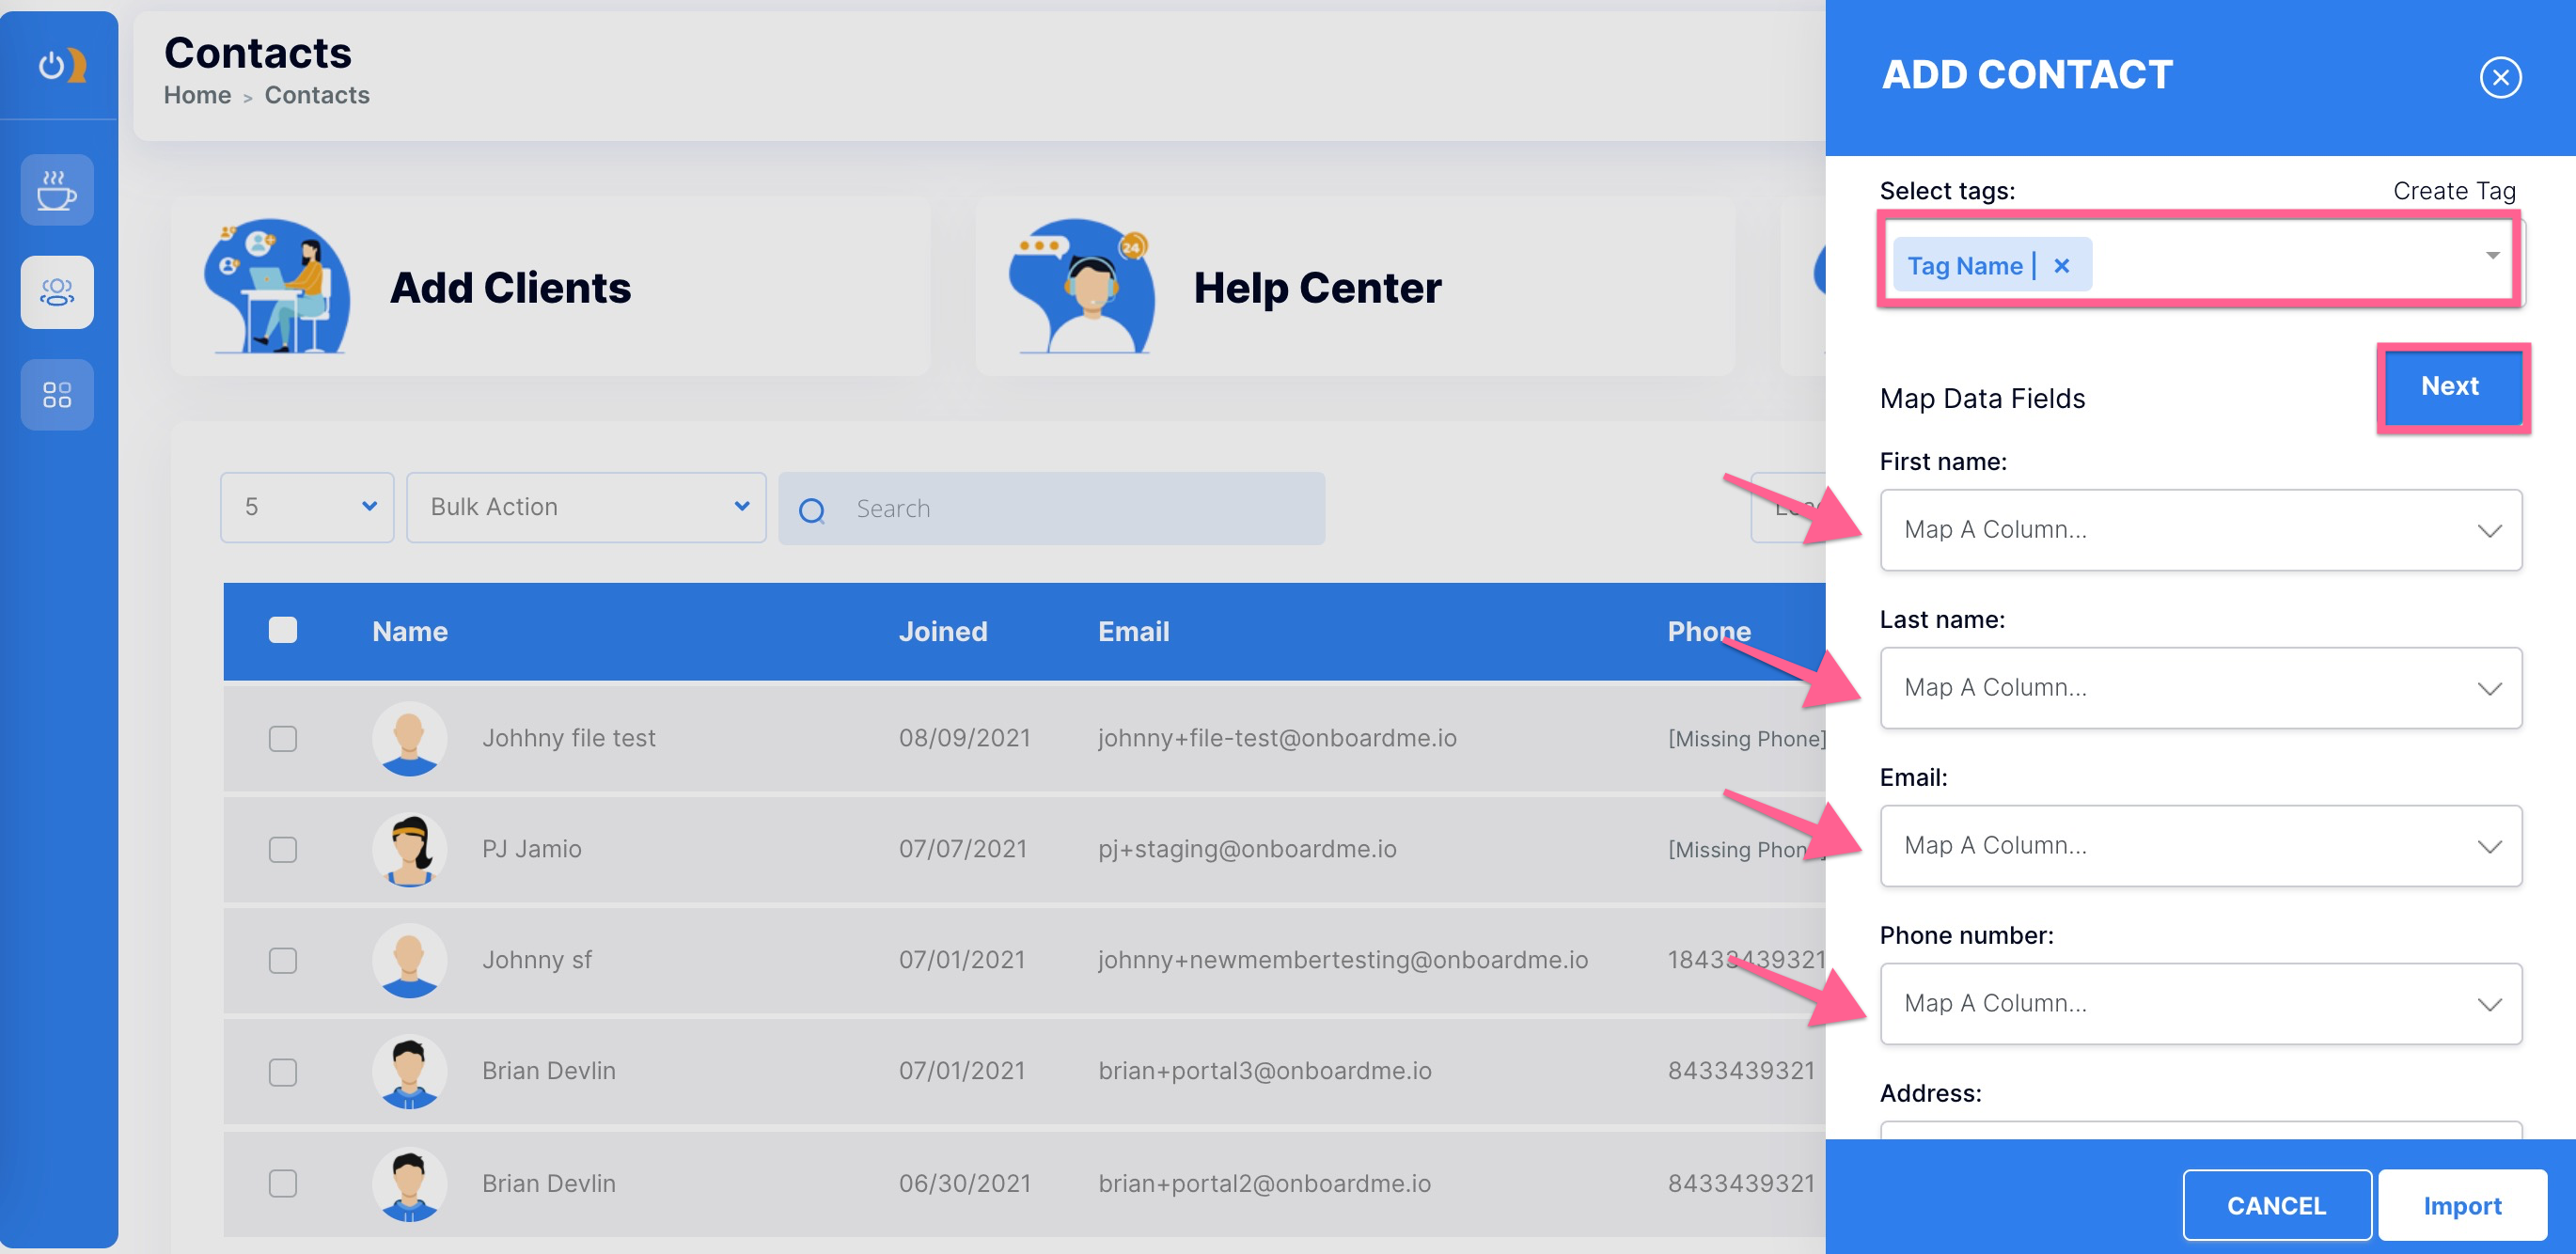
7. Once all data fields are mapped, don't forget to read the area in red, check the box, and click Import.
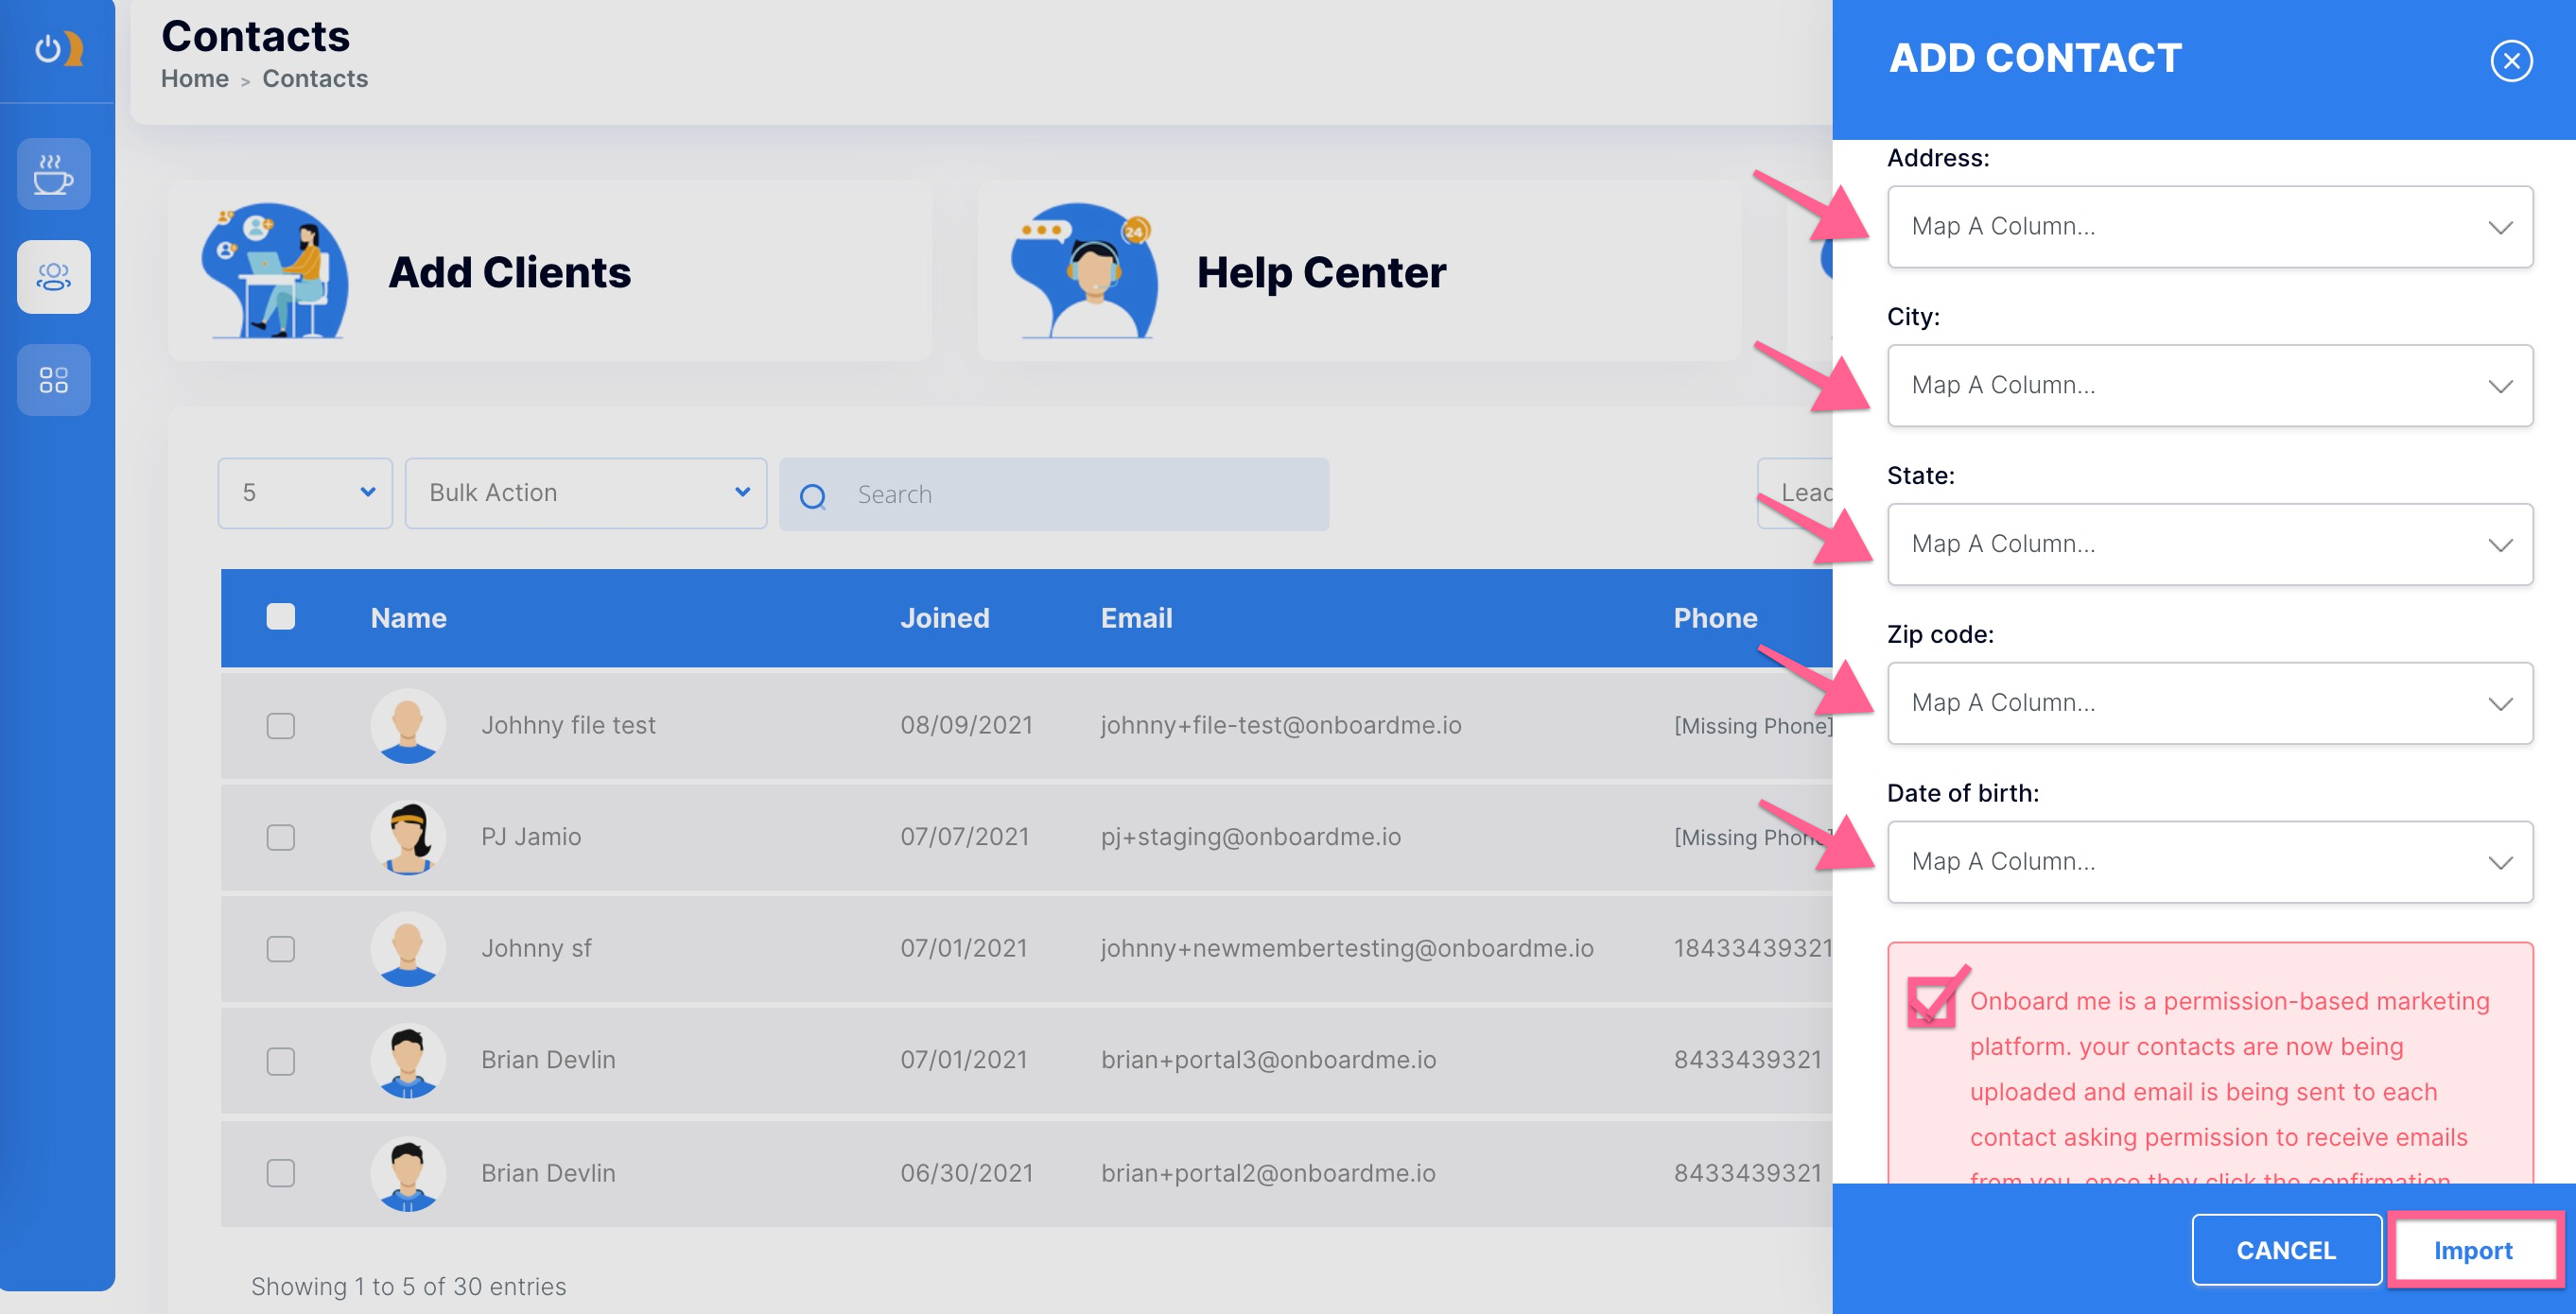
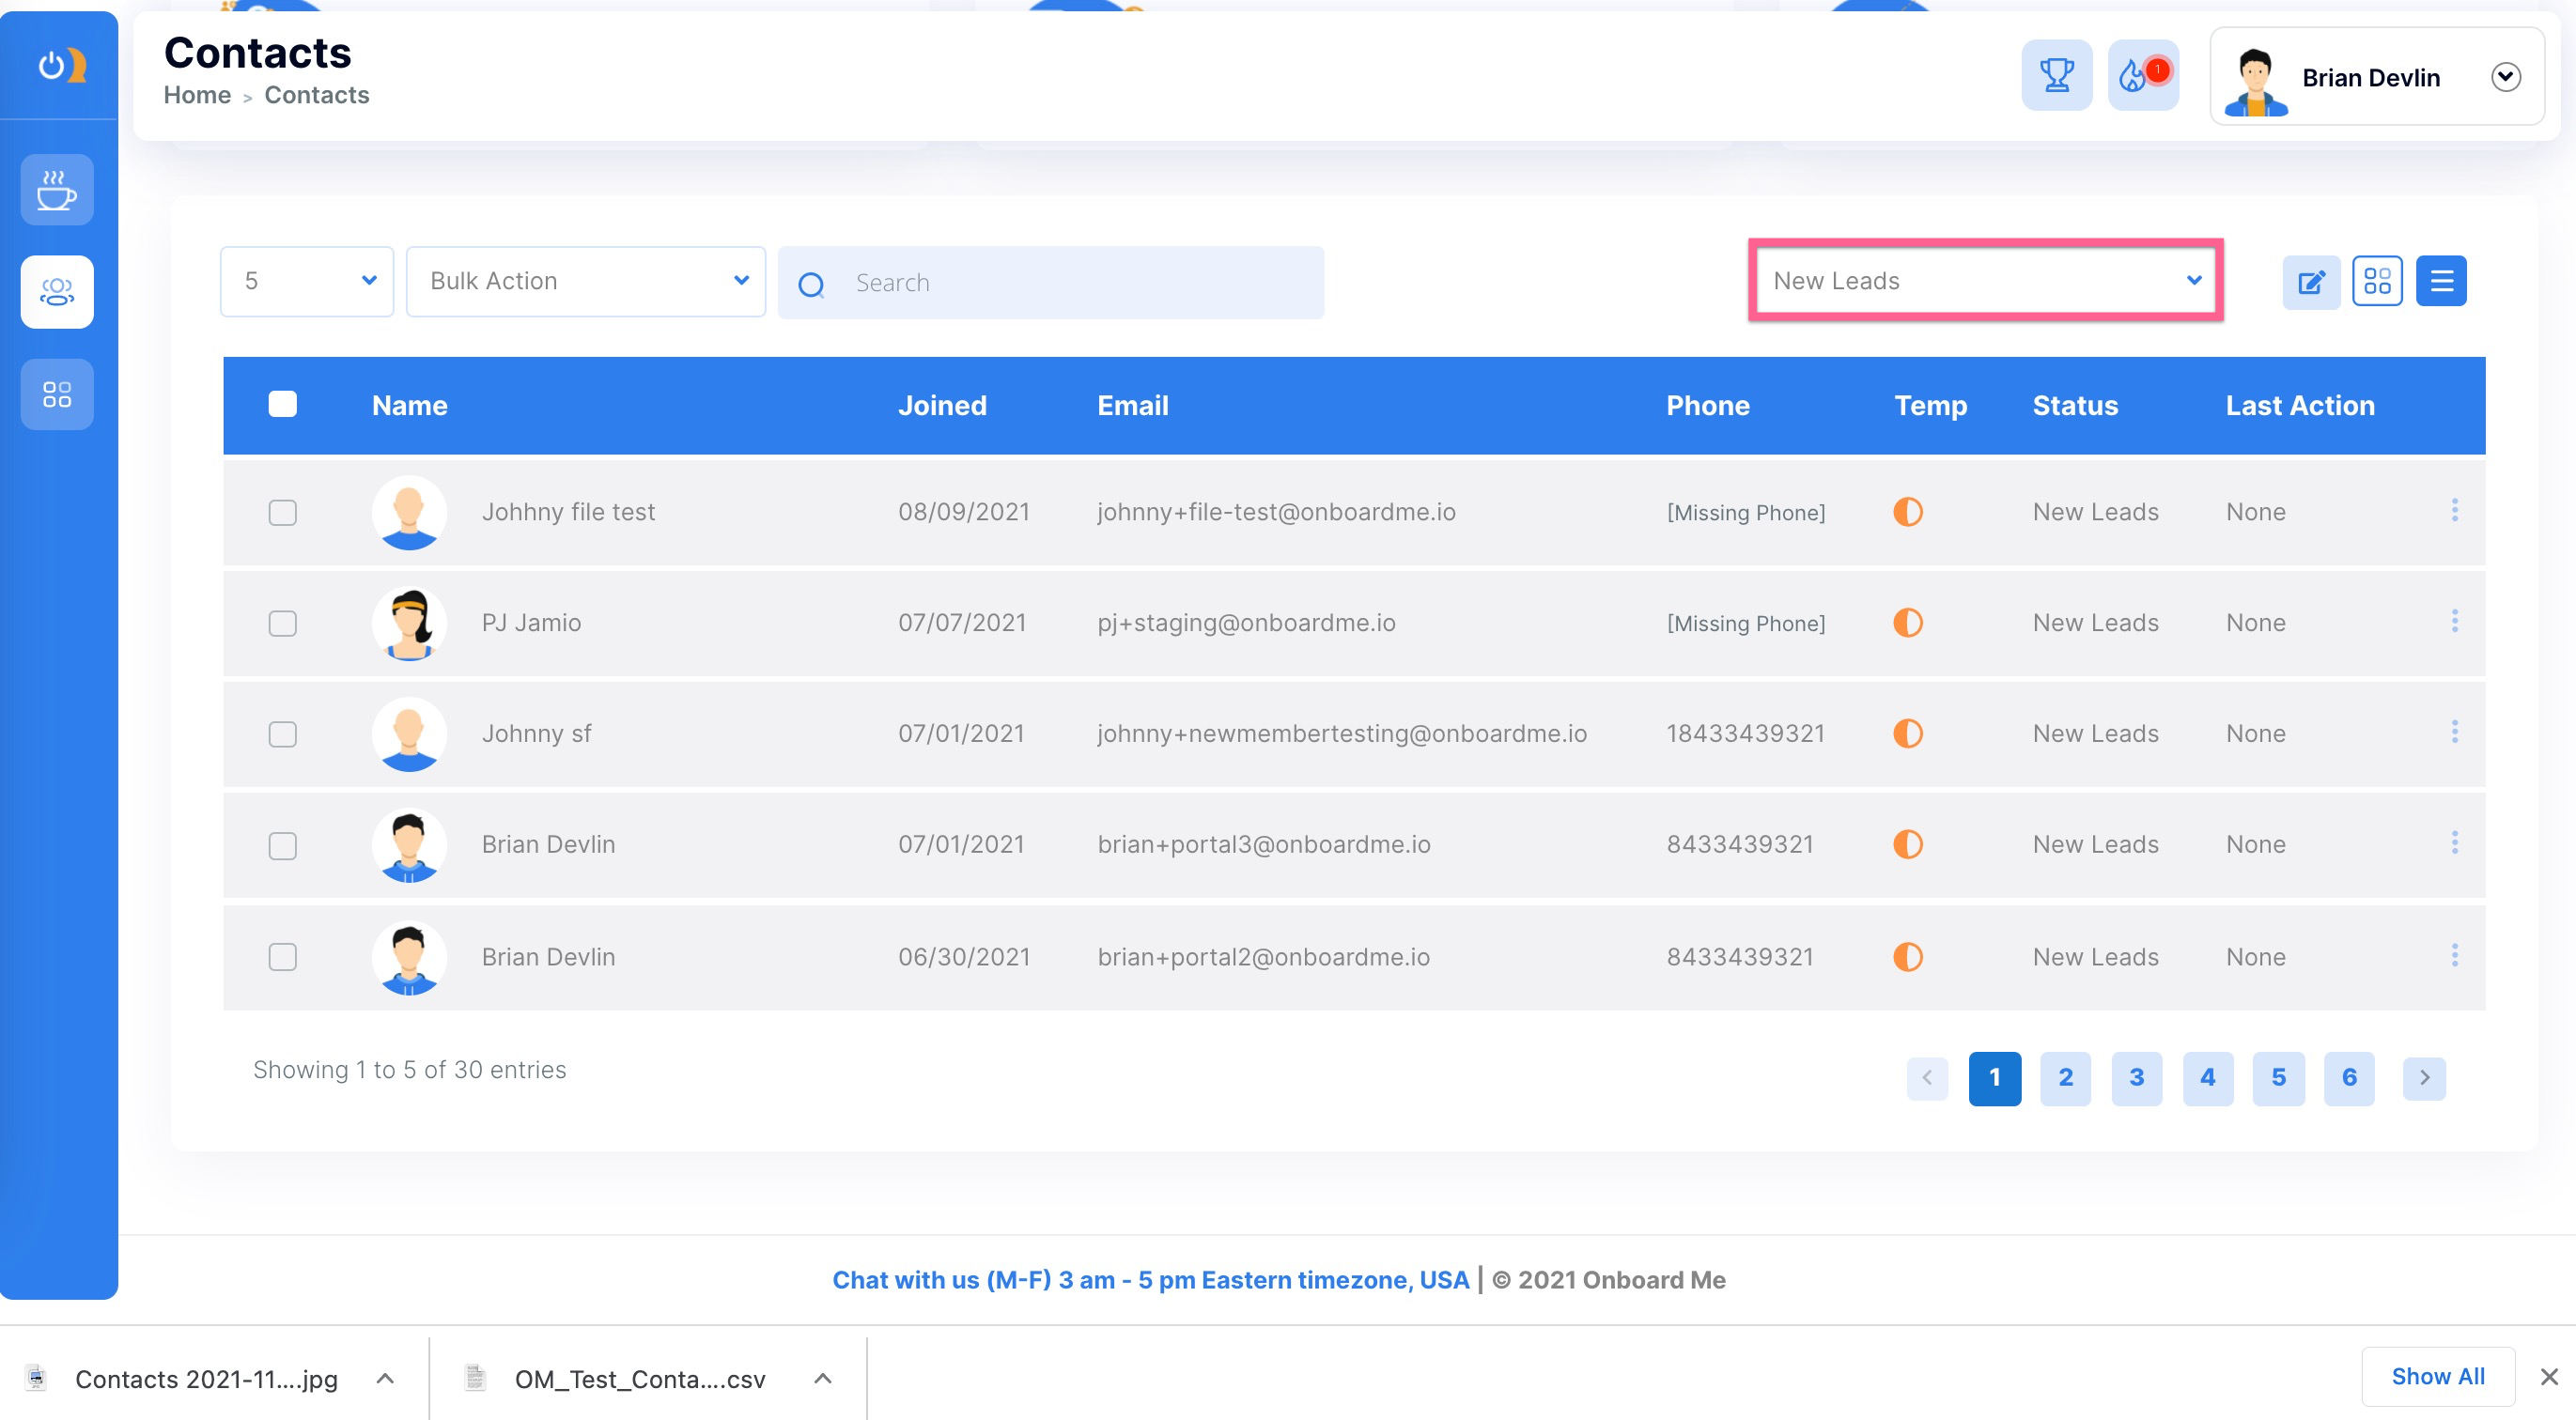
8. Your contacts should now be added to Onboard Me. You will find them under the New Leads tab (unless your upload was segmented into specific categories).
