What is Progress Tracking?
Welcome to Progress Tracking! This feature gives you the ability to collect data from your clients to chronicle their progress and hold them accountable to your challenges, personal goals, etc. There is a great deal of autonomy in how these are set up, from when you request reports to how much detail you require - you set the parameters, we make it happen!
![]()
Quick Training Links
- Here are some common use cases for Progress Tracking
- Your Progress Tracking Dashboard Overview
- Progress Tracking Dashboard Functions
- Creating Your First Progress Scenario
- Assign Progress Tracking Manually
- Assign Progress Tracking Automatically
Here are some common use cases for Progress Tracking:
- Tracking individuals within group challenges
- Tracking personal training client progress
- Tracking employee/staff performance
Your Progress Tracking Dashboard Overview
On your dashboard, you will see a few icons and a create button. Each progress tracker thumbnail will be displayed with quick action buttons. Here is what your dashboard should look like, with icons and buttons labeled for easy navigation.
![]()
Progress Tracking Dashboard Functions
Sorting your thumbnails
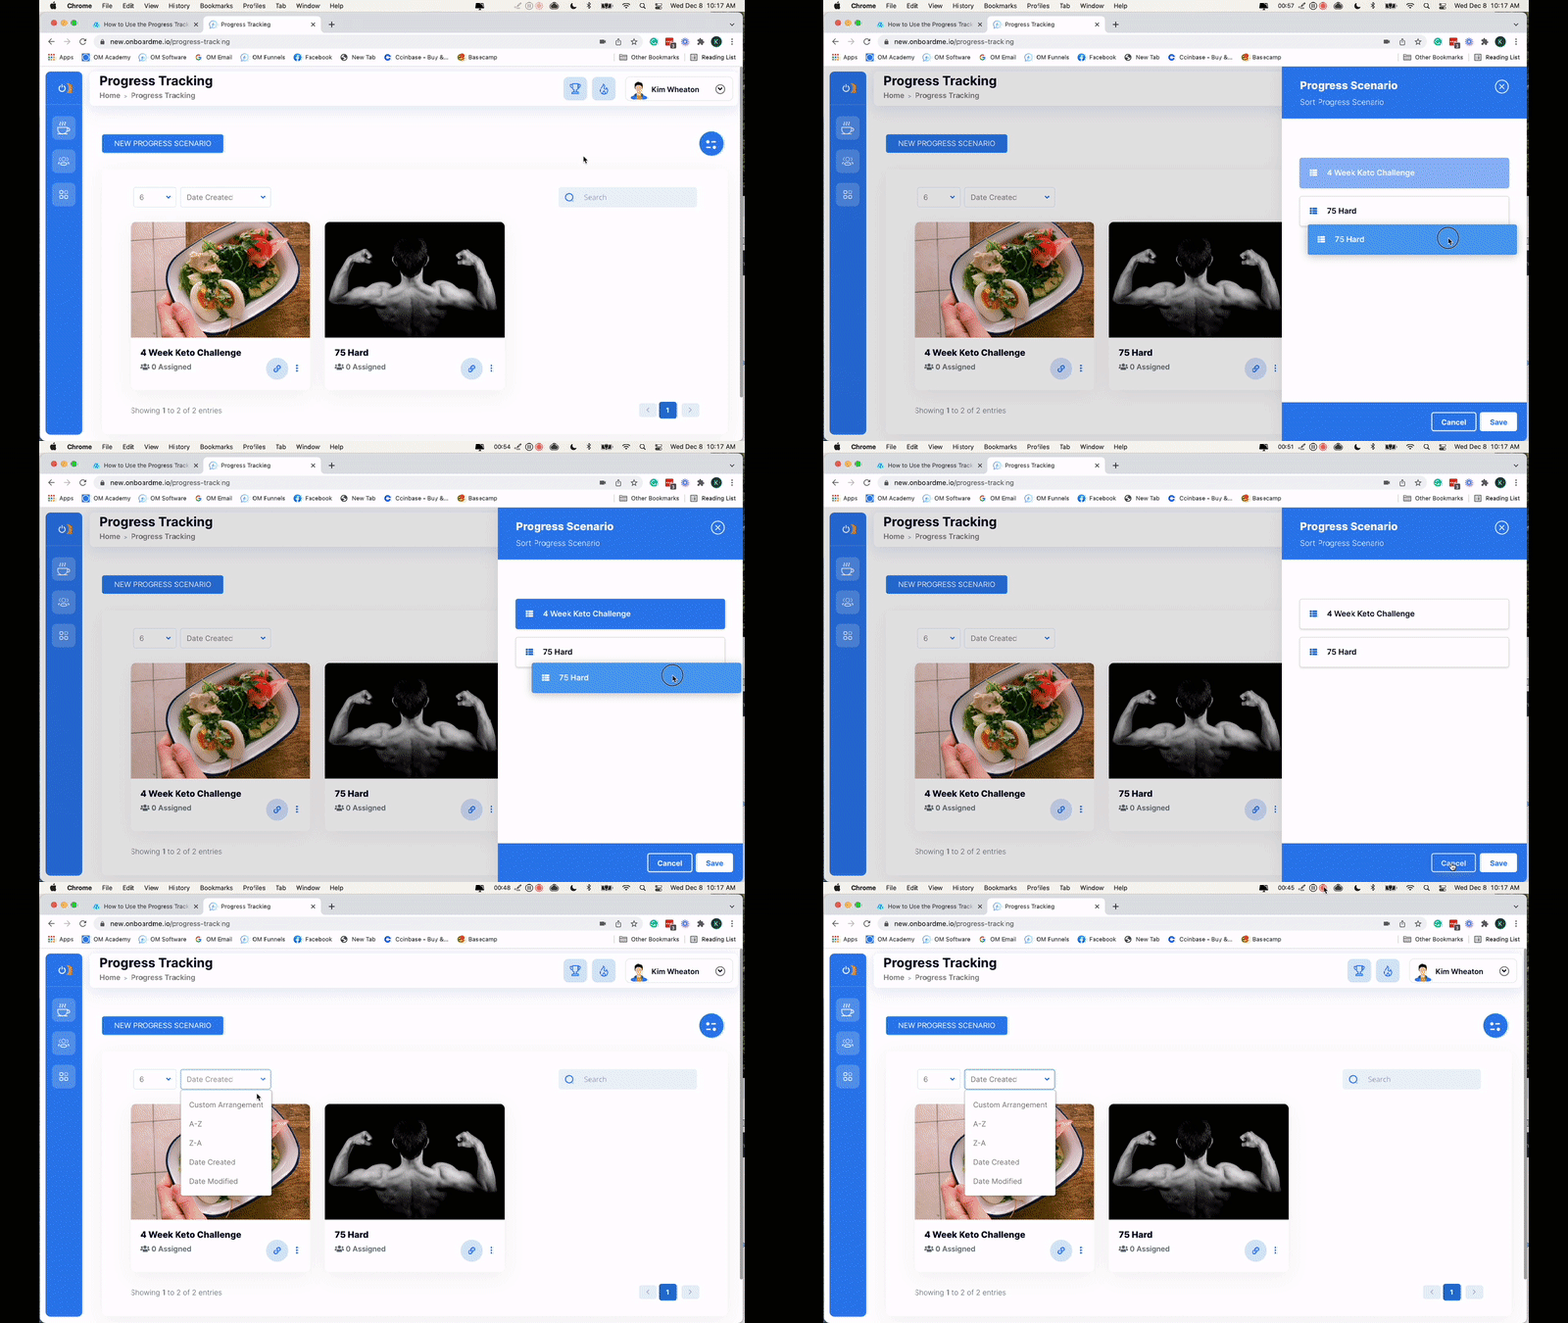
If you are like most of our Onboard Me users, you love an organized dashboard. We make it simple to sort how your progress scenarios show up on your main dashboard. Simply click the sorting icon, arrange the titles as you would like them to be shown on the page, and save your sorting. You can also sort by date or alphabetize your titles by using the simple sorting bar at the top of the page:
Quick progress tracking options
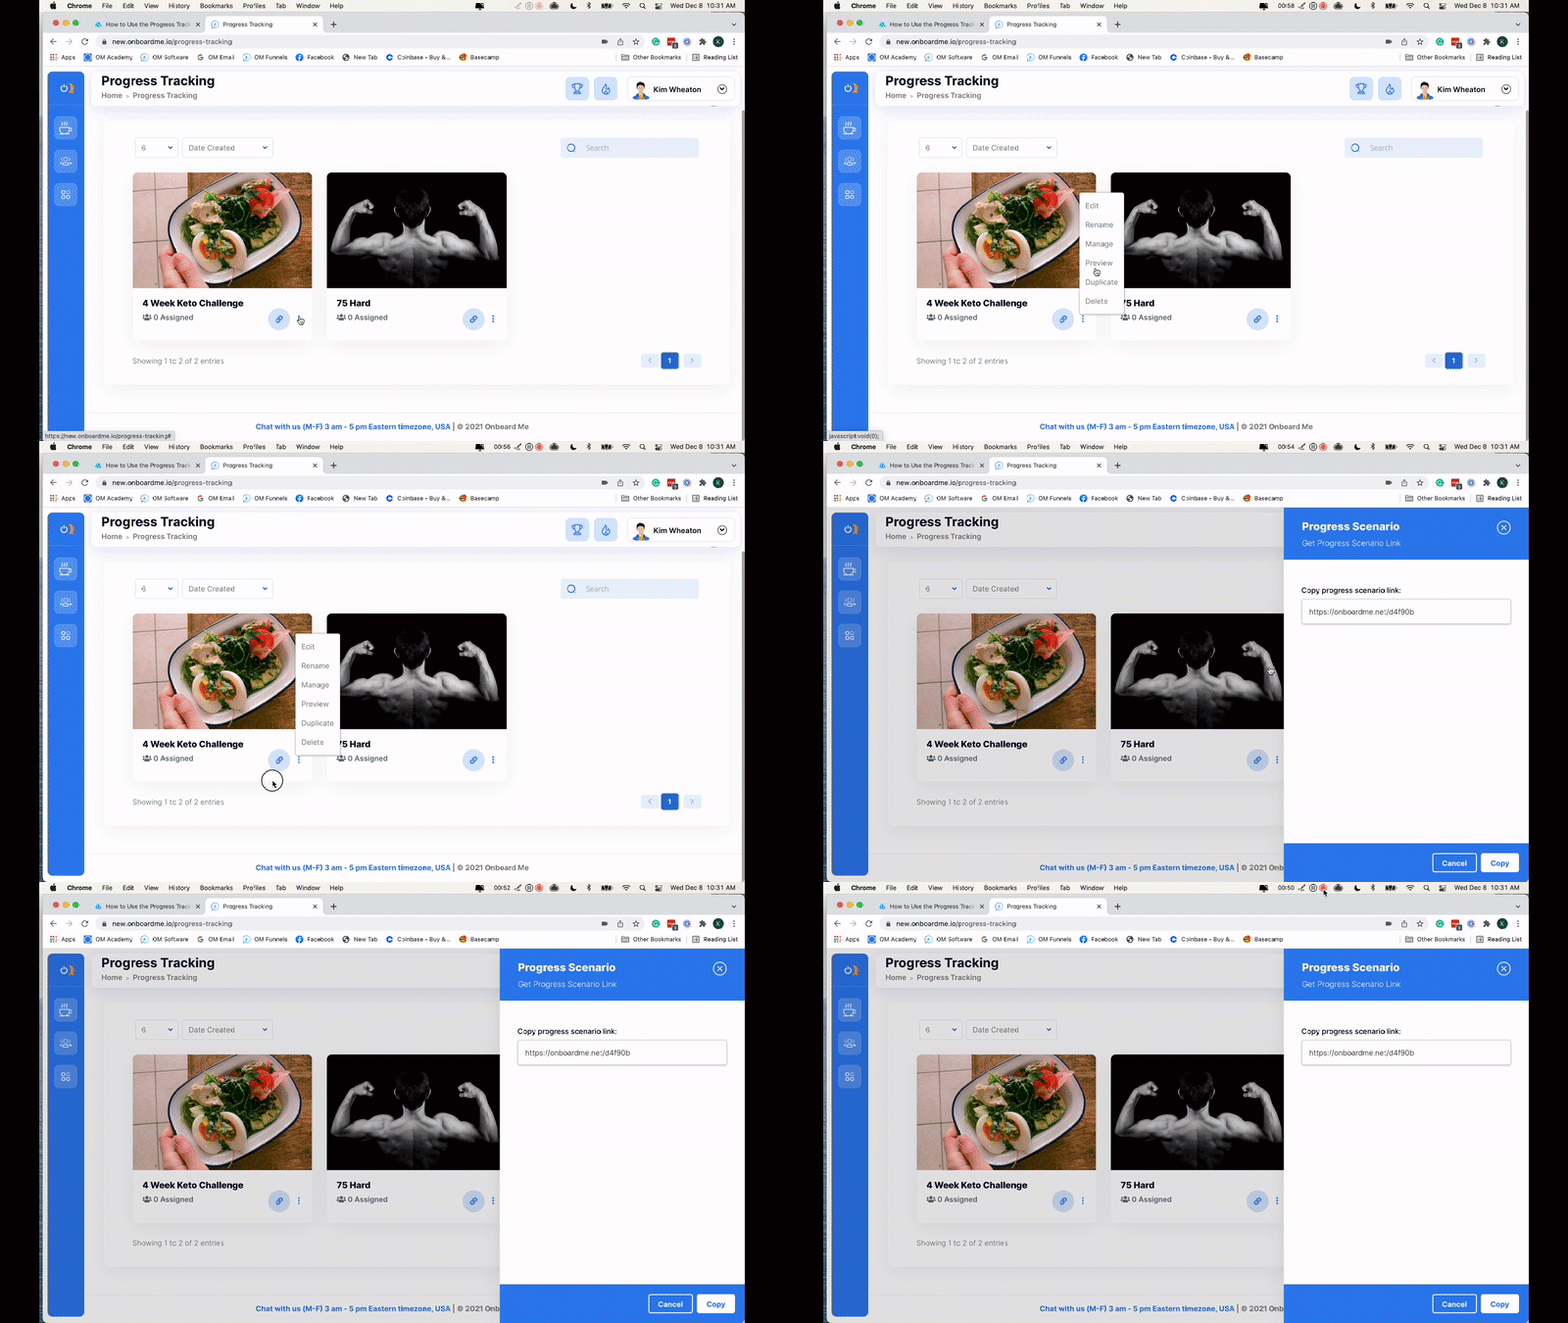
To allow for certain progress tracking actions without entering the editor, you can select the MORE menu by clicking the three dots located on your form thumbnail.
A look at what you can do with these quick options:
- Edit your progress scenario
- Rename your progress scenario
- Manage those involved
- Preview your progress scenario
- Duplicate your progress scenario
- Delete your progress scenario (sad moment)
To the left of the MORE menu is a link icon. Click this to retrieve your public URL, which can be used for public submissions. For example, all clients in a challenge could submit their progress data twice a week by going to a common URL and using member ID for entry.
Updating your form thumbnail image:
When you create a new progress scenario we give you a beautiful default image you can either keep or replace/customize. We even give you Canva templates. If you would rather search for an image, Onboard Me provides a free library where you can look around before selecting the best option for your thumbnail. Simply hover in the thumbnail image and click the pencil icon to update the image.
Creating Your First Progress Scenario
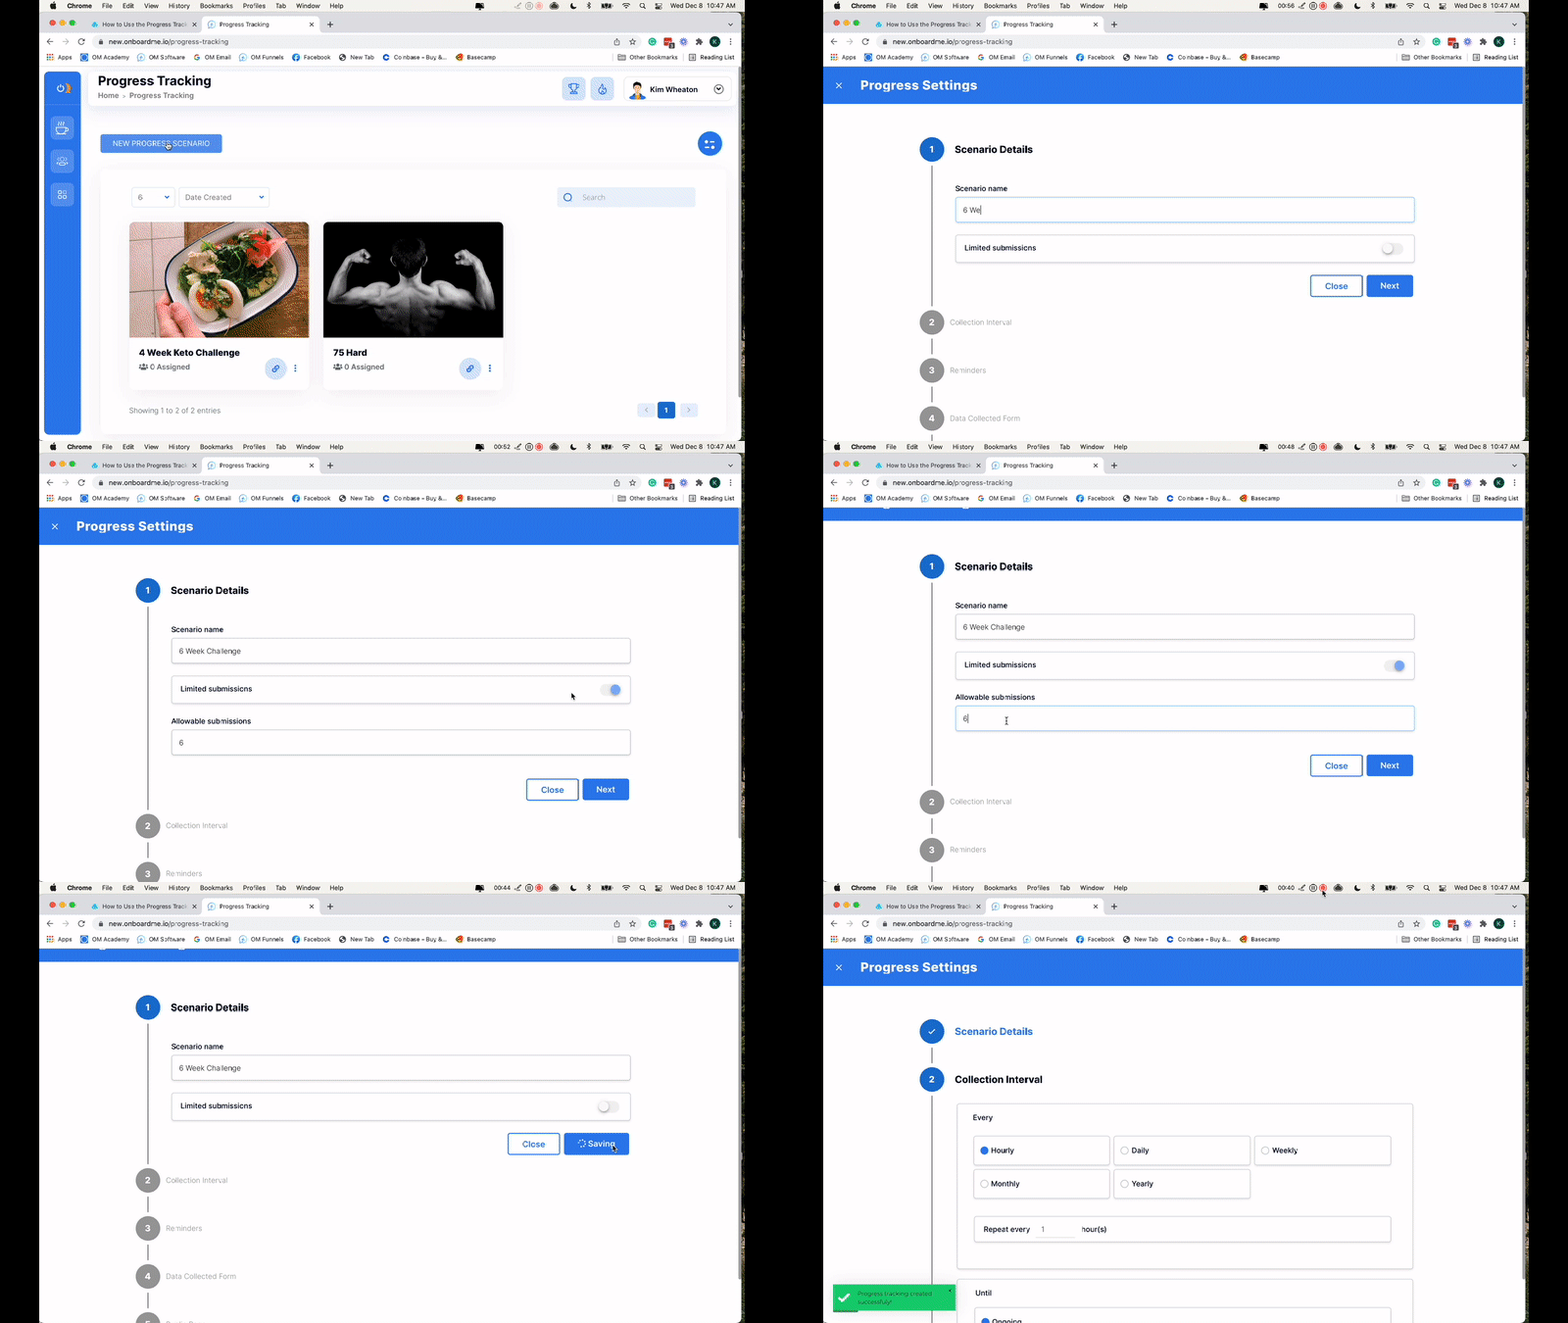
Creating your first progress scenario is easy! Just click the New Progress Scenario button on your dashboard, give it a name, and decide if you want to use your saved styling or just go with the default until you can update later.
Scenario name and allowable submissions
Choose a name that will be easy to categorize later. Determine if you would like to set a limit on the total number of submissions allowed. For example, if your challenge requires clients to submit their results twice a week for a 6-week challenge, you could set your limit to 12. You can also do this by way of collection intervals in the next section (in which case, leave this toggle OFF).
Collection interval
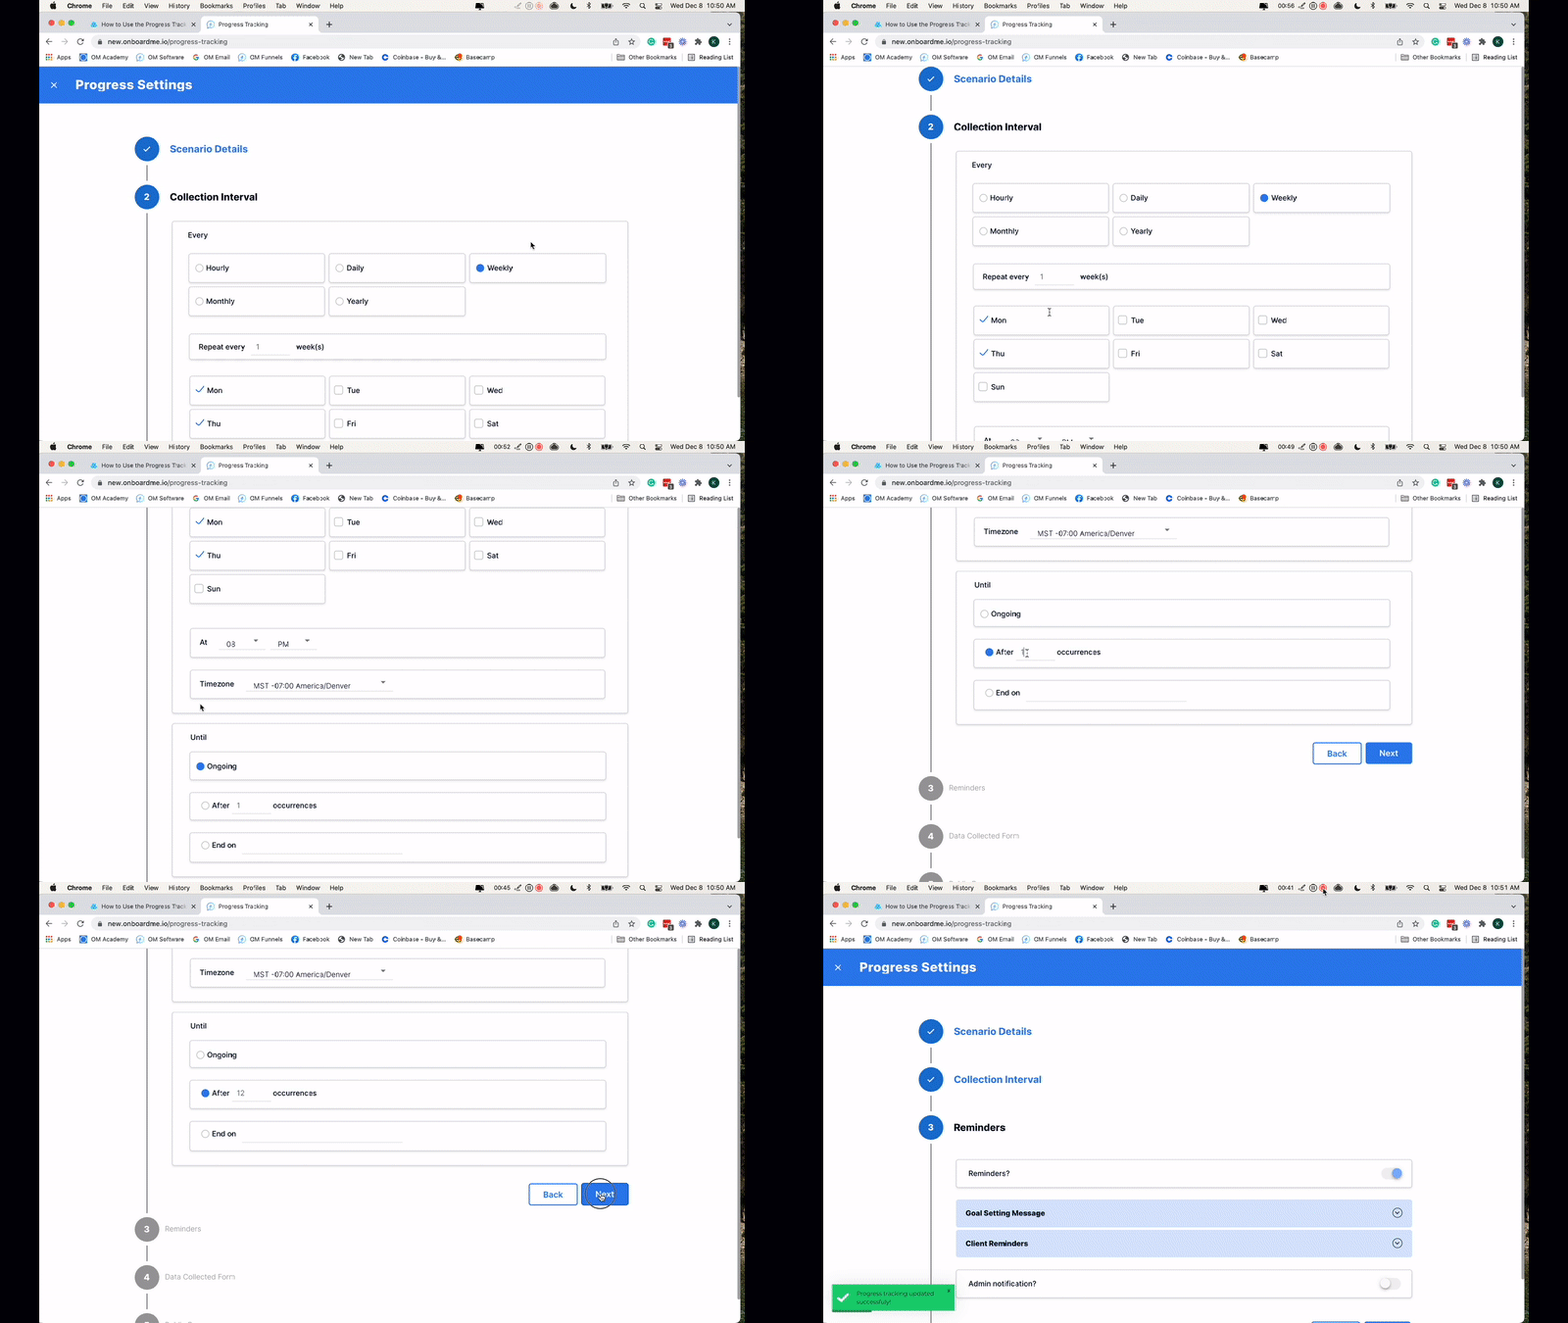
Here, you can set the interval between collections. To stick with our example, we will click the weekly option and set our collection days/times to Monday and Thursday at 8:00 PM. Ensure that your timezone is correct, then indicate when you would like to end collections. You have the option to collect submissions on an ongoing basis, but for our particular challenge, we terminate collections after 12 submissions. This setting could be designated by date (if your challenge ended on January 1st, for instance).
Reminders
To remind your clients to set their goal parameters, simply toggle the Reminders tab ON and edit the goal-setting message as you see fit. We recommend leaving the double brackets in place, altering only the message around it to ensure the right information is parsed into the email (you can edit within brackets if you have advanced email marketing knowledge).
Reminders can be set for clients, so they don't forget to make their submissions on time. As with the goal-setting reminder, these can be customized with your logo, signature, and can be tested before sent out.
Last, but perhaps the most important, is the admin notification. By toggling this feature ON, you will be notified when submissions are made. This will help you keep track of challenges or stay on top of personal training client progress. Customize this message type and format as you see fit, and click Next.
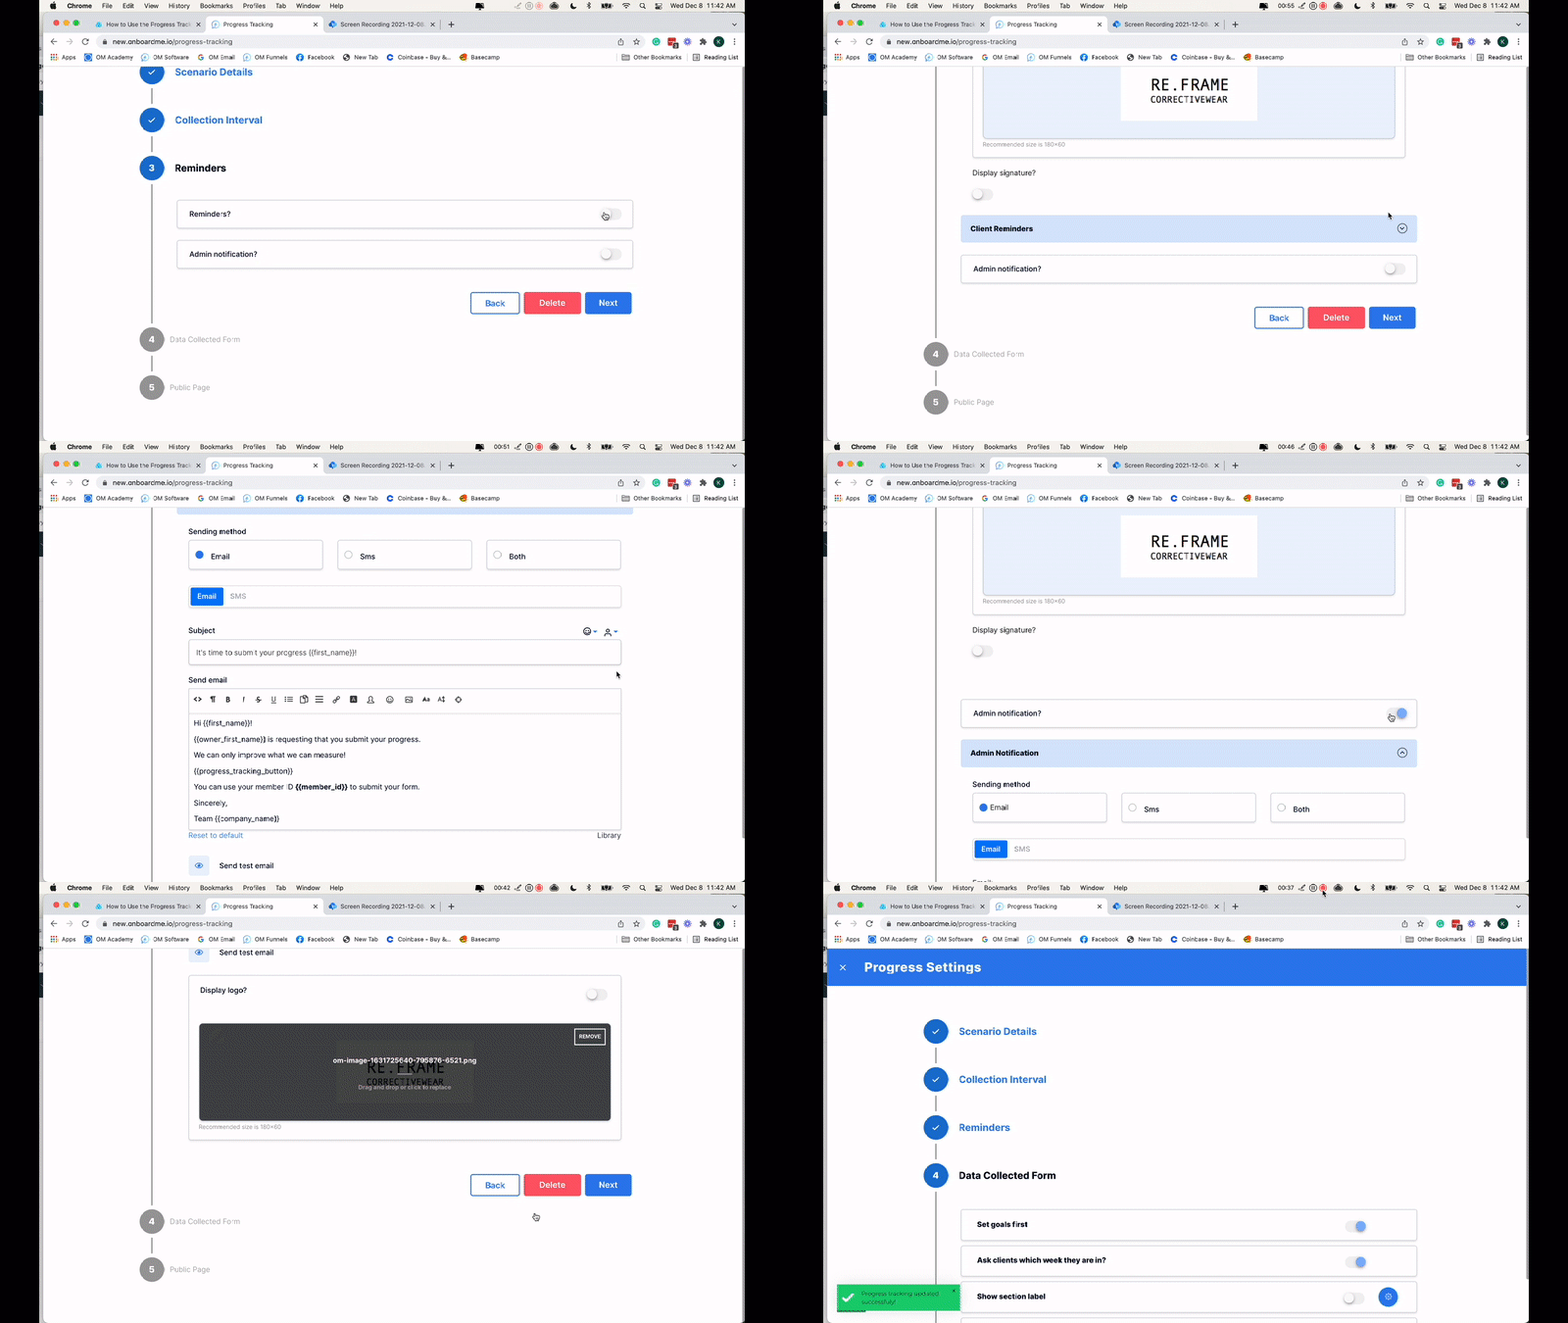
Data Collected Form:
This is where you will design your progress tracking questionnaire. Toggles can be used to determine which information you would like to collect, then you can fine-tune your ON toggles. The Set Goals First toggle is automatically ON, as you will most likely want clients to set their goals before submitting data. Customize your form further by adding your own questions at the bottom (or use this feature entirely if you are not interested in the sections above it). Click Next to continue setting up your progress scenario.
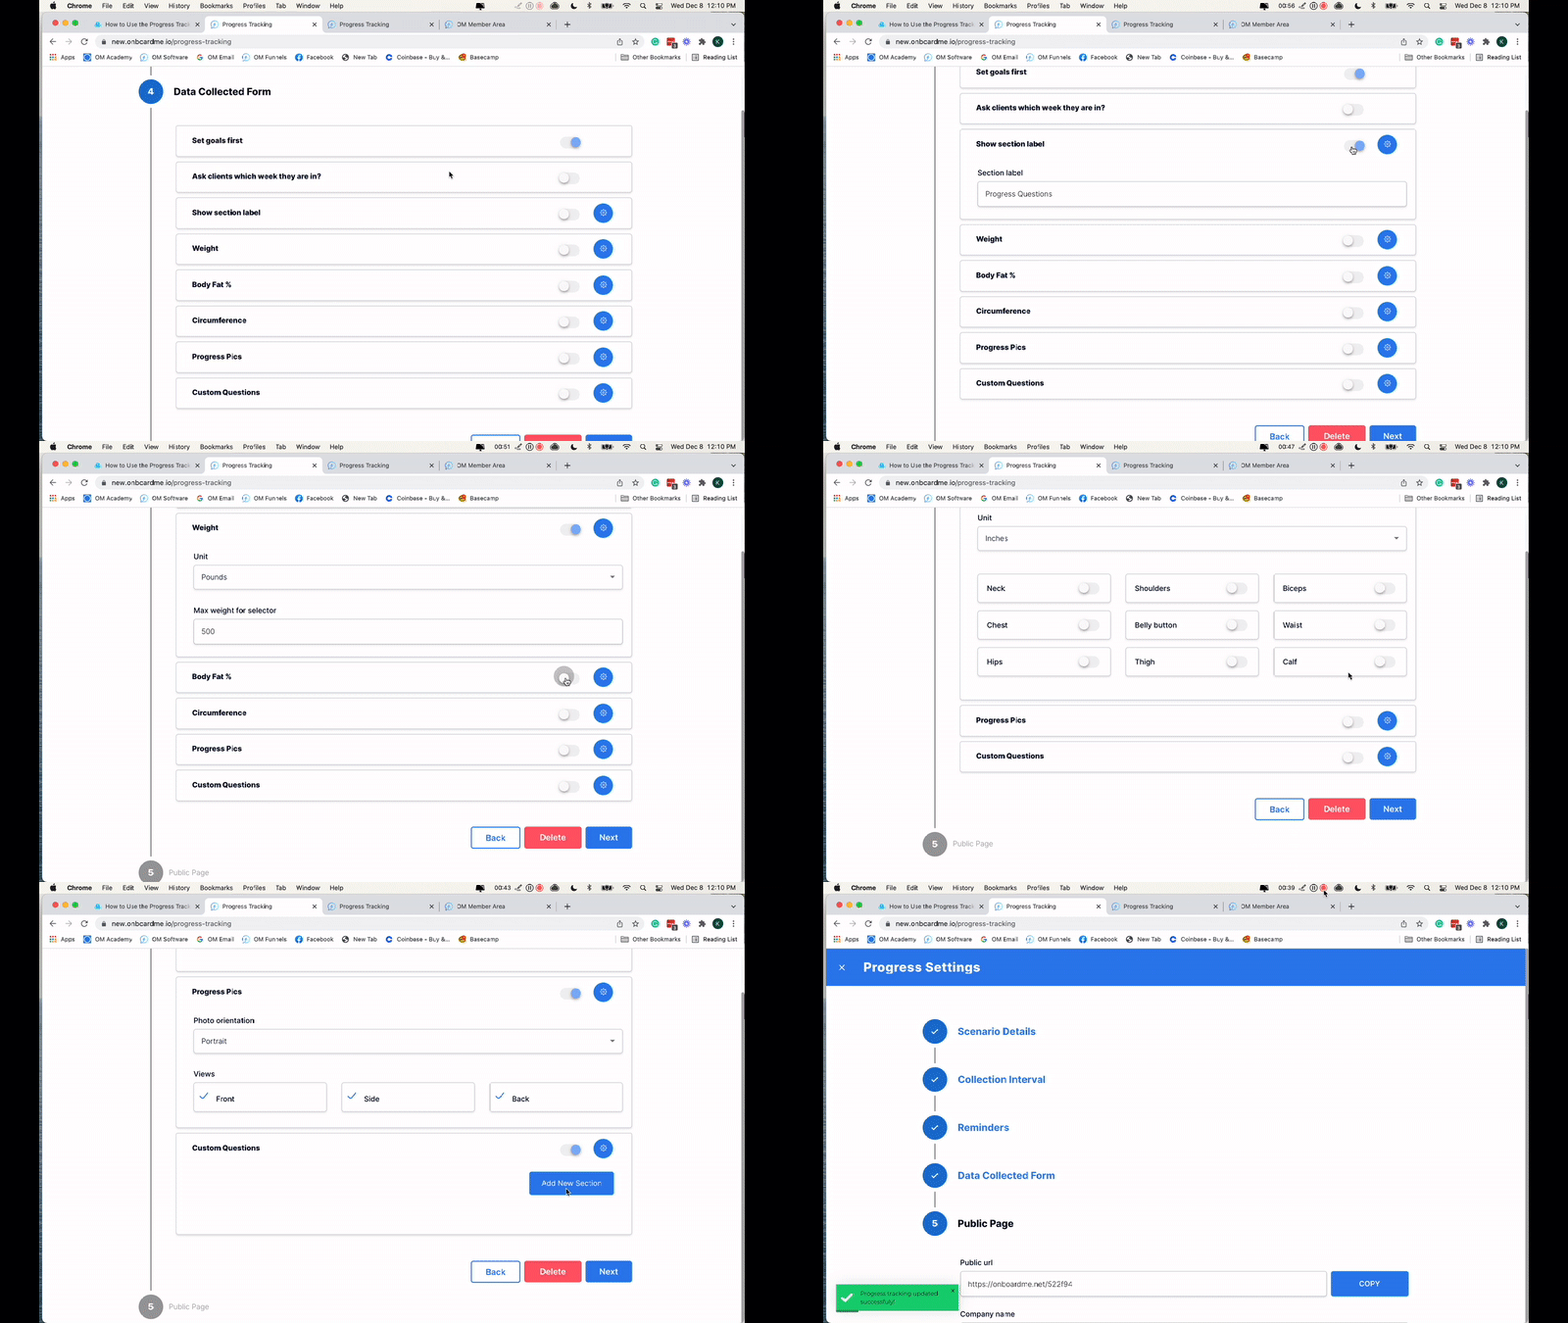
Public Page
Customize your public page, where you can send clients to submit their stats using their member IDs. Here, you have options to customize your background/font colors, add logo/coach image, cover image, add an explainer video, and more! Preview your page easily to see what your clients will see, and be sure to save your work!
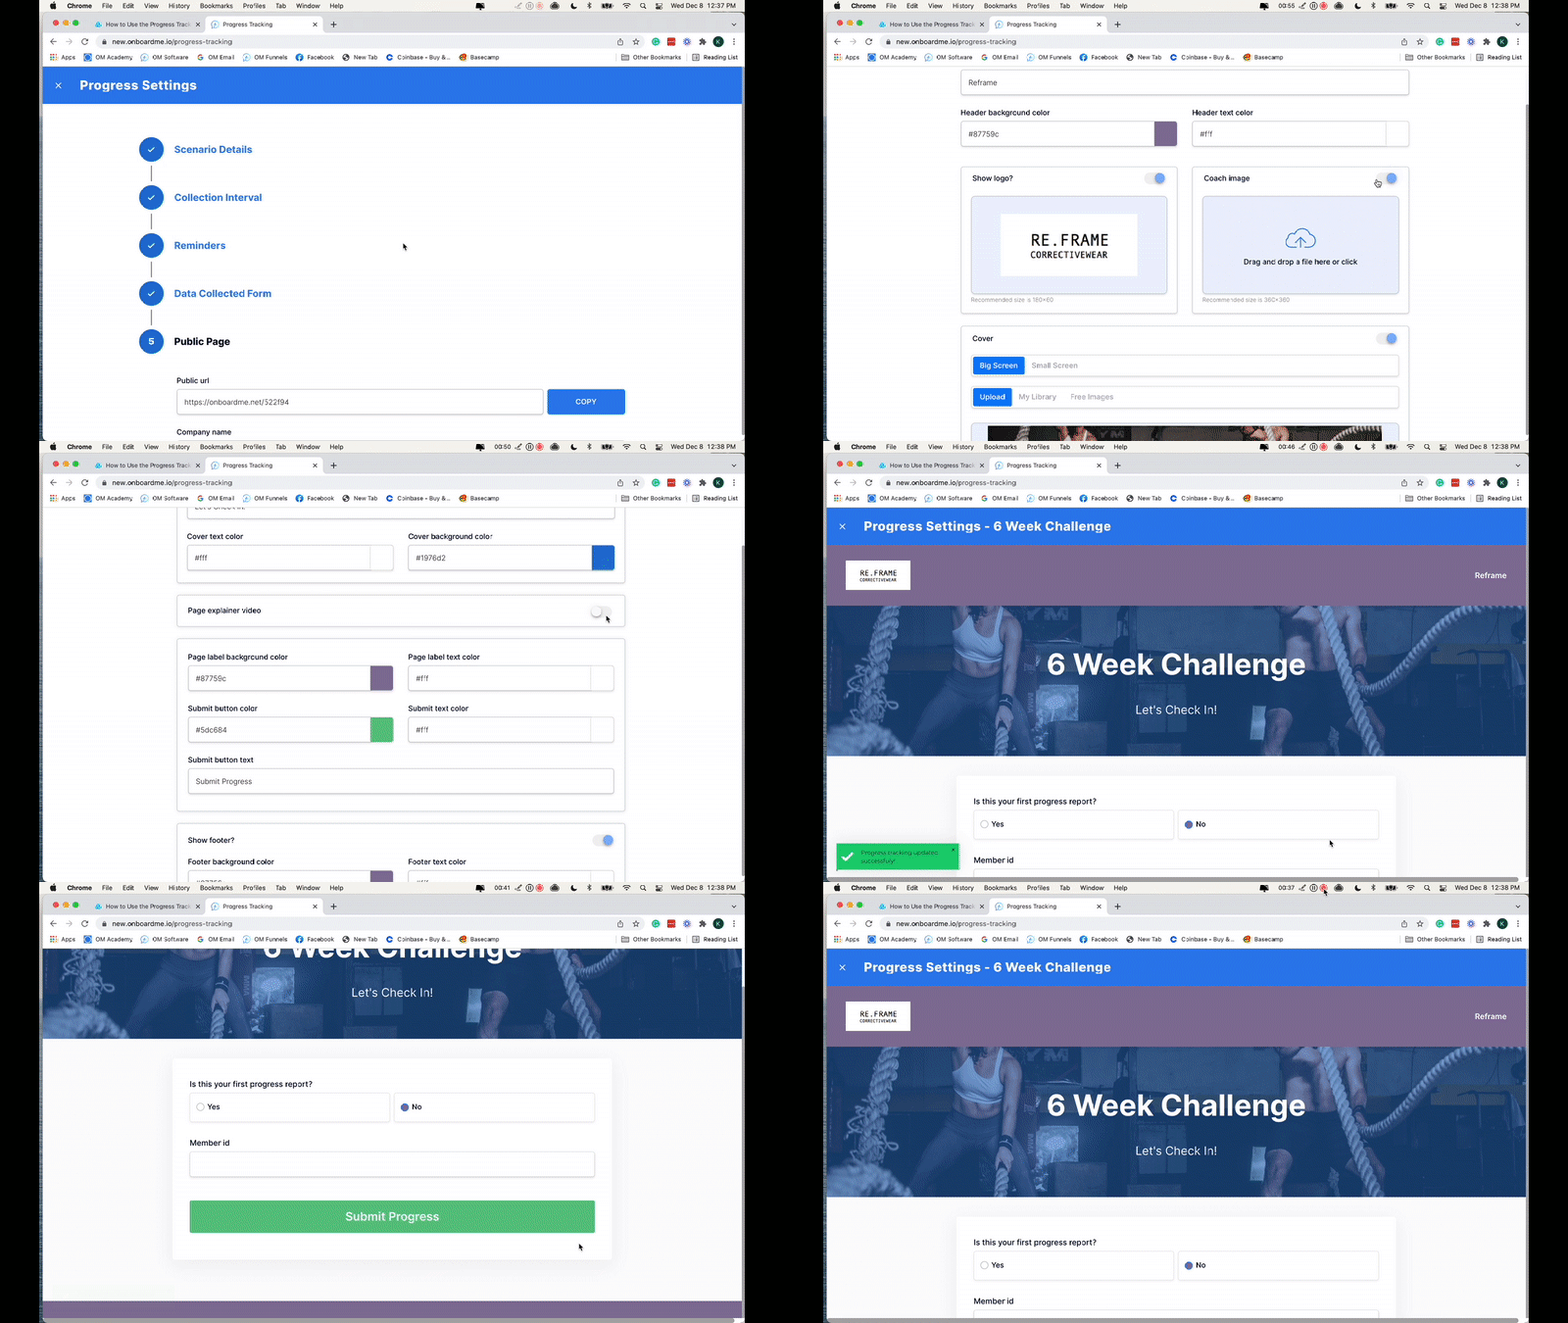
Assign Progress Tracking Manually
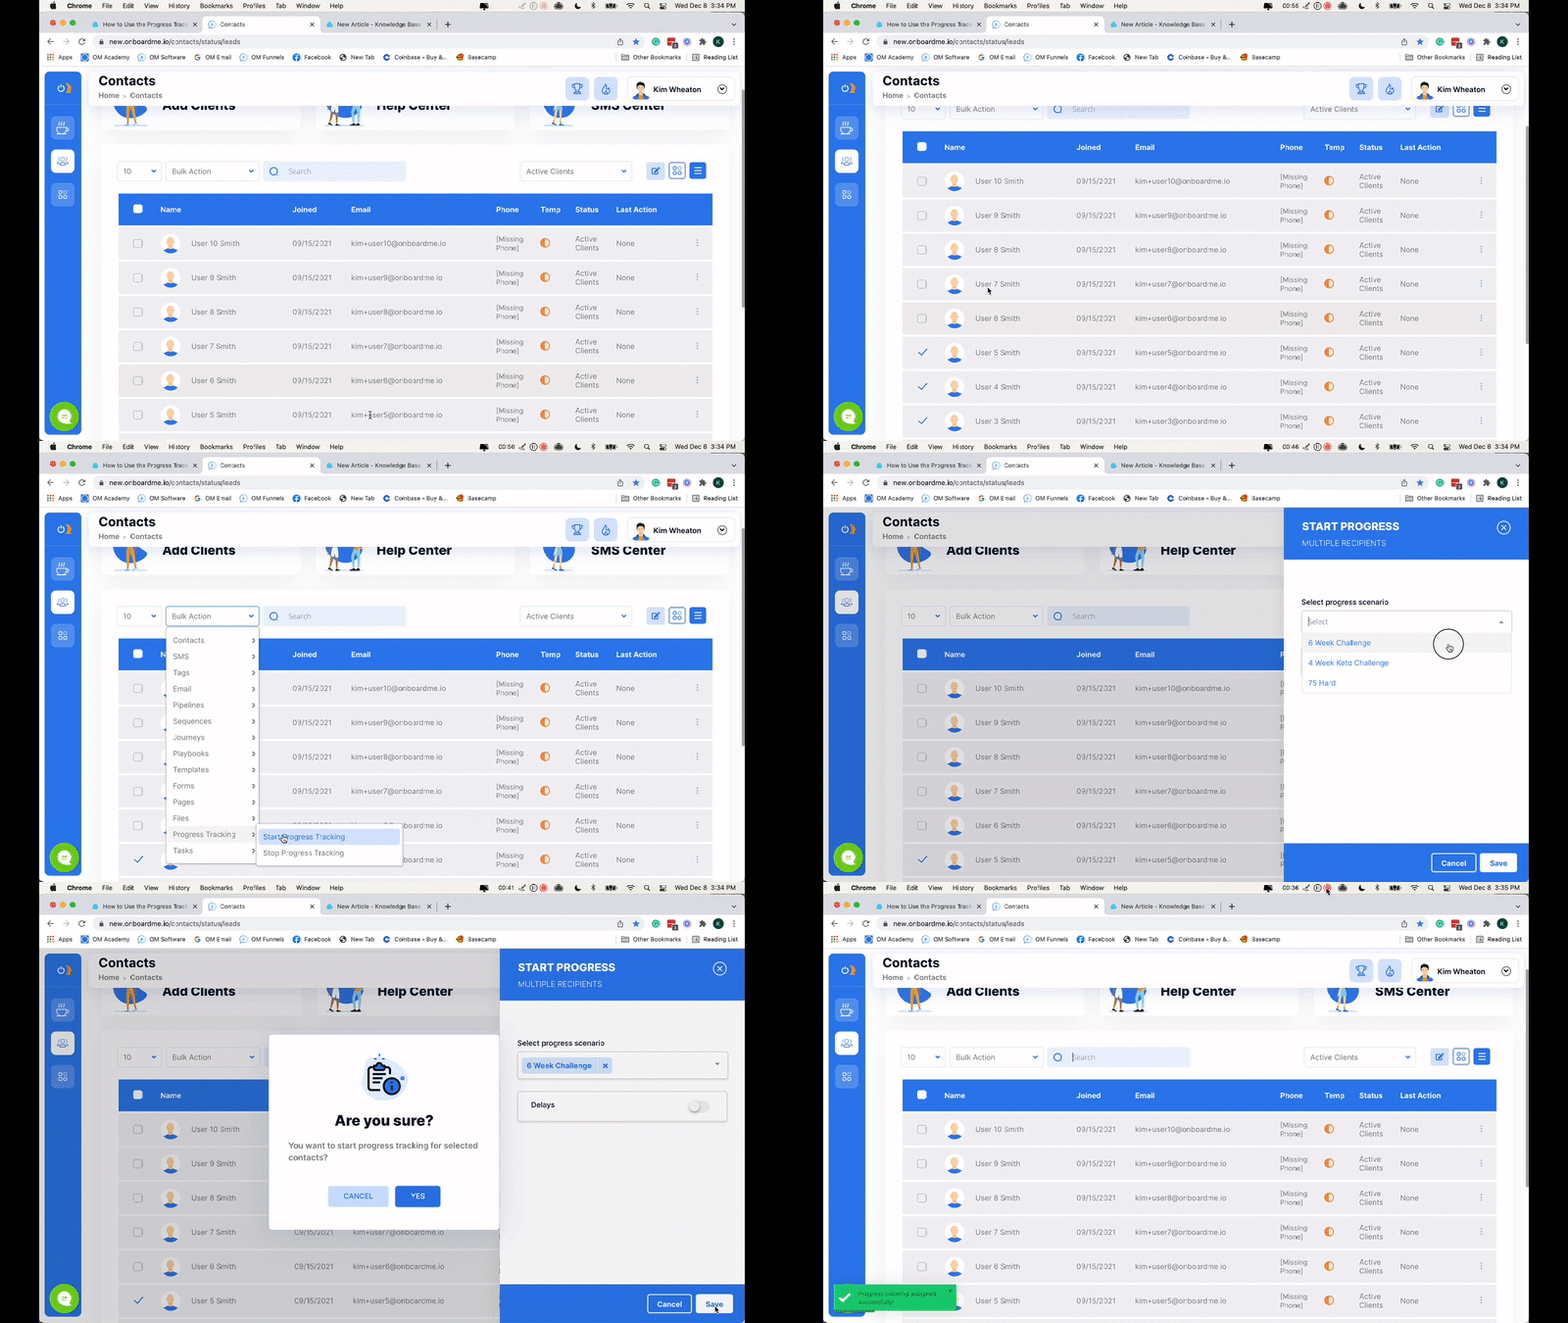
There are two ways to give contacts access to your progress tracker manually:
1. Use the launch pad in your contact center.
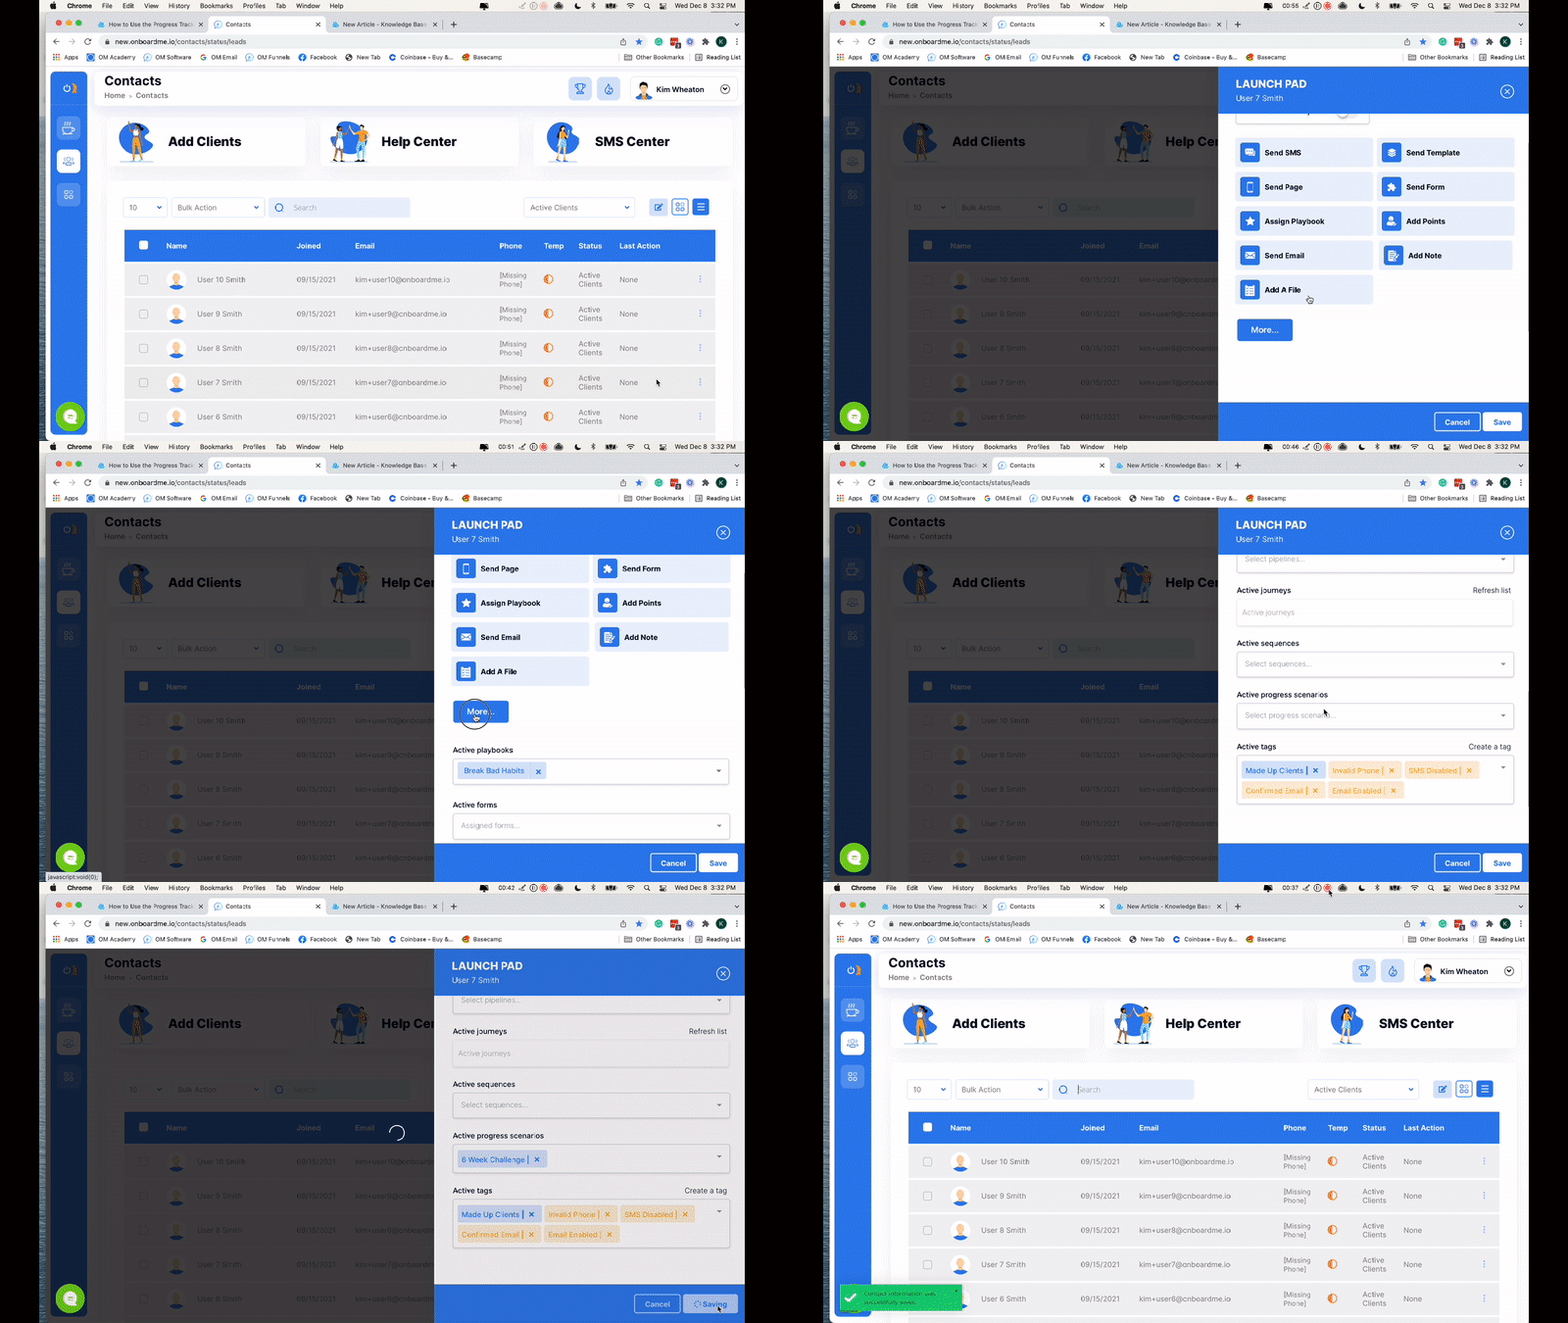
2. Use the bulk action menu in your contact center.
Assign Progress Tracking Automatically
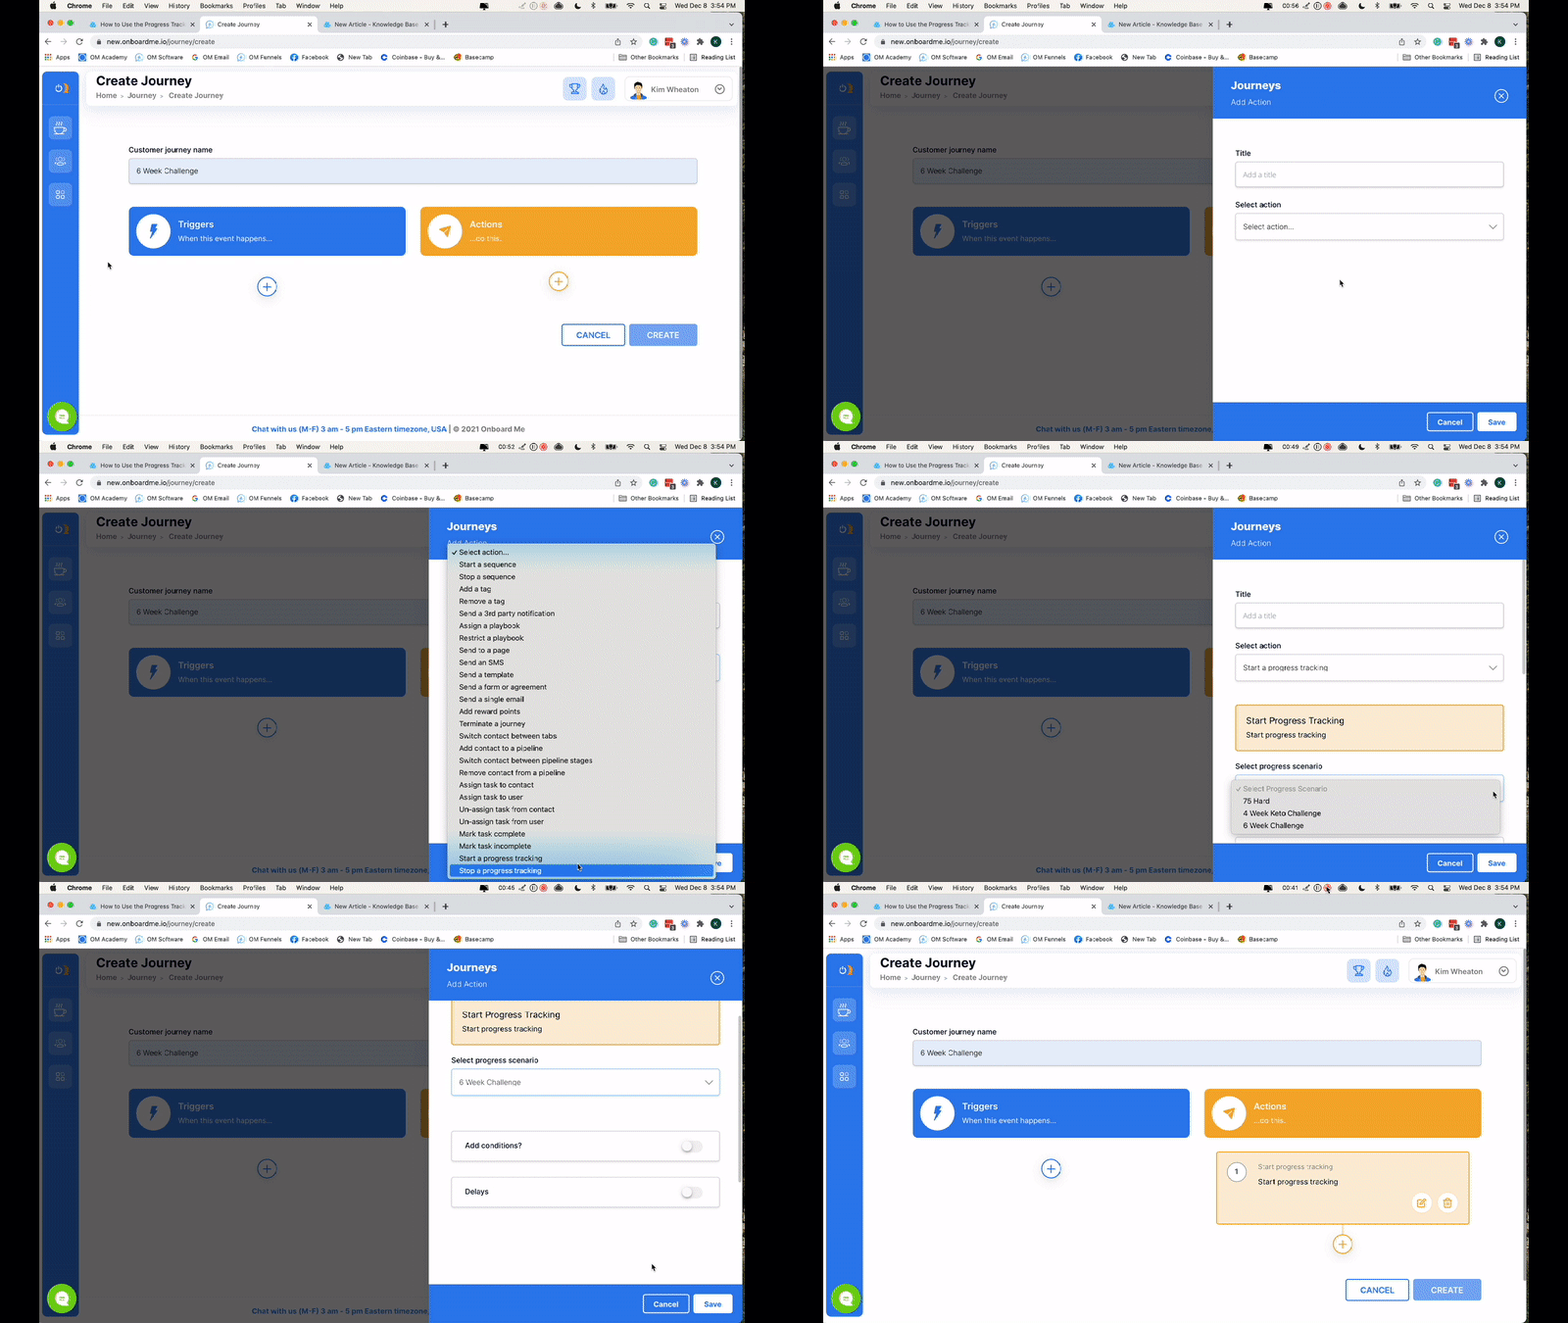
This can be done using the Journeys feature. In your journey, select "Start a progress tracking" from the actions menu. A complete journeys tutorial can be found HERE.
Assign


