


1. Funnel Overview
Today we are going to build your email Newsletter sign-up system. This will allow you to post a form on your website, after your live casts, or in your social media posts so that prospects can opt-in to your Newsletter list.
Quick Training Links
2. Setup Steps
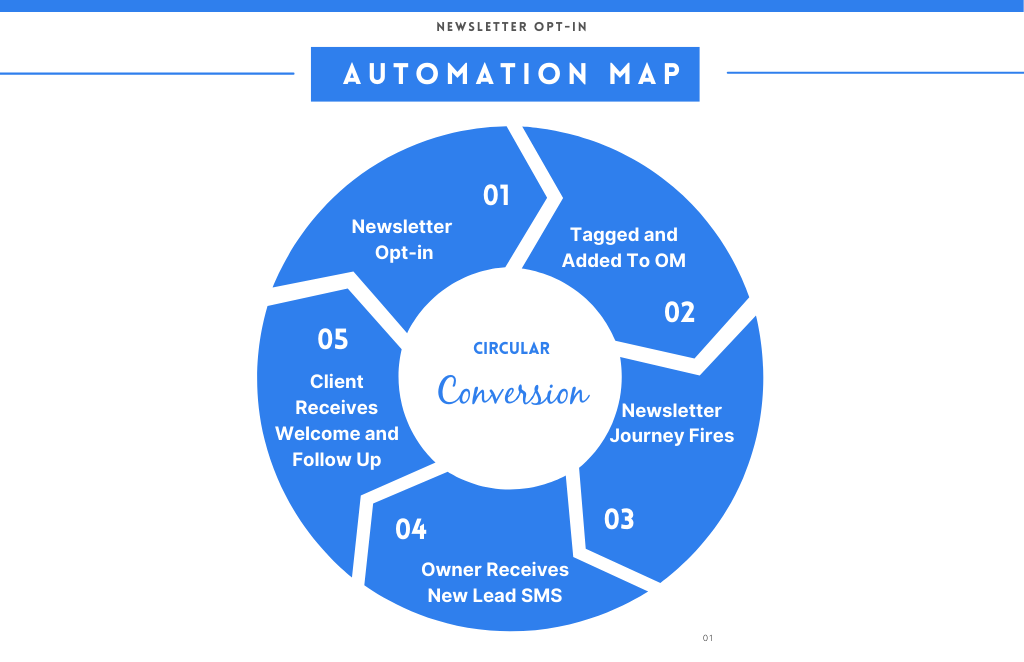
This is how the process works:
1. A prospect will answer a few segmenting questions on your form
2. They will submit the form
3. The customer journey will be triggered
4. You will receive a new lead text
5. The prospect will receive your welcome letter letting them know whet to expect as a subscriber
6. The prospect will receive a personal follow up in 14 days asking if they have any specific questions or need help
Ok Lets get this funnel set up. Here are the broad steps
Step 1: Import all the done-for you templates by downloading the CSV file and importing them through your content club importer.
Step 2: Edit the emails, form, and journey to your branding and voice
Step 3: Test your new system
Step 4: Deploy
3. Setup Details
Let's take a closer look at Step 1: Import all done-for-you templates by downloading the CSV file below and importing them through your content club importer. While logged in, you can also click the URL for each asset to get them one by one.
Complete Newsletter CSV: Newsletter-Forms.csv - Droplr
Newsletter Welcome Template: https://new.onboardme.io/asset/share/3325/85148/EyonOyaJA9u6ALaQ
Newsletter Follow-up Template: https://new.onboardme.io/asset/share/3325/85149/xOpufozIXOgaXO3u
Newsletter Welcome Journey: https://new.onboardme.io/asset/share/3325/9839/iHOJExaPoWAmIdoF
Newsletter Form Template: https://new.onboardme.io/asset/share/3325/11230/zOfUyInApEbEBohe
Let's take a closer look at Step 2: Edit the emails, form, and journey to your branding voice.
Navigate to your Templates dashboard and click on the Template title to edit the welcome and follow-up emails. Edit them to your branding.
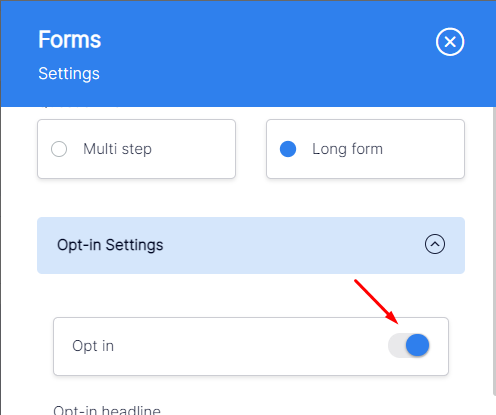
Navigate to your Forms Dashboard and click on the Form title. Configure the form to your voice and your branding. You can change colors, add videos, change the header and footer etc. Make sure that the Opt-in toggle is turned on.
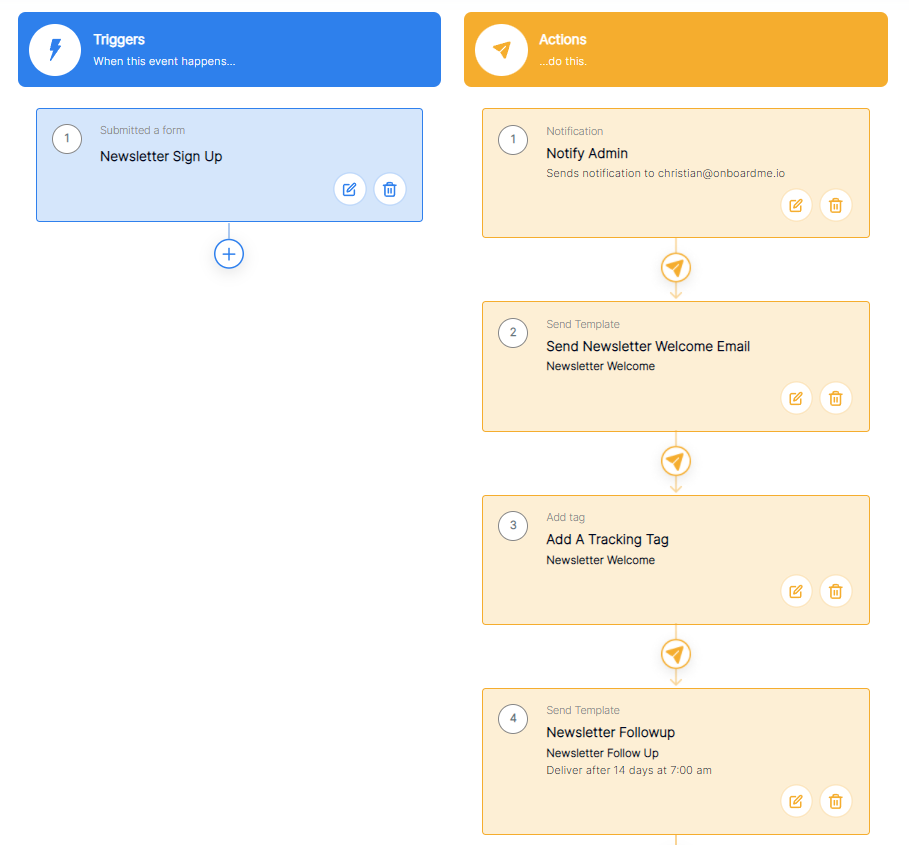
Navigate to your Journeys Dashboard and find the Newsletter Journey. Edit the journey. You can add additional actions like Assign a Playbook. The trigger should be "Submitted a form"
Let's take a closer look at Step 3: Test your new system.
Go to your form link and sign up using a test email. After signing, you should get the initial 3rd party notification, then the welcome email set to your registered email address.
Let's take a closer look at Step 4: Deploy.
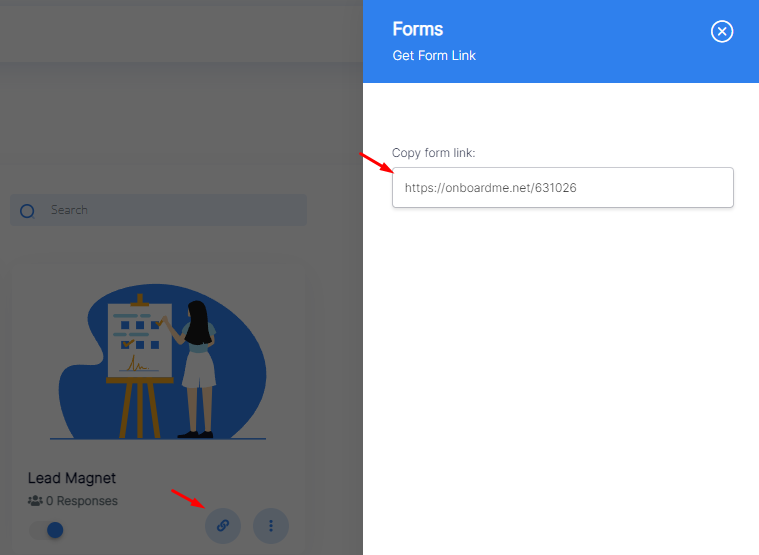
Just like what you did with the testing, copy the form link. You can then post this link to your website, after your live casts, or in your social media posts so that prospects can opt-in to your Lead Magnet.
To learn more on how to assign a form, checkout these links
Assigning a form manually.
Assigning a form Automatically.
4. Troubleshoot
1. Make sure your form is turned on.
2. Make sure the journey is turned on.
3. Make sure the correct form is used in the trigger.
5. Commonly Asked Questions
1. I have made changes in my Journey. How will that affect my contacts?
The changes will reflect to future clients who will be added to the Journey, but won't affect the existing ones. You can restart the journey for your existing clients so they'd get the changes.
First, terminate the journey by going to your contacts dashboard, mark the checkbox of your selected contact, Bulk Action>Journeys>Terminate Journey.
Then reapply the trigger. Sign up on the Form using the same email address.
2. Can I see who's in my Journey?
Yes! Go to the Journey, then click on the History Log at the bottom.
3. How can I check who submitted the form?
Click the number of responses below the form title. A sidebar will appear containing the Form Respondents.